
Buying a Supra | 26/09/2020
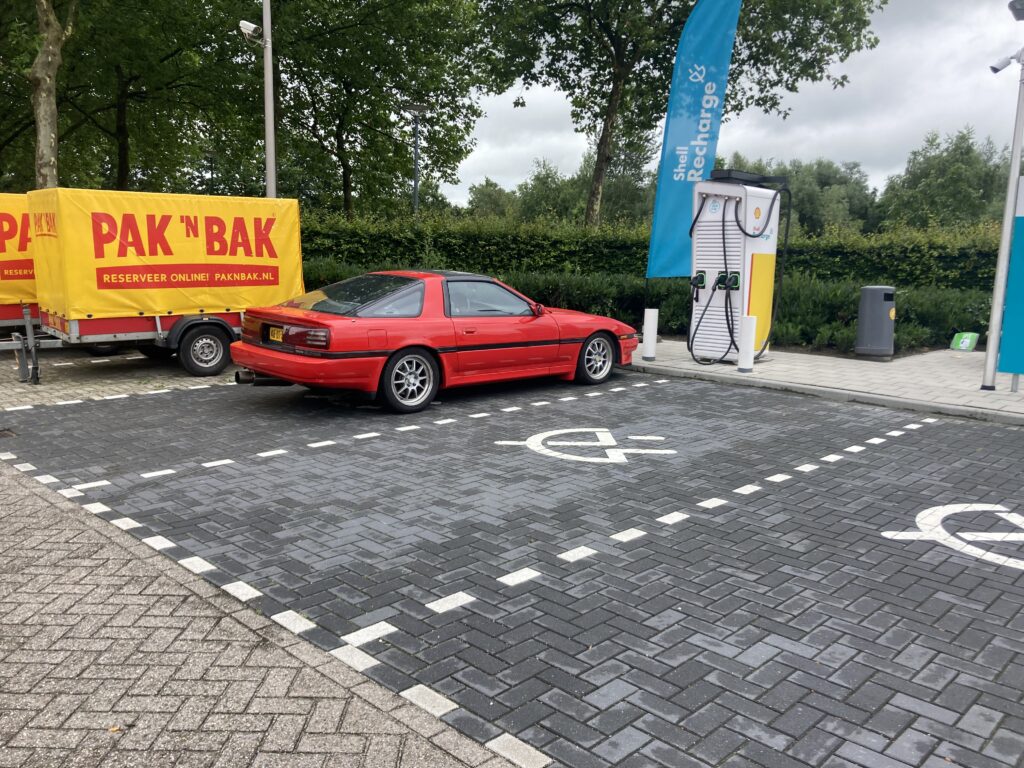
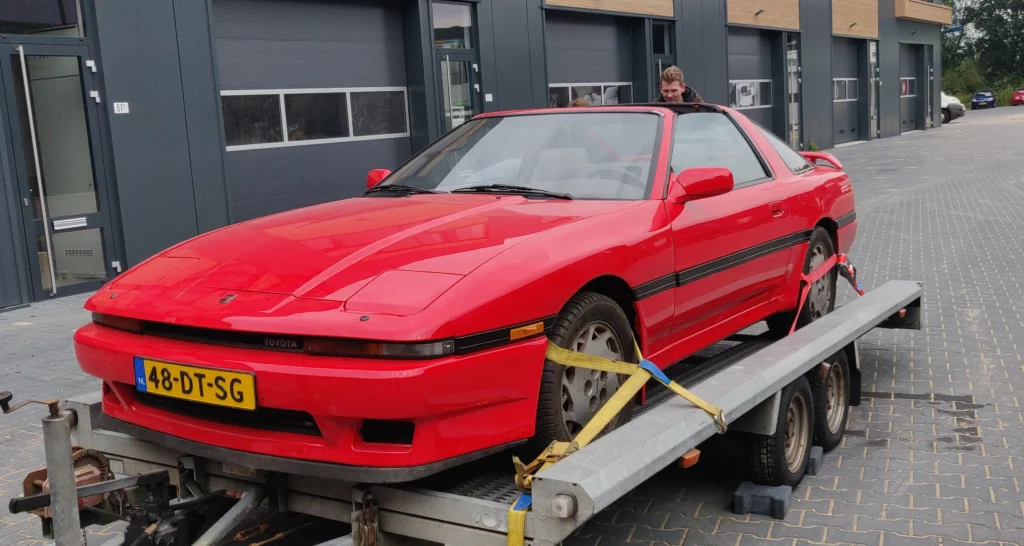
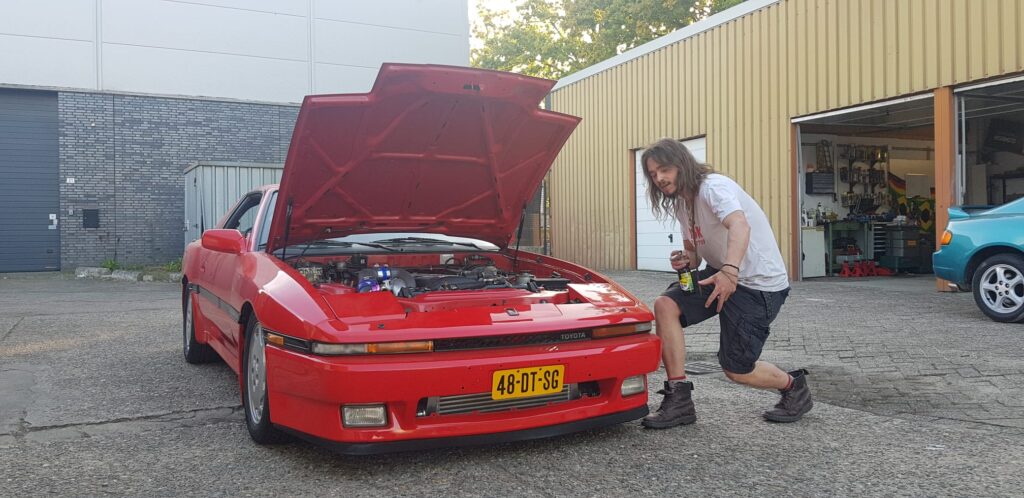
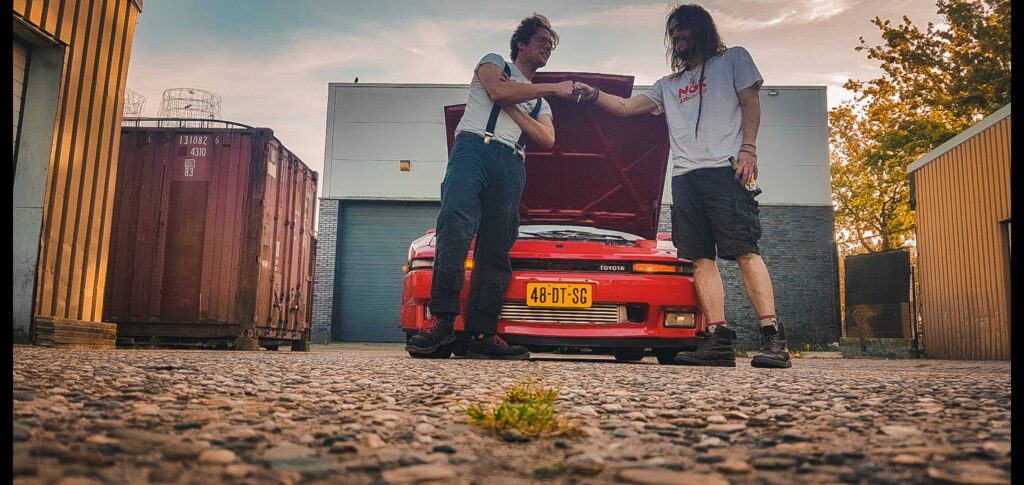
On September 26th, 2020, I purchased an A70 Supra without much consideration. When I stumbled upon the car listing, I was immediately sold on the idea of owning my dream car. I convinced myself that I wouldn’t do anything crazy with it and just enjoy having it. However, this was a deceptive thought that my brain made to justify my impulsive purchase. Let’s delve into the details of the car when I first bought it.
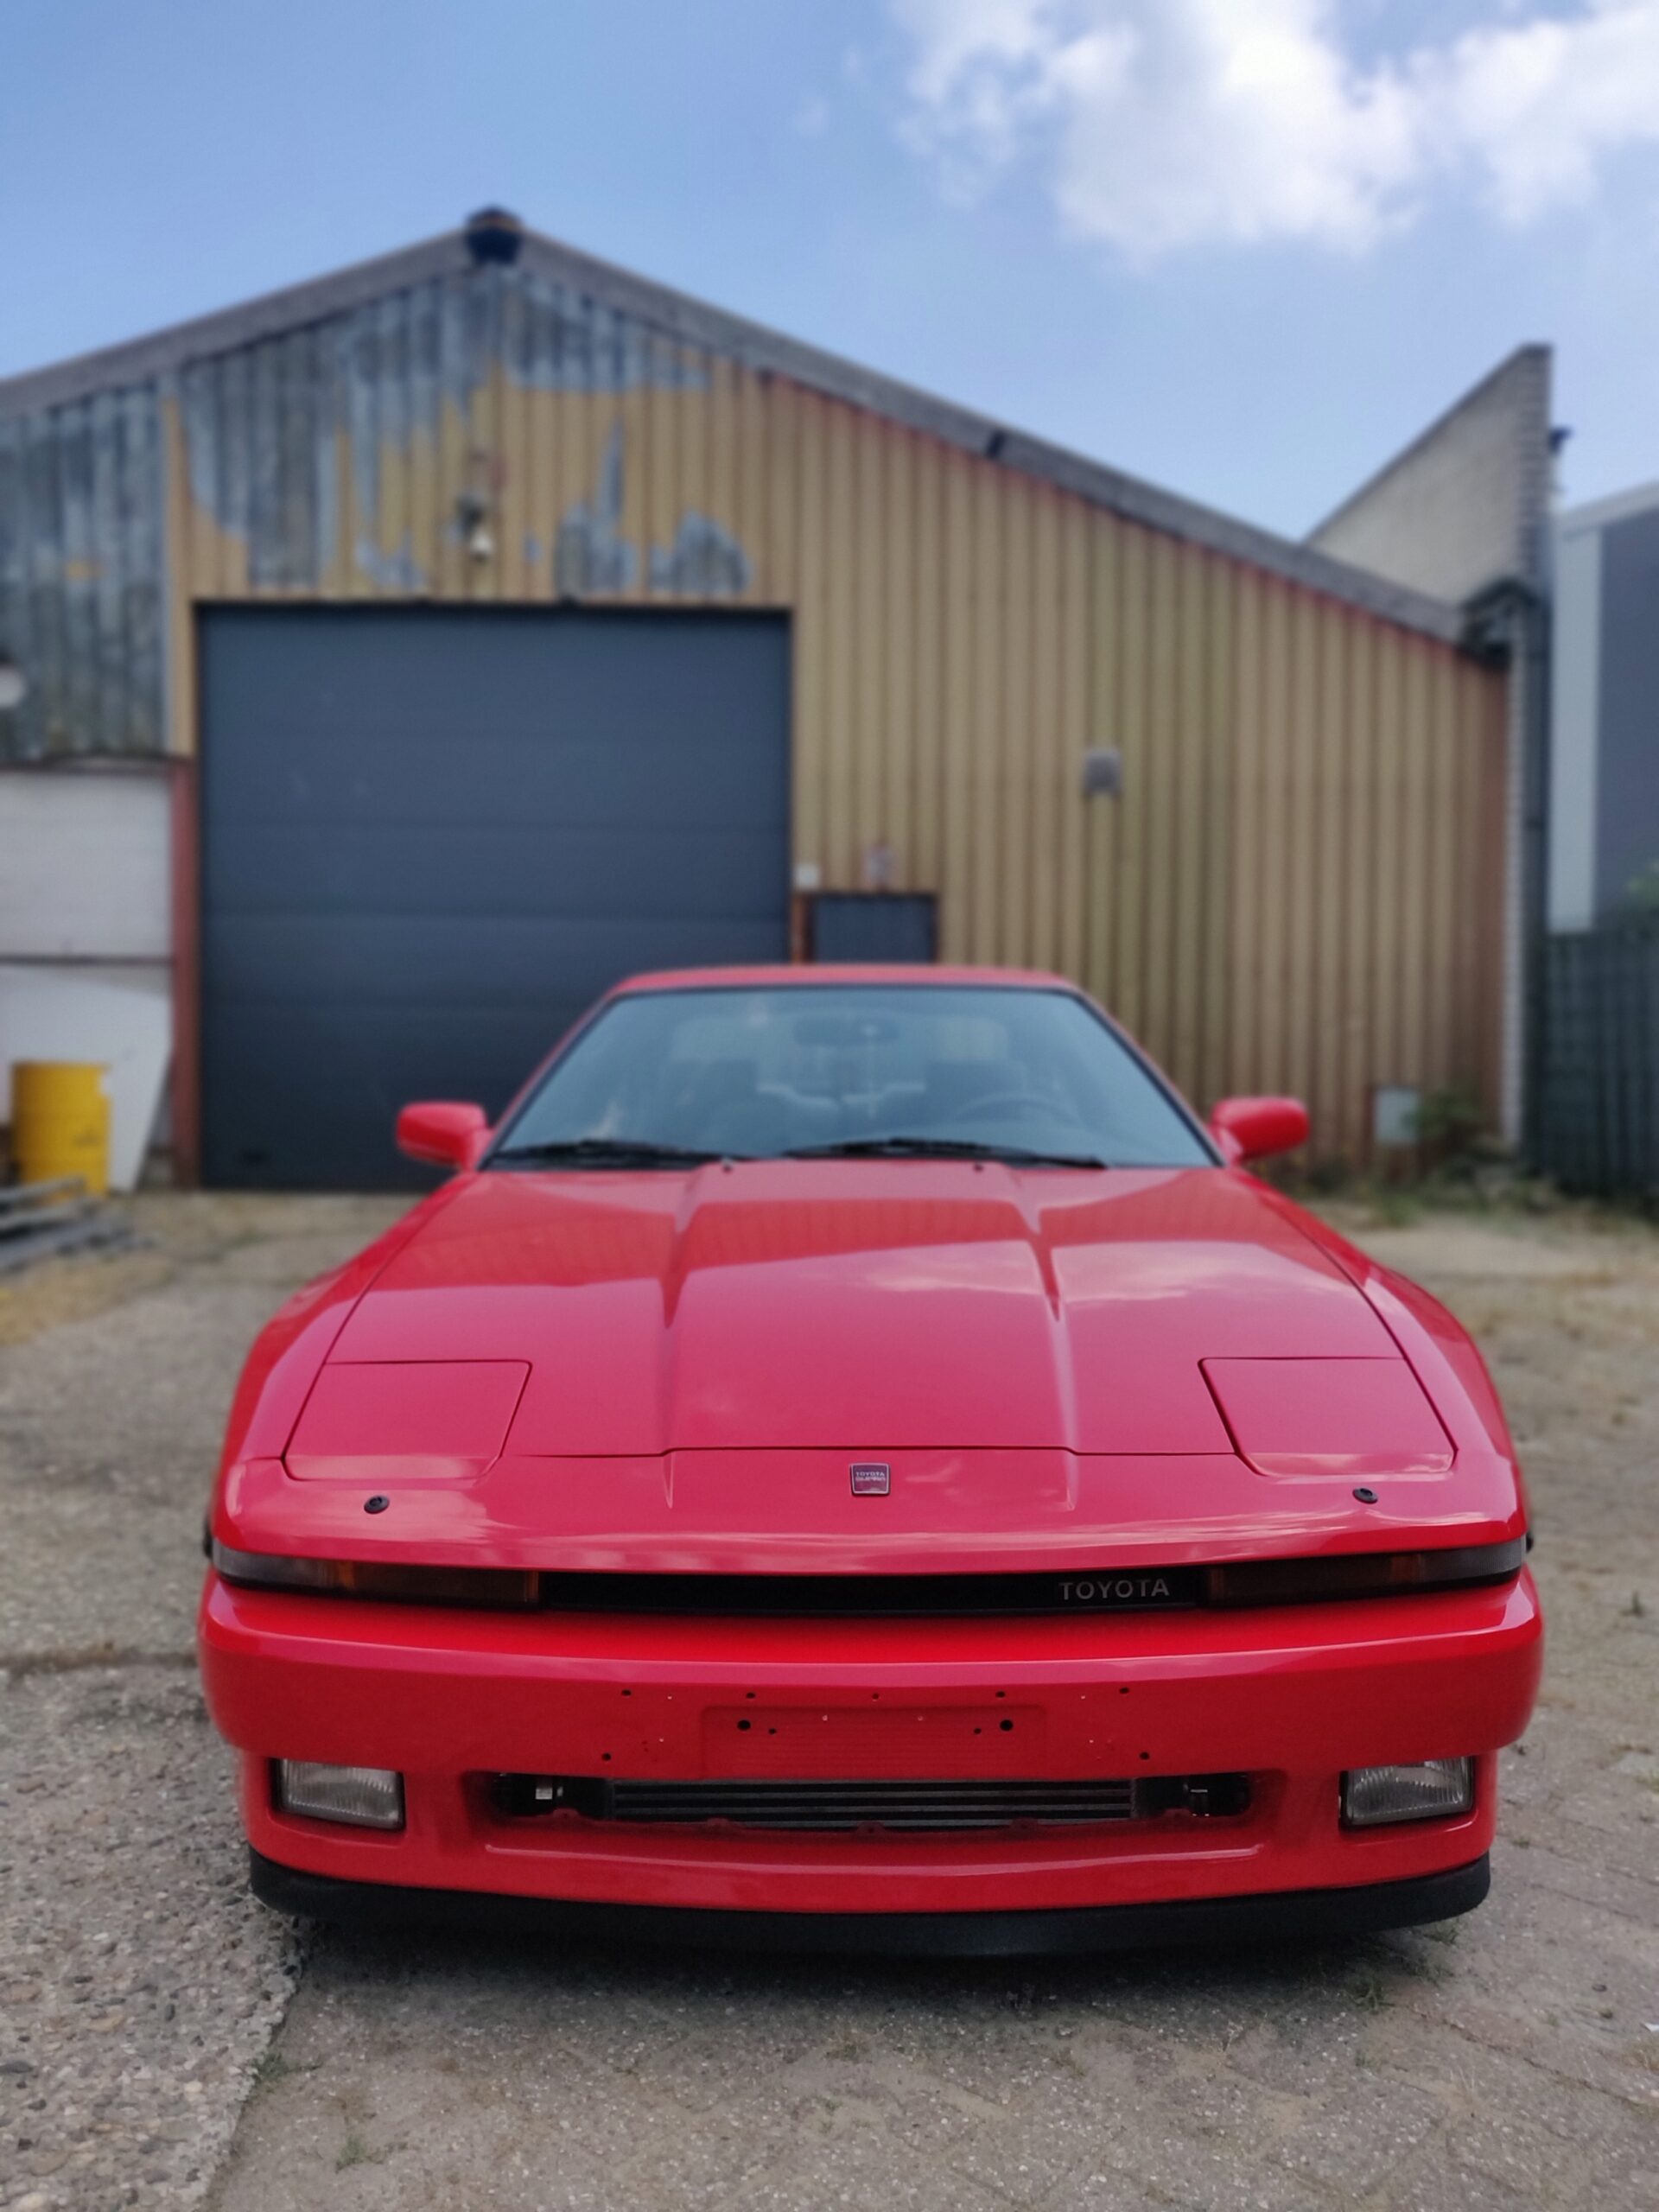
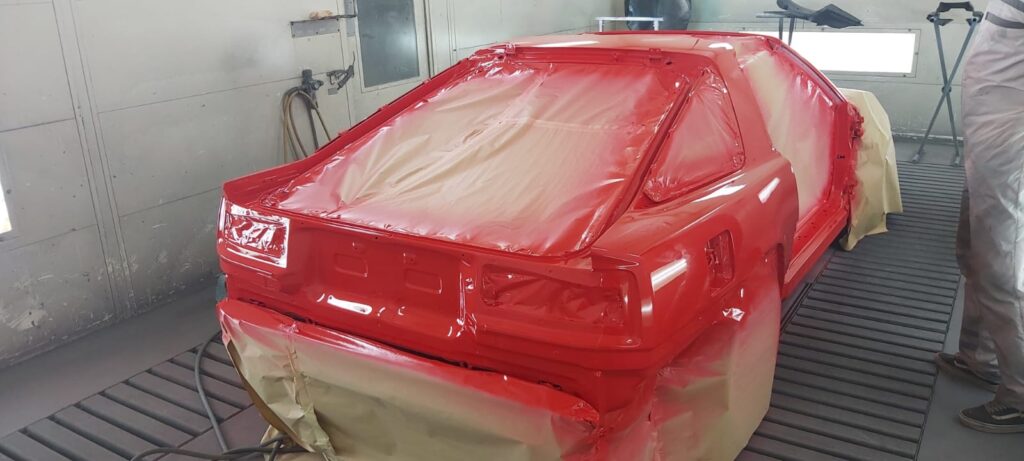
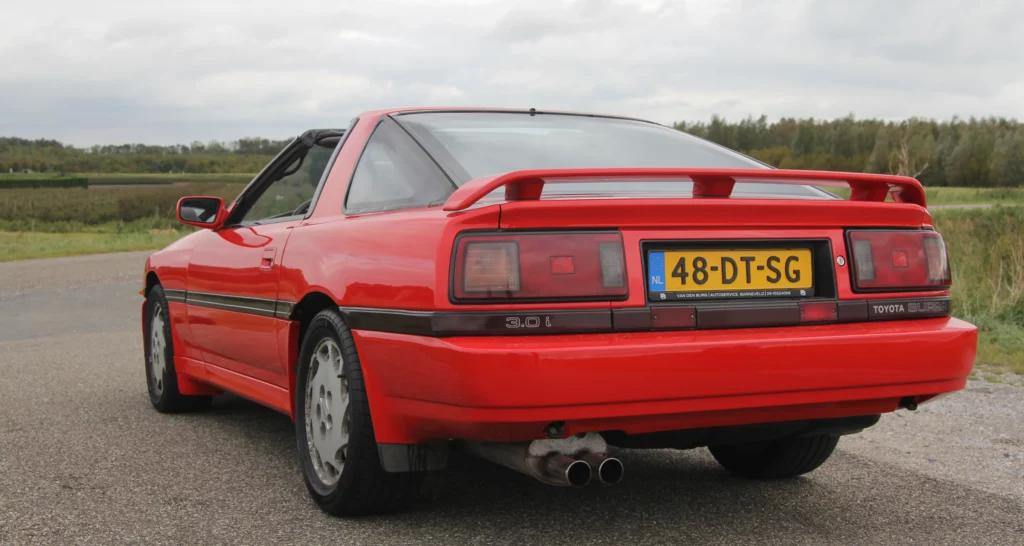
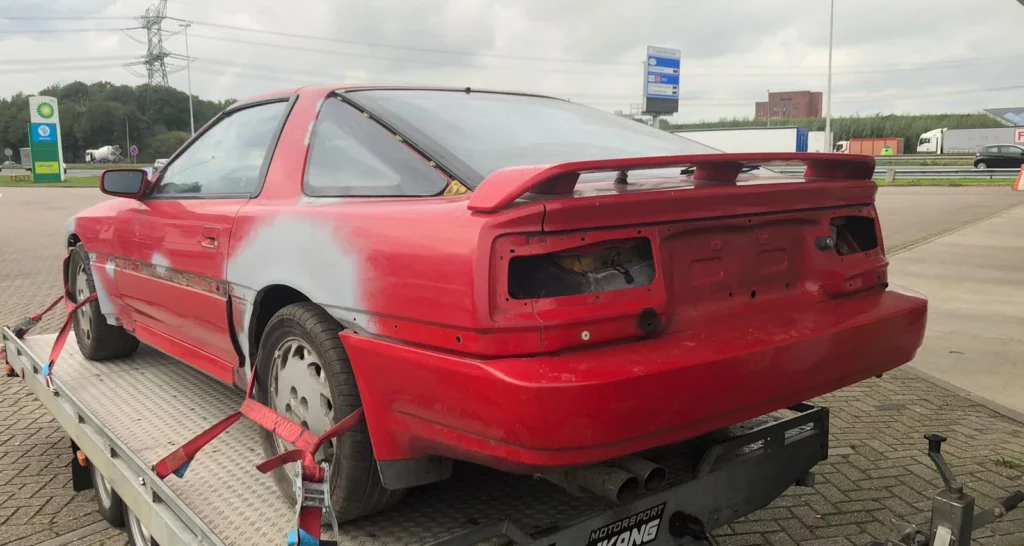
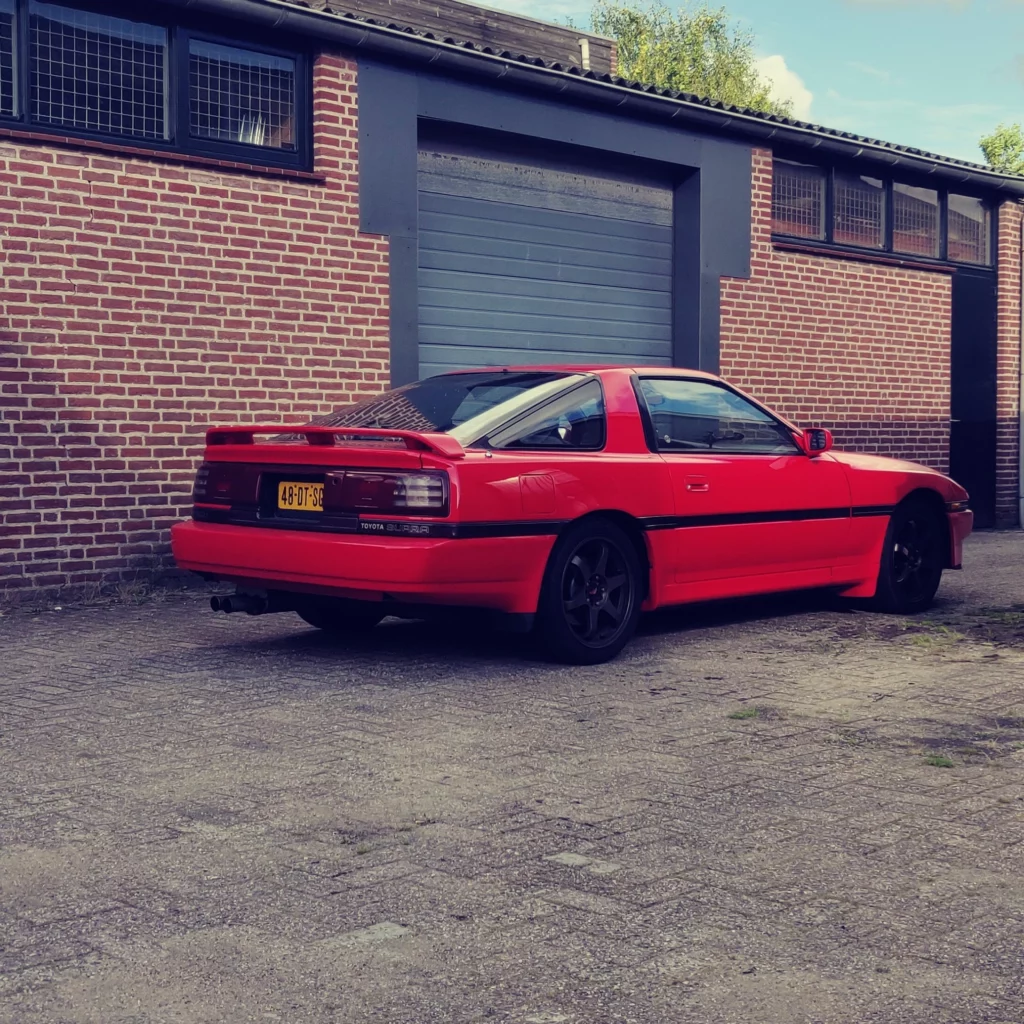
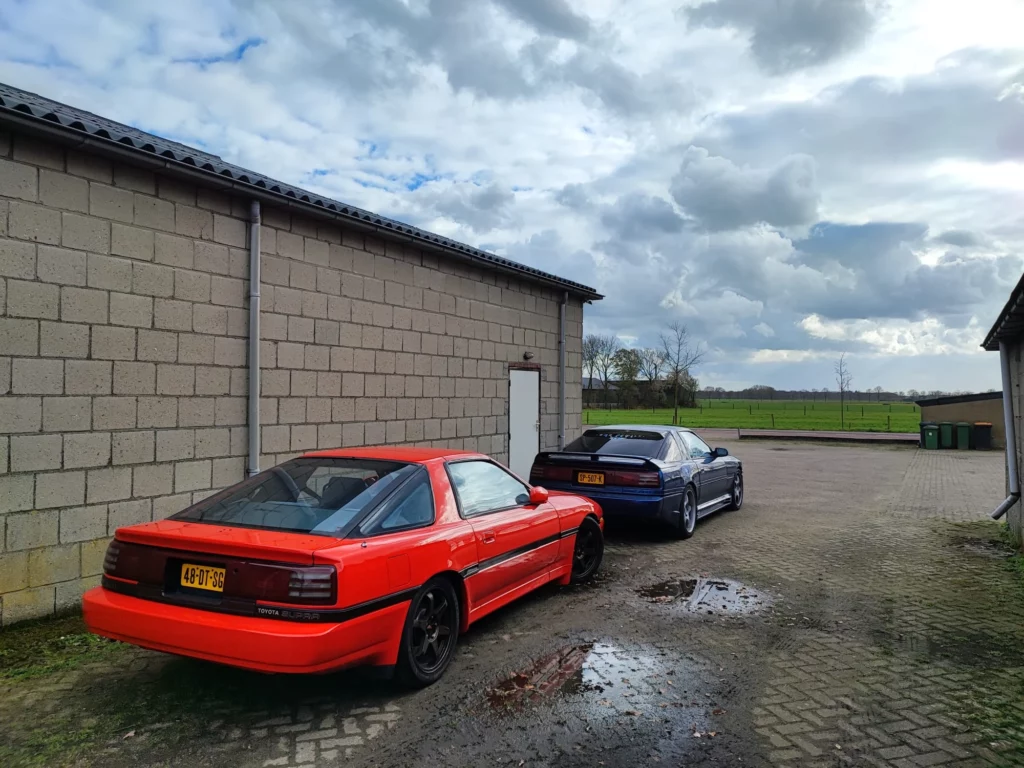
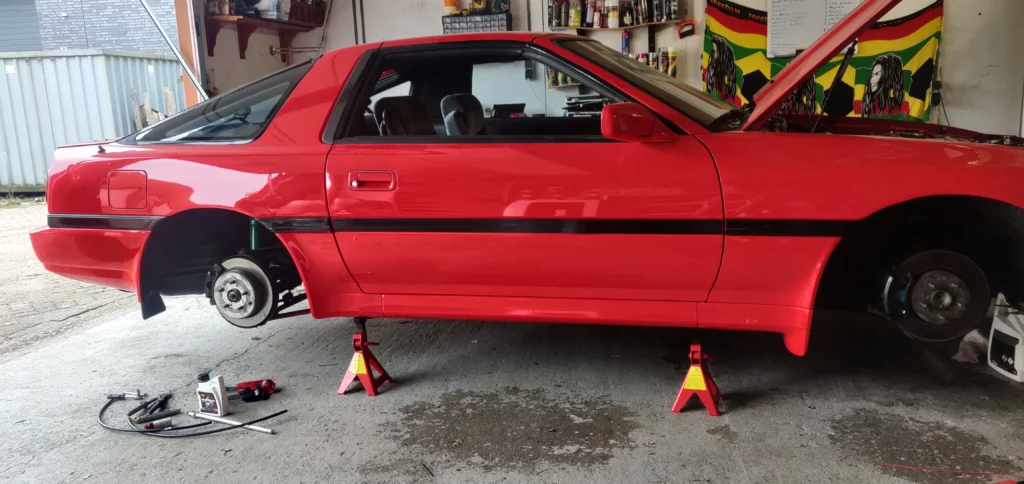
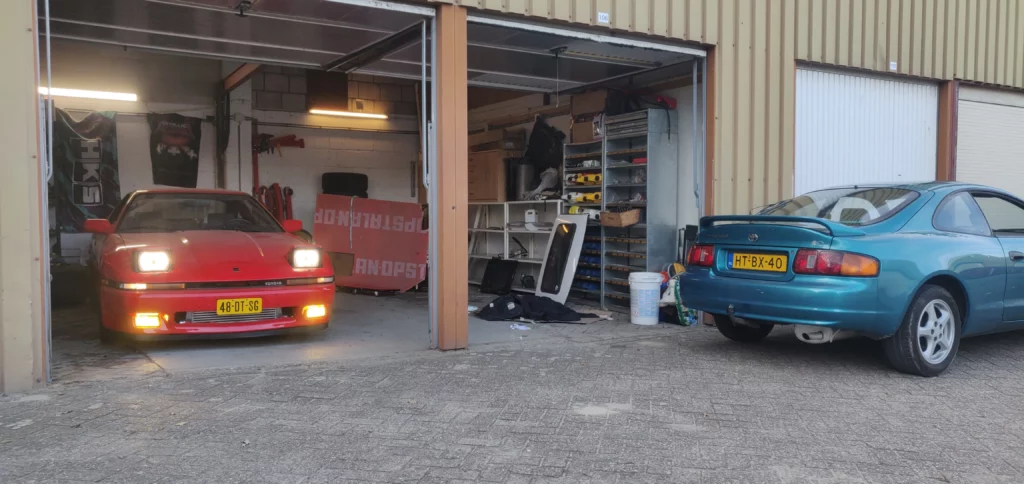
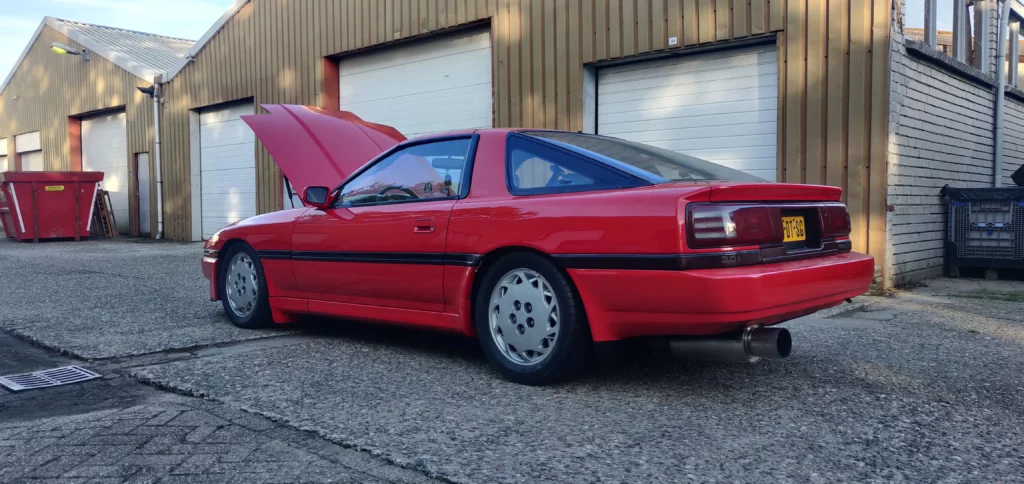
The previous owner had done a lot of bodywork on the rusted parts and had repainted the whole body before putting it up for sale. The car was completely stock, with an old 1987 7mGE engine, W58 transmission, stock rims, pre-facelift spoiler, bumper, taillights, and so on. The only modifications were some Tein lowering springs on the worn-out stock shocks and facelift trim around the car, except for the rear two. At the time of purchase, there were a few electrical issues with the car. The battery wasn’t charging correctly, and the interior cluster wasn’t working. However, these problems turned out to be due to a bad grounding issue that was fixed later on.
After the issues were resolved, I could finally enjoy cruising around in my new car.
Going down the Rabbit hole | 05/01/2021
Do you remember when I said I wasn’t planning on doing anything crazy? Well, I ended up going down a path that I never thought I would.
I mean, it can’t be too difficult, right? Everyone is swapping JZ engines into all sorts of cars. It seemed like it wasn’t too far-fetched of an idea. Well, to some degree, this is true, but it all depends on your level of knowledge when it comes to engine swaps. And let me tell you, I dug myself into quite an interesting hole here!
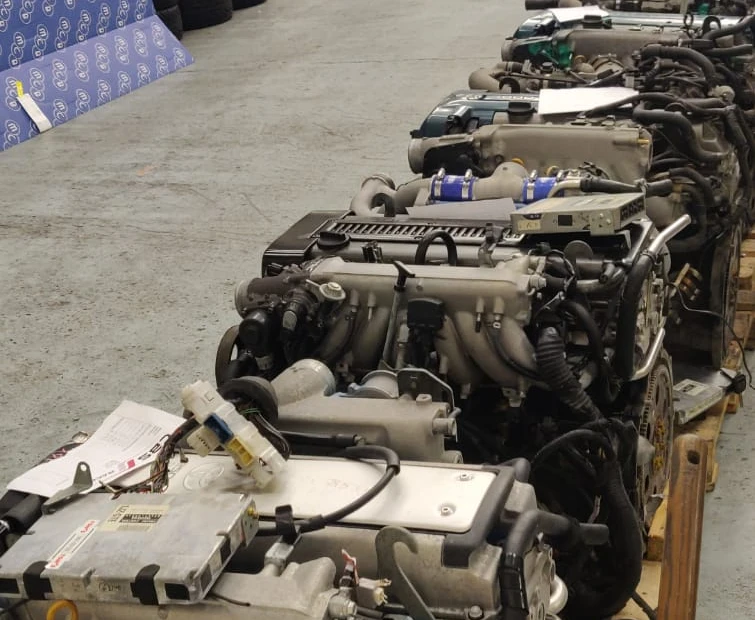
I was scouting the internet for parts and a daily car for the cold season when I stumbled upon a Lexus advert. After connecting with the seller, he invited me to come and take a look around since he had more cars and Supra parts for sale. When I walked inside, I was taken aback by what I saw. There was a whole row of 2JZ engines, the entire place was filled with OEM Toyota parts, tuned Supras and Lexuses, and the most JDM engines I’d ever seen in my life.
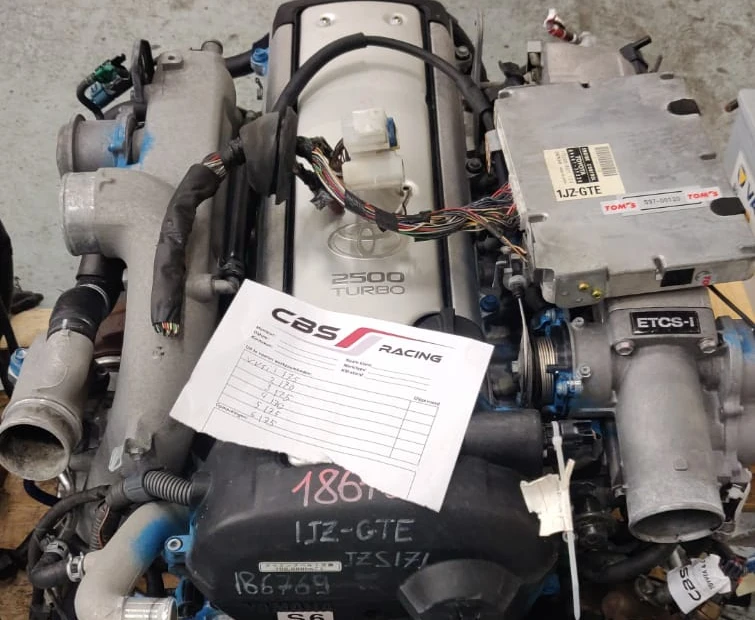
As I was gazing at the row of 2JZs, my eyes fell upon a JZS171 1JZ. Back then, the prices of those engines were quite a bit lower than the 2JZs, and I couldn’t help myself from asking if it was still available. Which, obviously, it was.
Knowing that the prices of JZs were only going up, I saw this as my only chance to ever do this. (which it was, seeing the prices as of writing). Being still very new to the whole “car life,” I did not have a working place, no crane lift, not even a car to transport the engine. Luckily, the guys at the company were nice enough to store it for me until I figured out how to do all of this.
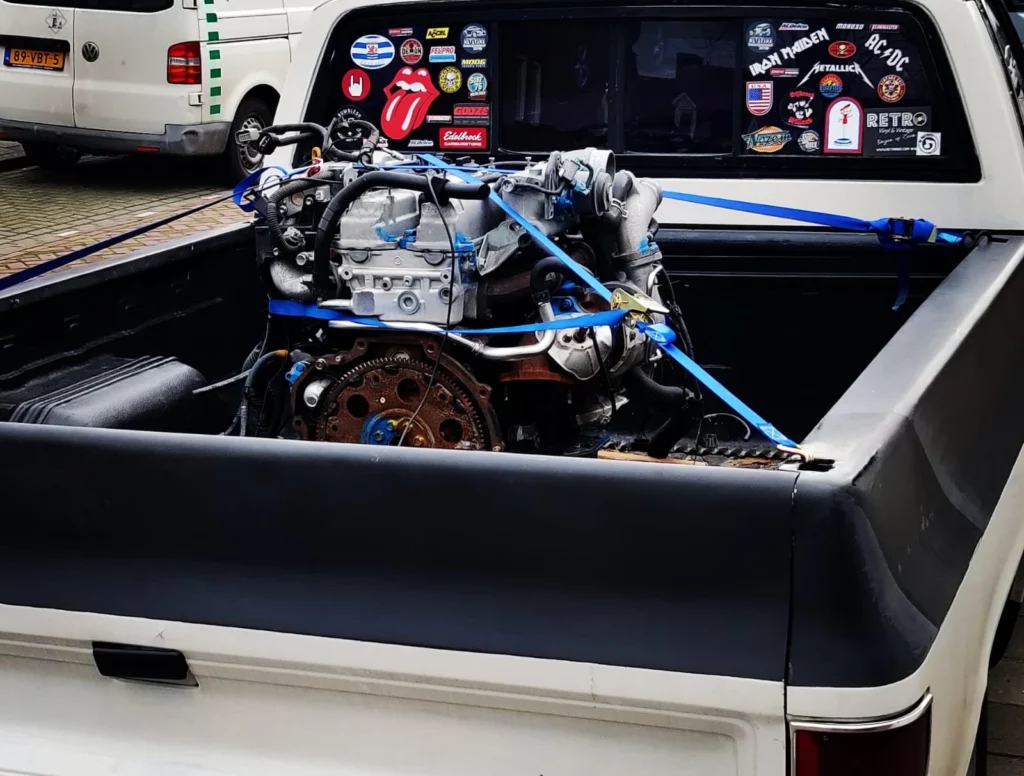
Within two months, I was able to get the engine, transport it to my house, and park it next to my roommate’s and my bikes. They must’ve loved me.
So, what upgrades did the car have before I bought the JZ? None. I bought this engine on the 5th of January, and I had only owned the car for about three months, during which I put it into winter storage. This meant that I really needed to find a garage now
Obtaining a Garage | 27/07/2021
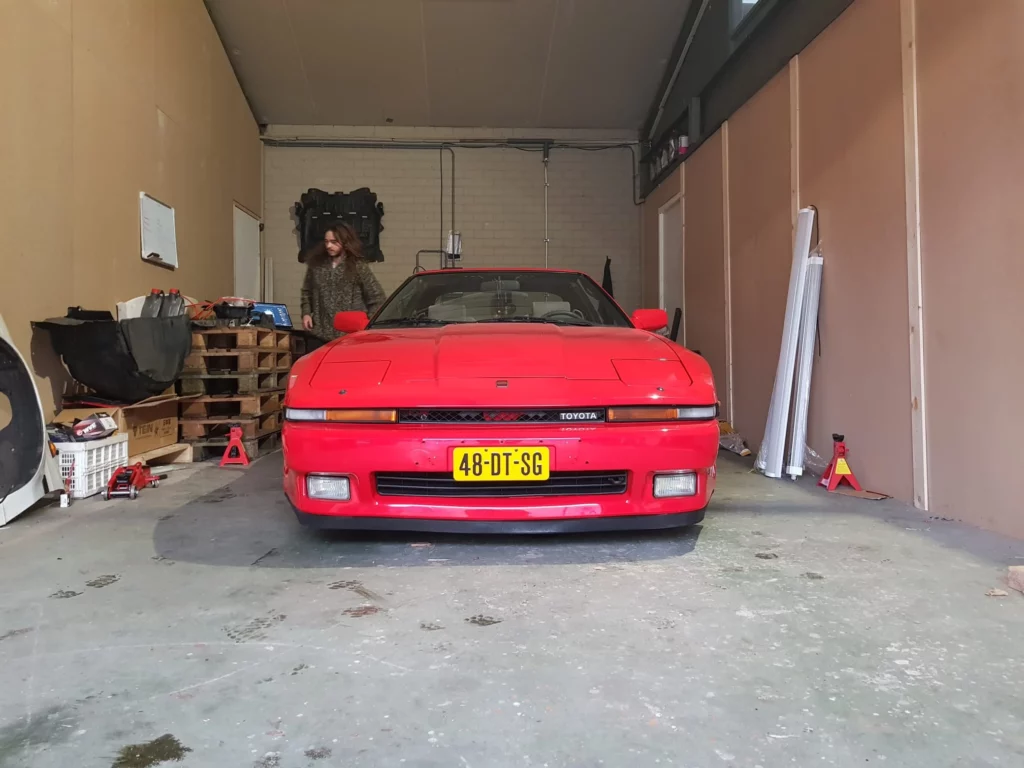
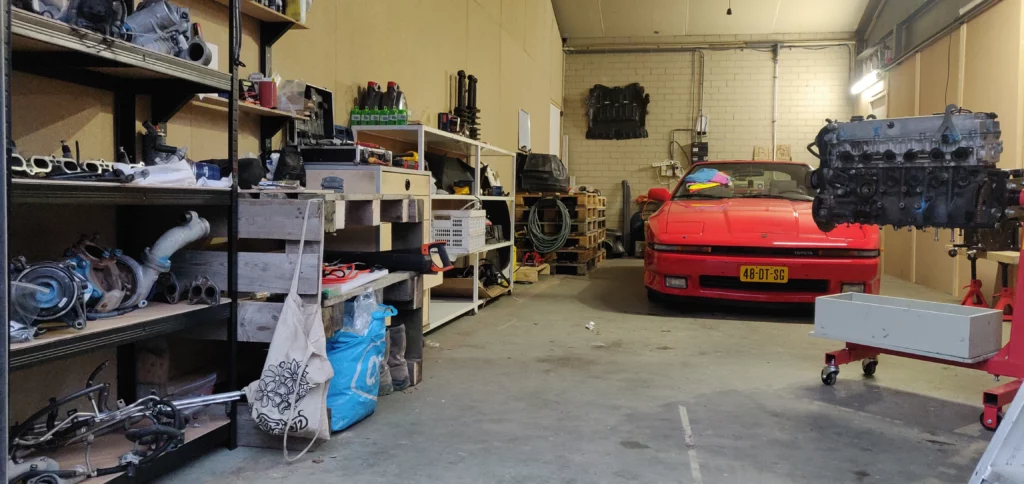
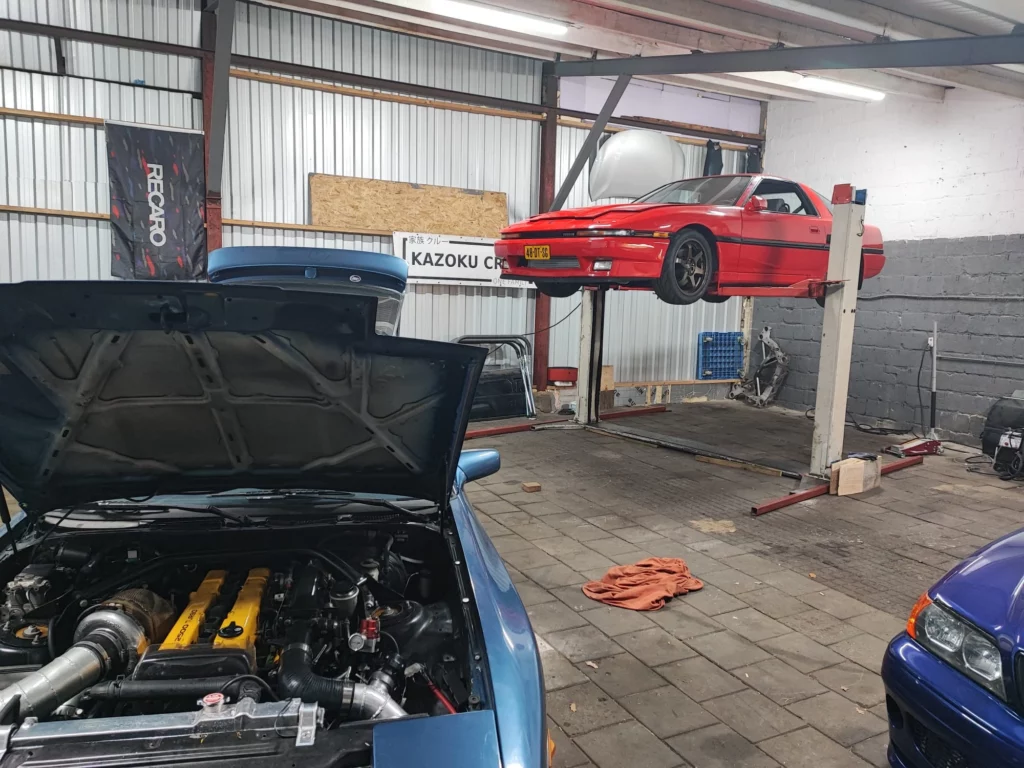
After an extensive search, I finally acquired a spacious garage for my project. Though the garage was pricey and located 30km from my home, I was thrilled to have a place of my own to bring my vision to life.
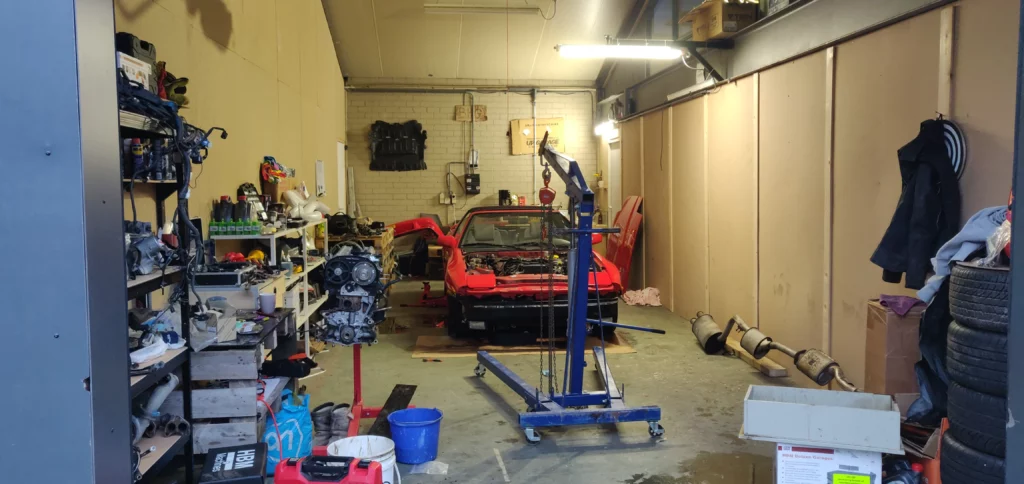
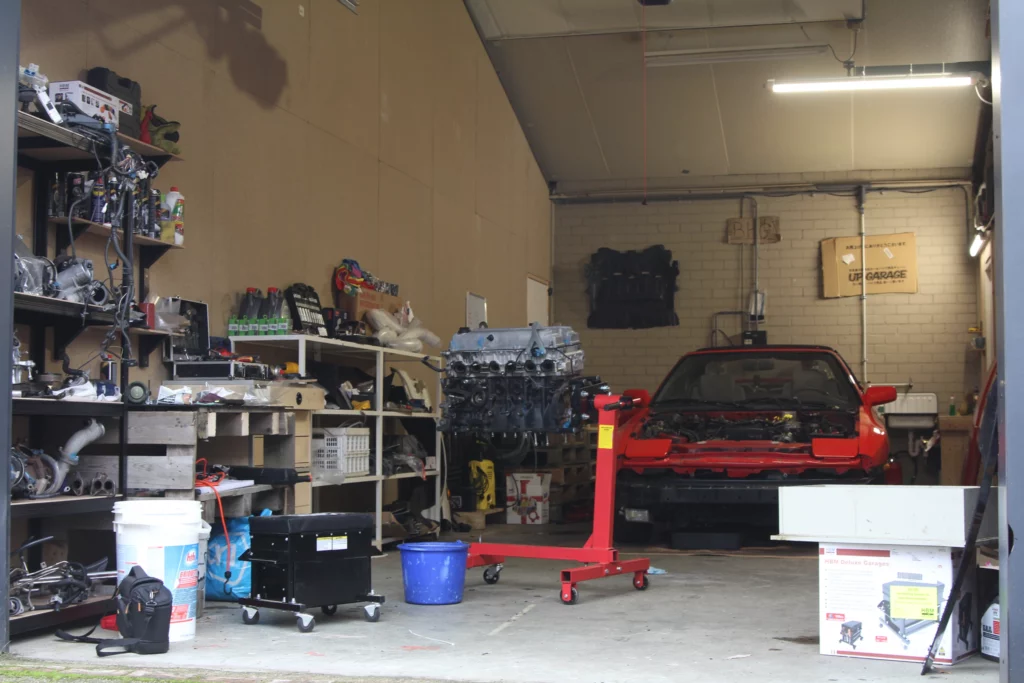
The garage boasted high ceilings, a sink with a water tap, and enough space for a bridge. I even toyed with the idea of building a loft to relax and admire the supra from above. With this space, my imagination knew no bounds. In the meantime, I had been quite busy. I enjoyed pushing the 7mge to its limits, made new friends in the Supra world, and learned more about the chassis than I ever thought possible.
In addition to acquiring necessary parts, such as a rear sump, and a new bellhousing, I had also been upgrading various aspects of my car. I had installed Tein Coilovers, which were a huge improvement over the old worn out sock suspensions. I also switched to semi-slick tires with some cheap knockoff rims, which gave my car a bit more grip, and at the time i liked the stijl of rims. Furthermore, I was able to replace the pre-facelift tail-lights with a clean set of JDM cherry facelift set, which was a huge upgrade. However, my biggest mistake was not having a solid plan. Initially, I intended to simply drop in the whole engine and do the minimum work needed to get it on the road. However, as an impulsive person, I started researching more about these engines, swaps, and upgrades. My plan soon evolved from a no-engine refresh, stock ECU, w58 transmission, and stock exhaust to something more intricate.
Pulling the Engine | 28/11/2021
Some time passed, and I enjoyed the summer making friends in this new world. I went on drives and meets, and started to slowly disassemble the 1JZ engine. As I met numerous people who had been down similar roads, I realized I’d better refresh the whole engine with all new gaskets, clean the parts, and paint everything. I remember those days fondly as I sit here writing about this, while my car is currently still undriveable. However, the inevitable happened… I blew out the 7M head gasket. Yep, it had to happen someday. I knew these were common issues with these engines, especially under boost. Mine was a non-turbo, but to be honest, I did push it to its limits. Most people would obviously hate this moment, but since it was the end of summer and I wanted to swap the engine in the cold season, I was proud that I was able to actually blow it. For me, it was somewhat of an achievement, and since those old engines aren’t worth much, it did not hurt me financially. I knew the whole season I wouldn’t have to baby the engine to keep it running forever.
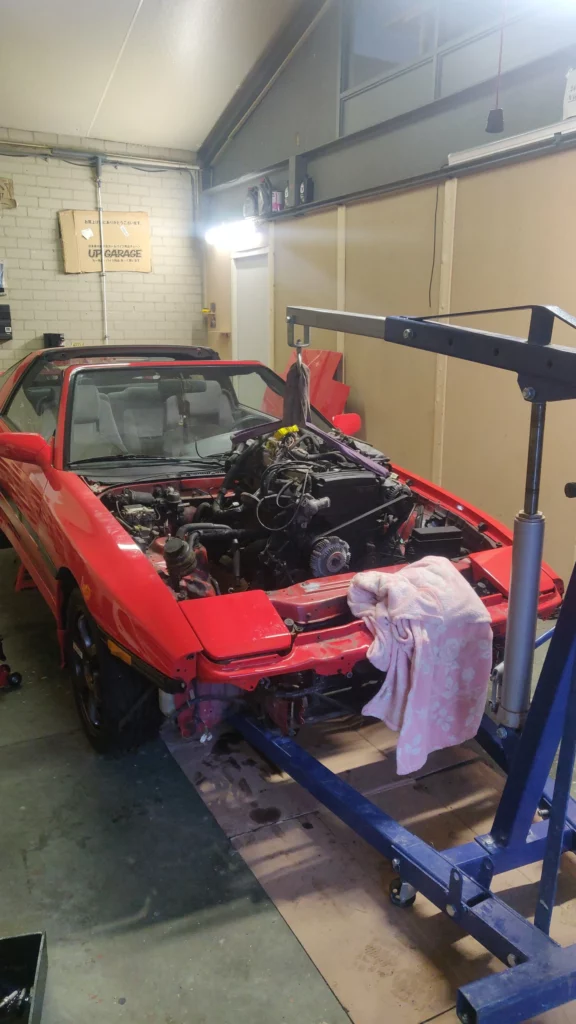
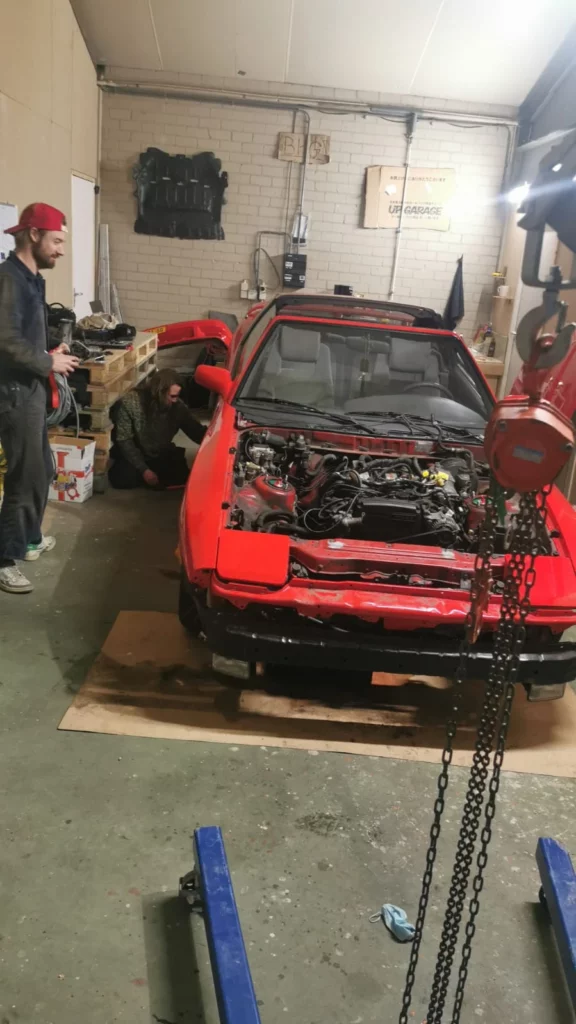
About a week later, I came up with the great idea of just sucking it out, which sounded easier than it was (for the first time). I had a vertically long gas can, my car was lowered way too much, and the tank was 2/3 full. Have you ever been high from fuel? If not, I can tell you I felt terrible! And I smelled like gasoline for four days. I had to wash my clothes four times before I got the smell out. But I got it done, and now I could finally get back to where I was. With everything loose, the tank empty, and reading about what to be careful with, I felt comfortable doing this. The day I was planning to remove the engine, a friend of mine wanted to come visit. When I told him I was going to work on my Supra, although he doesn’t have any interest in cars, he wanted to come and help.
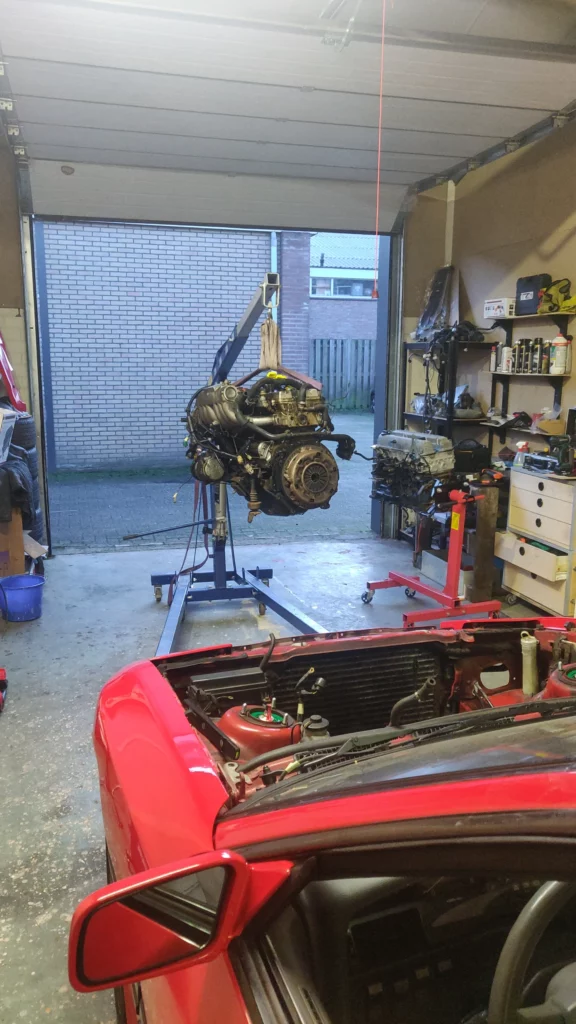
Together, we started to lift the rear of the car in the air, connected the engine crane to the engine, and made an attempt. Halfway through, however, we realized that the crane couldn’t go fully under the chassis. I had really lowered my car too much. After some consideration about what I should do, I came to the conclusion that I’d rather try to disconnect the transmission from the engine, in the hope that I wouldn’t need such a far reach. With luck by my side, this ultimately worked, and I just pulled out my first engine in my life without any broken parts. But damn, now I noticed how dirty the now empty bay had become over the years…
I really enjoyed being part of it, and it taught me a considerable amount of skills. It connected me with people and brought me a lot of joy. Eventually though, due to differences in direction, we left the project, leaving only the founder behind. It ended on good terms, and I hope to see his vision for it work out.

Painting the bay | 06/01/2022
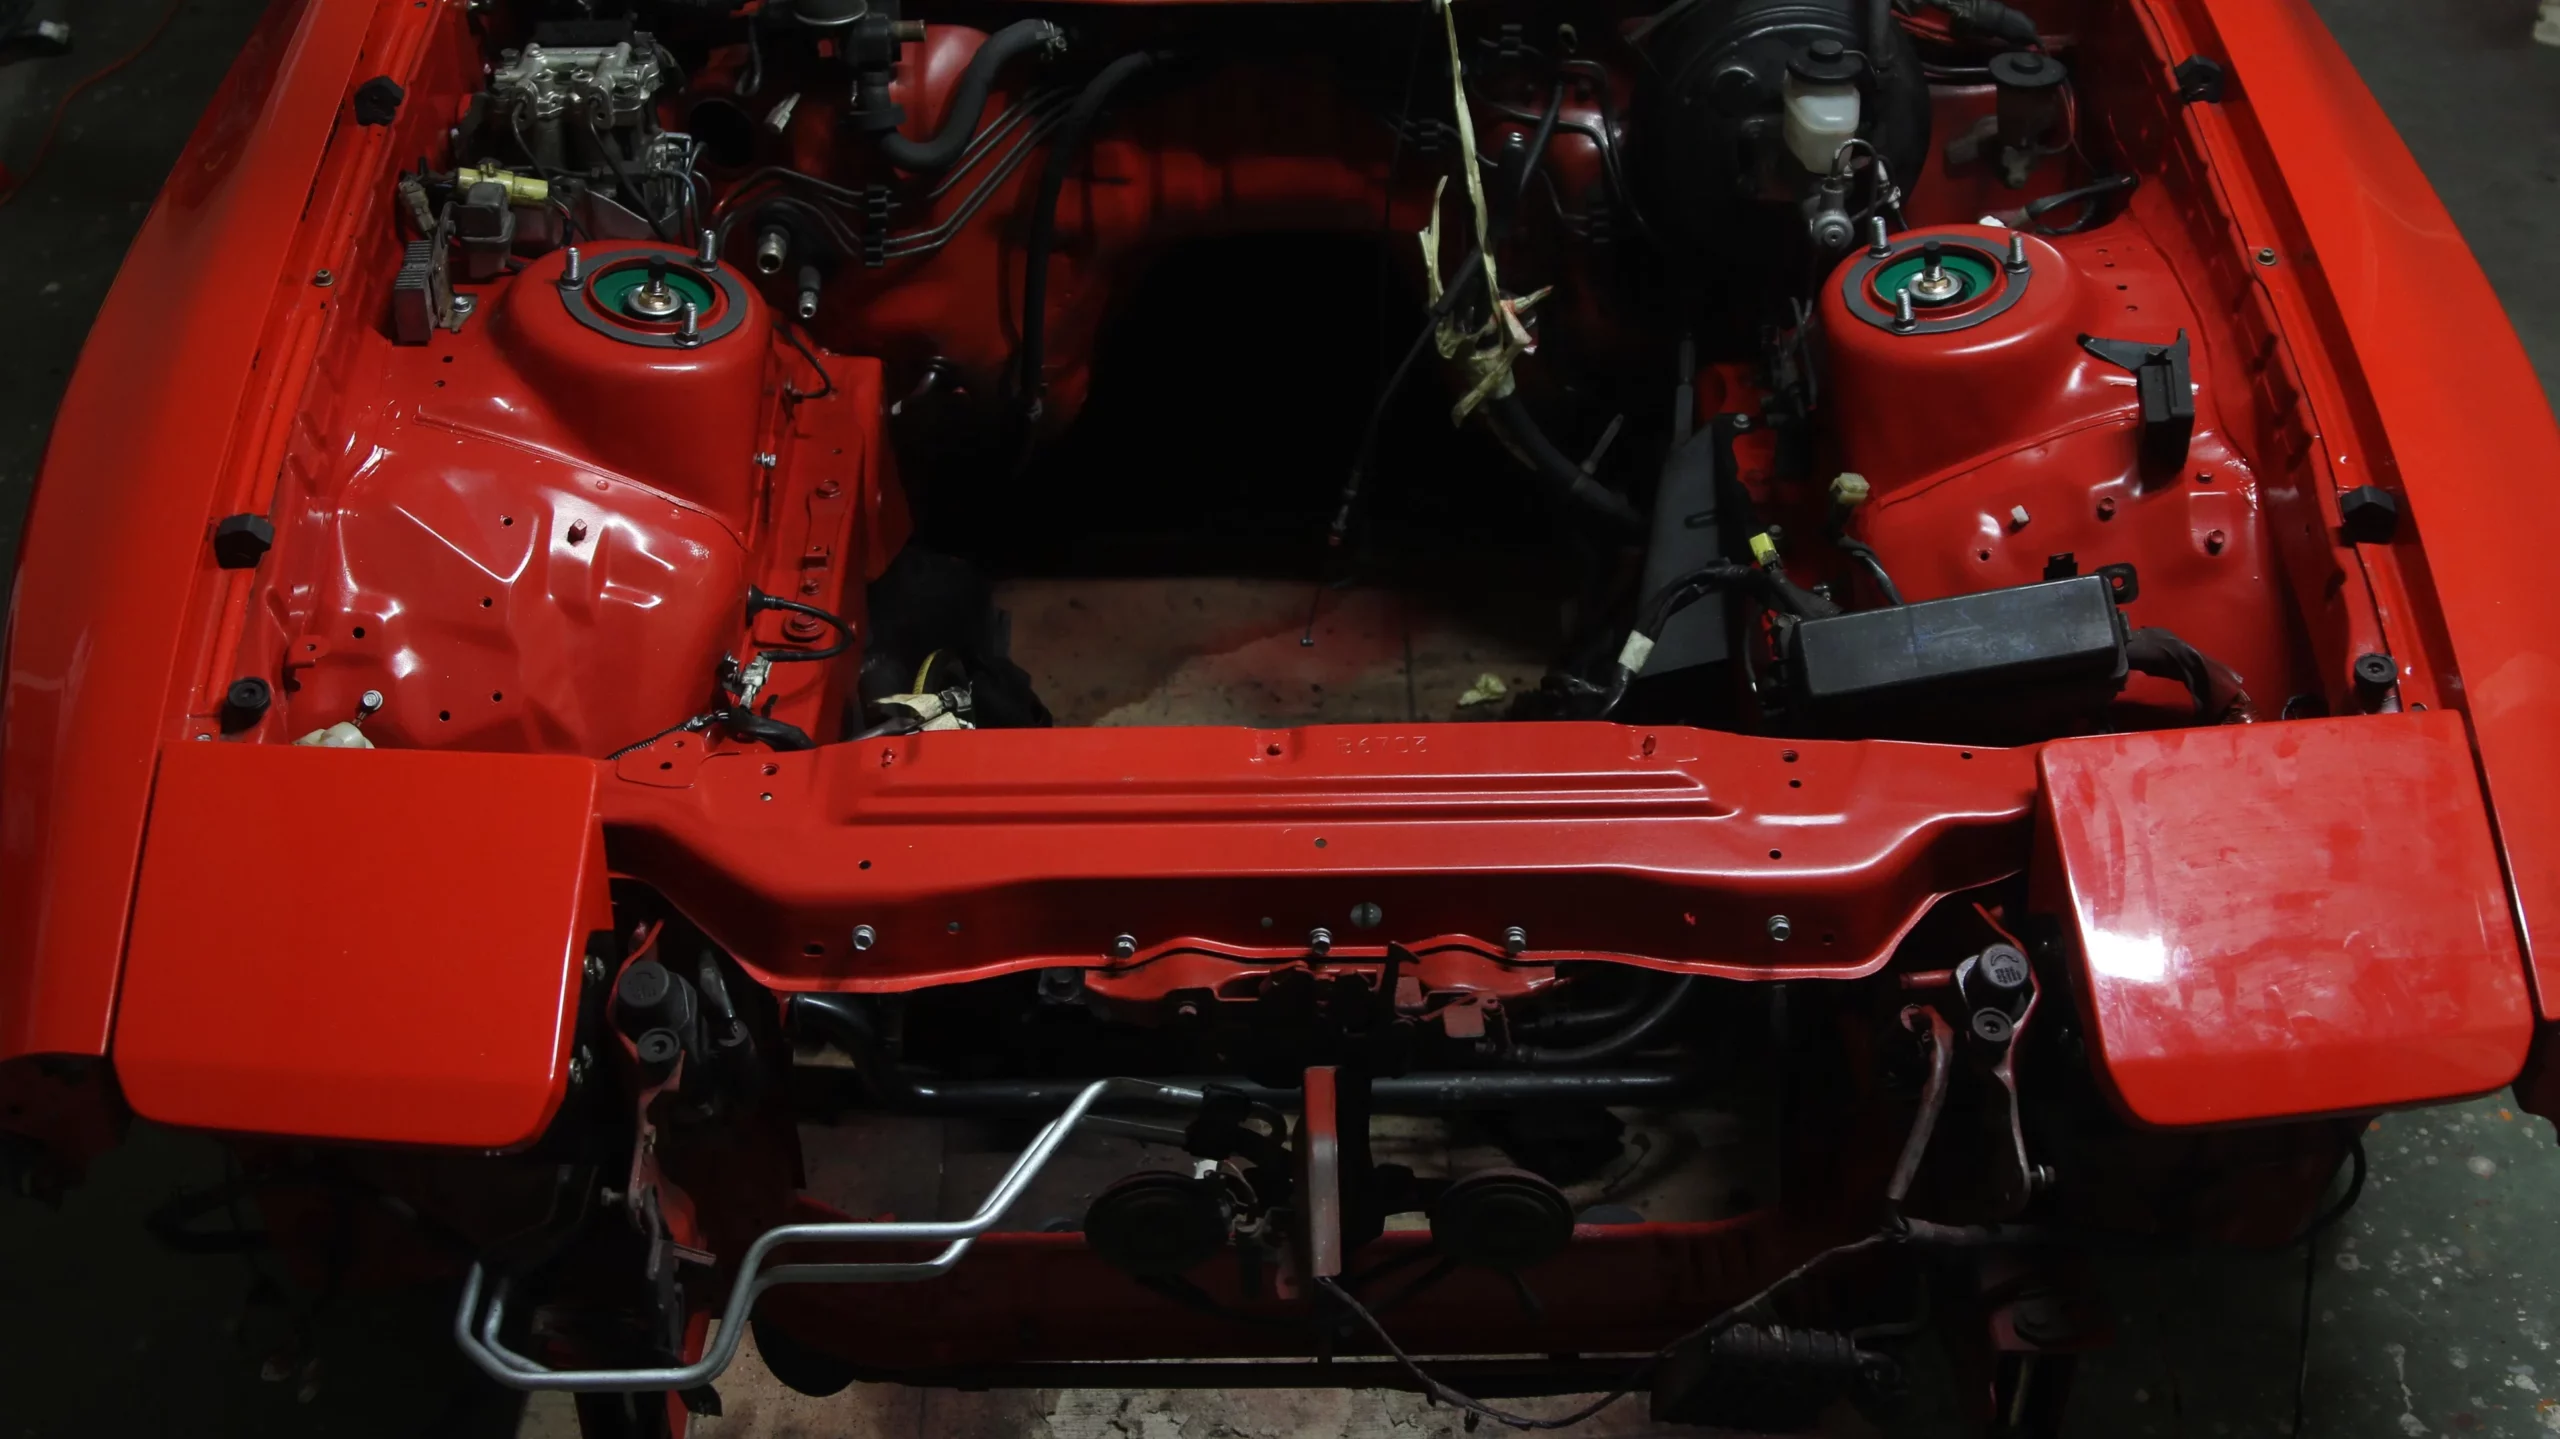
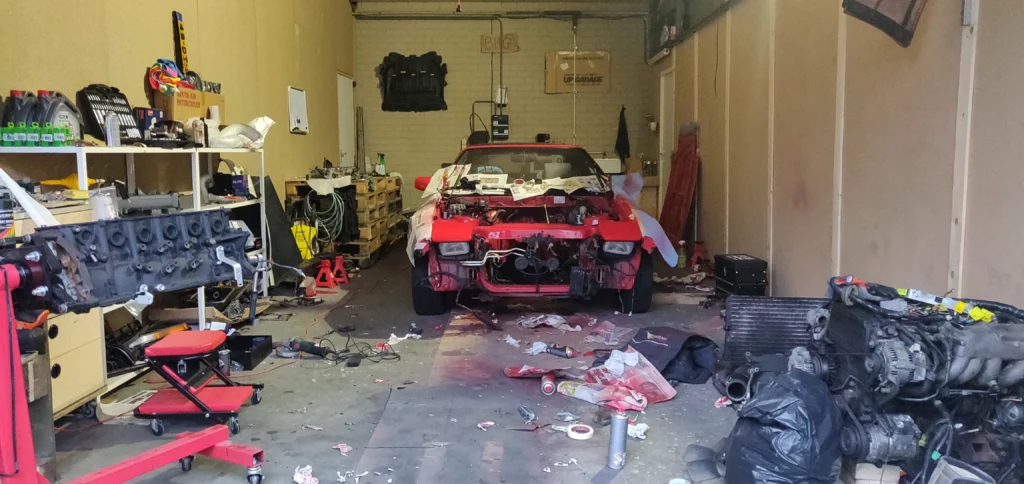
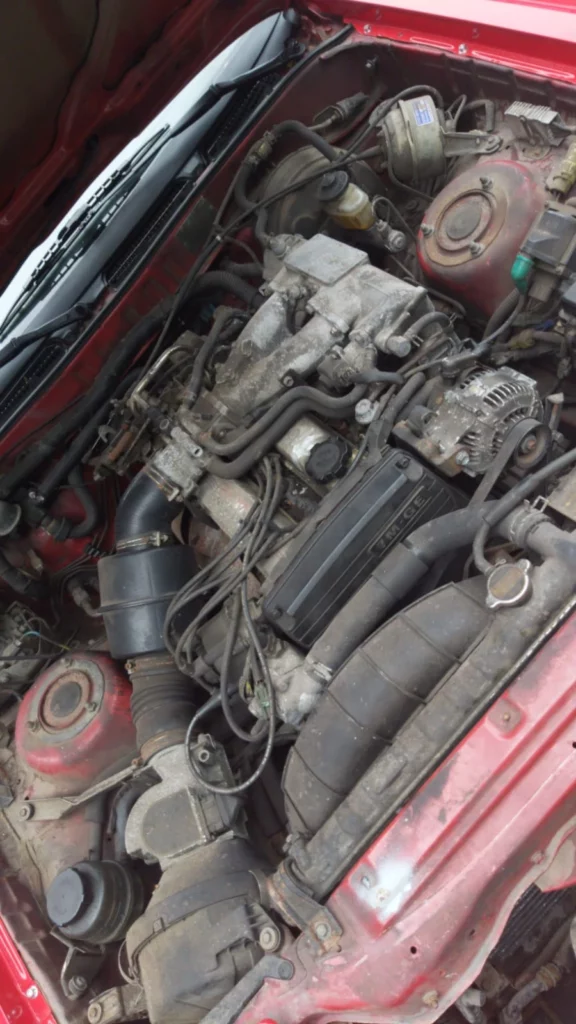
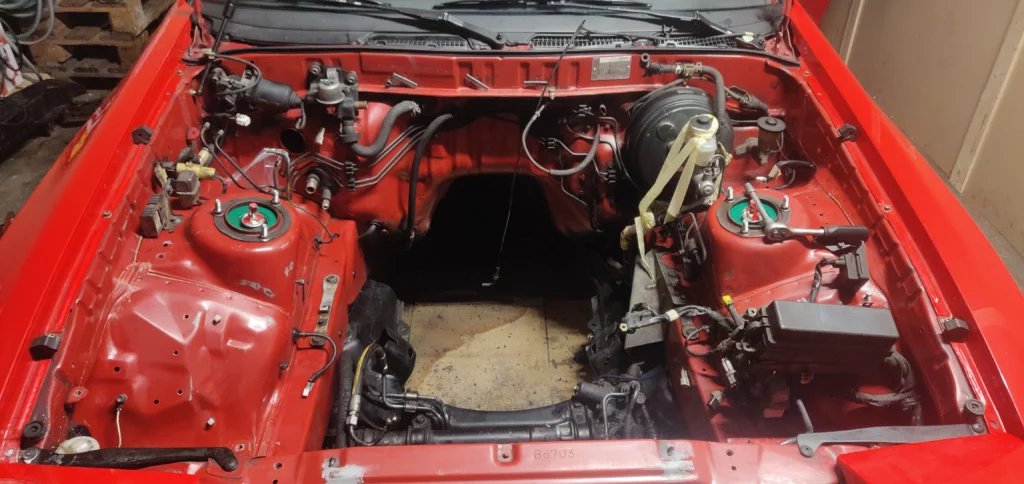
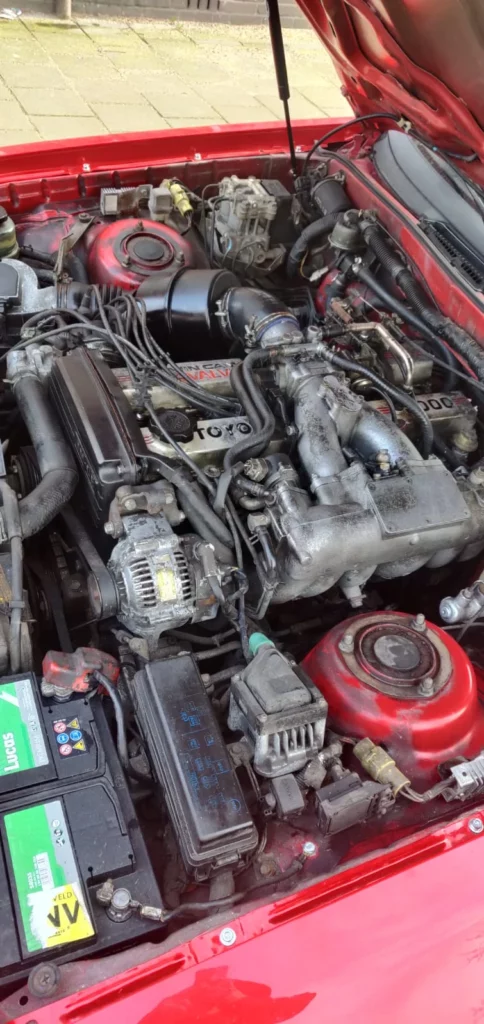
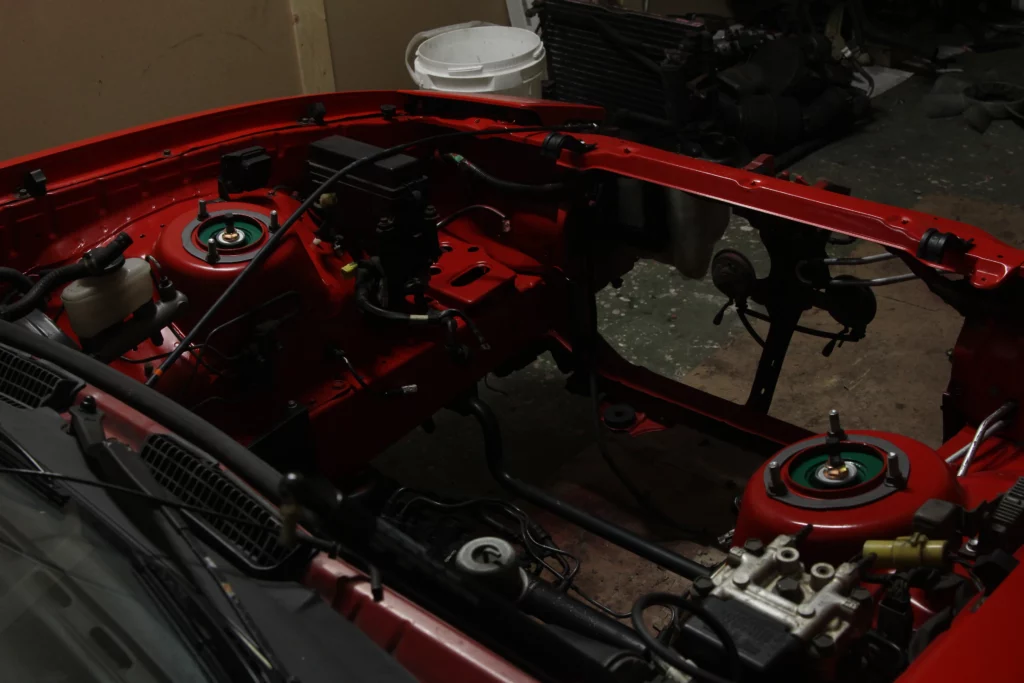
Do you remember when I mentioned that my biggest “mistake” was not having a set-out plan? Well, I have to admit, I alreadyx kind of lied to myself when I started to refresh the engine. But, it wasn’t really a big undertaking. However, as I slowly started taking the JZ apart, I couldn’t help but get annoyed looking at the dirty, old metal, and those pesky blue paint spots on the engine. It just didn’t look as good as I had envisioned it. As I was simultaneously researching JZ swaps and browsing through loads of videos and pictures of amazingly clean engine bays, once again another impulsive idea struck me. Why not order some paint and give my engine bay a fresh coat while I’m at it anyway? It won’t be too much extra work anyway. So, I took the plunge and ordered the paint. As I eagerly awaited its arrival, I started to imagine how amazing my it could all look in the end. But then, reality struck. I finally took a good look at my Supra’s engine bay, and to my horror, it was extremely dirty. The old paint was barely visible beneath layers of grime and grease. It almost looked like there were oil spills from 1987 that had never been cleaned up. I knew I had to do something about it. So, armed with 20 packs of cloths, sponges, paint brushes, and a whole box full of Dasty, I committed myself to a week-long cleaning spree. It was a daunting task, but I was determined to bring my engine bay back to life and make it shine like new. Little did I know that this would be just the beginning of my painting adventure, but I was up for the challenge. After investing a bigger amount of time then i expected, I can confidently say that it was all worth it. Despite not being sponsored by Dasty in any way, I was pleasantly surprised by how effective their product was in removing greasy old oil stains, especially considering it cheaper than a can of soda. Interestingly, the neglect of cleaning the bay actually had a positive side. While cleaning, I noticed that there were parts of the bay where the paint had worn off, revealing bare metal. However, the layers of oil on those areas had actually protected the metal from rust and weather damage. Nevertheless, I couldn’t let this go unnoticed. With the engine beautifully painted and the exterior of the car freshly painted, the faded paint in the bay would bother me to no end after the swap.
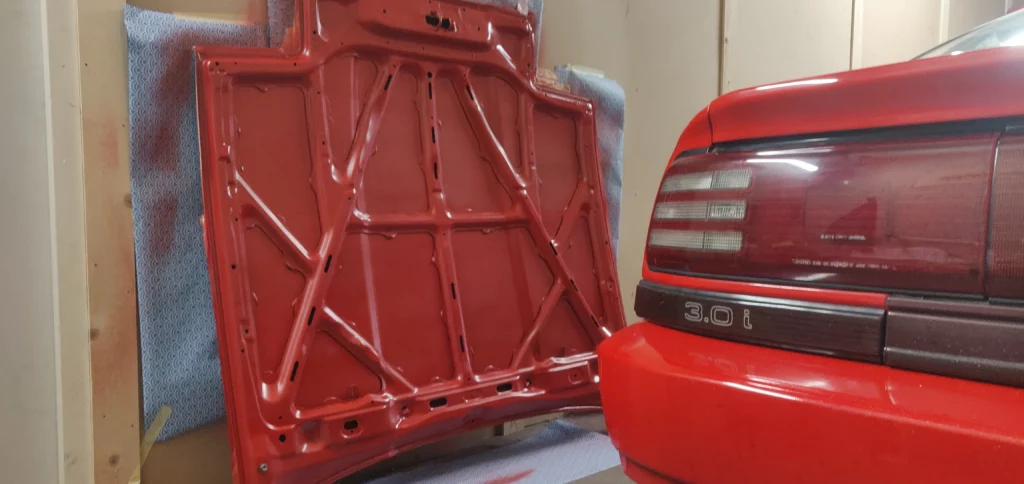
As I stood there, contemplating whether I should take on the task of painting the bay myself, I couldn’t help but feel a little hesitant. After all, I wasn’t a professional painter and I didn’t have the proper equipment for the job. Plus, the thought of finding a professional painter, transporting my car there, and paying their fees seemed like a hassle, besides, i’d rather spend that money on getting the car back on the streets. On the other hand, the faded paint in the bay would look unsightly compared to the fresh coat on the rest of the car. With some hesitation, I finally decided to bite the bullet. I ordered some OEM paint, masking tape, degreaser, and other supplies, and got to work removing everything I could from the bay and masking off the surrounding areas. I masked off the tops of the Tein coilovers, because I was too lazy to remove them (don’t ask me why, in hindsight it would be better and quicker just to remove them). It took me a while, as it was in the middle of winter and I even had to warm the paint in water. But my determination paid off in the end. Once I finished painting the bay, I still had some paint left over. I hadn’t calculated how much paint I would need, since I wasn’t exactly skilled at that, haha. But it was a pleasant surprise. As I admired my makeshift paint job, my eyes caught sight of my hood against the wall. The underside was just plain gray, as I had already did not own the OEM cloth that was supposed to be there. The dull underside was no longer acceptable after all the effort I had put into the bay. Luckily, the leftover paint was enough to repaint the entire underside. Finally, my car could match the engine. So what did I learn from this experience? Well, I certainly won’t be pursuing a career as a painter. I’m proud of what I accomplished, and the results turned out better than I expected. However, I didn’t really enjoy the painting part of the project. Next time I need something painted, I’ll definitely be calling in a professional.

Easter & Birthday build | 17/04/2022
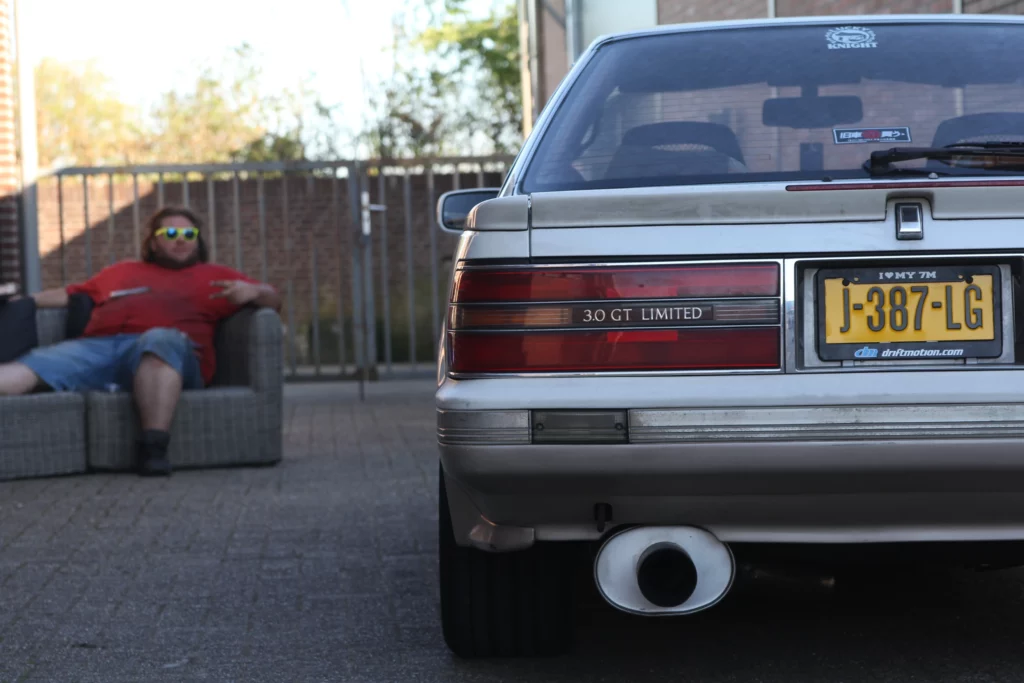
On April 17th, which also happened to be my birthday and Easter Sunday, I decided it was the perfect day to work on my JZ during daylight hours. A fellow car enthusiast and friend, whom I met through the car community, came over with the right tools to help me remove and reinstall the head to the long block, along with a stash of chocolate eggs. The day kicked off with my friend picking me up in one of the only two MZ21 Soarers in the Netherlands, which he had imported himself. Despite the worn-out paint, the engine had been fully rebuilt by him and had some impressive upgrades, including a digital dash that I absolutely loved, R154 transmission, 7MGTE, a massive aftermarket intercooler, 3.5” Altair exhaust, MINE’s ECU, and while rebuilding the engine, he even found HKS cams inside and an OS Giken twin plate with push/pull conversion. Clearly, this car had been owned by a true car enthusiast back in Japan! Armed with the right tools, we proceeded to disassemble the JZ further. We removed the head from the long block to inspect the inside of the cylinders and check the head gasket. Fortunately, we were pleasantly surprised by the condition of everything. While my friend carefully cleaned the top of the block and checked for any warping, I replaced the valve stem seals and inspected the cams. This engine had been well taken care of, and despite my initial expectations, it was in great health and cleanliness. With all the parts carefully laid out around the garage, we took a break for lunch. Since my garage was conveniently close to a supermarket, I went to buy some food and returned within 20 minutes. We enjoyed our lunch in the sun, admiring the Soarer, Supra, and JZ parts while sharing stories. But when I picked up the head to resume reassembling the engine, I spotted a chocolate egg, followed by a mischievous laughter from my friend. I soon discovered that he had hidden chocolate eggs all over my garage while I was at the store. They were literally everywhere! We laughed heartily as I found eggs in various spots even months later. With our spirits lifted, we proceeded to install the ARP head studs, a new MLS head gasket, followed by the head, cams, valve covers, and the Polyurethane engine mounts. As the day wore on, we decided to call it a day after installing some new Superpro steering rack bushings. It was a good decision, as it’s much easier to do this upgrade with the engine out of the car. Installing them with the engine in would have been much more challenging and less fun. With the engine well on its way to being assembled and the steering rack bushings upgraded, we wrapped up for the day. I had a party to attend, and my friend had a long 1.5-hour journey back home. While we may not have made significant progress, we had a blast, enjoyed the day, and took our time with the project.

Upgrades! | 06/06/2022
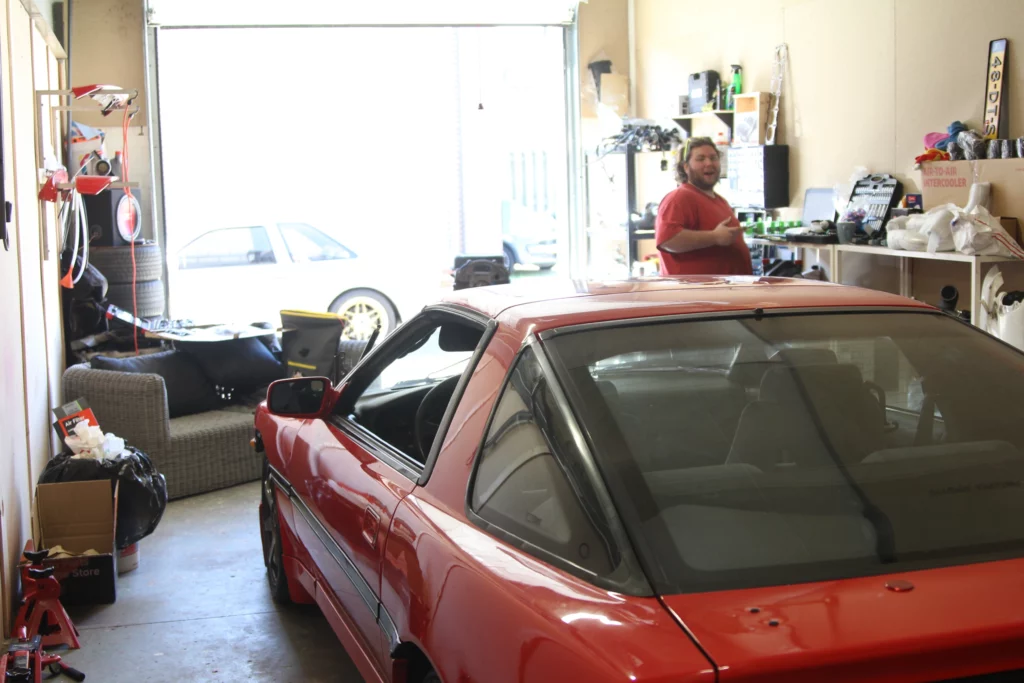
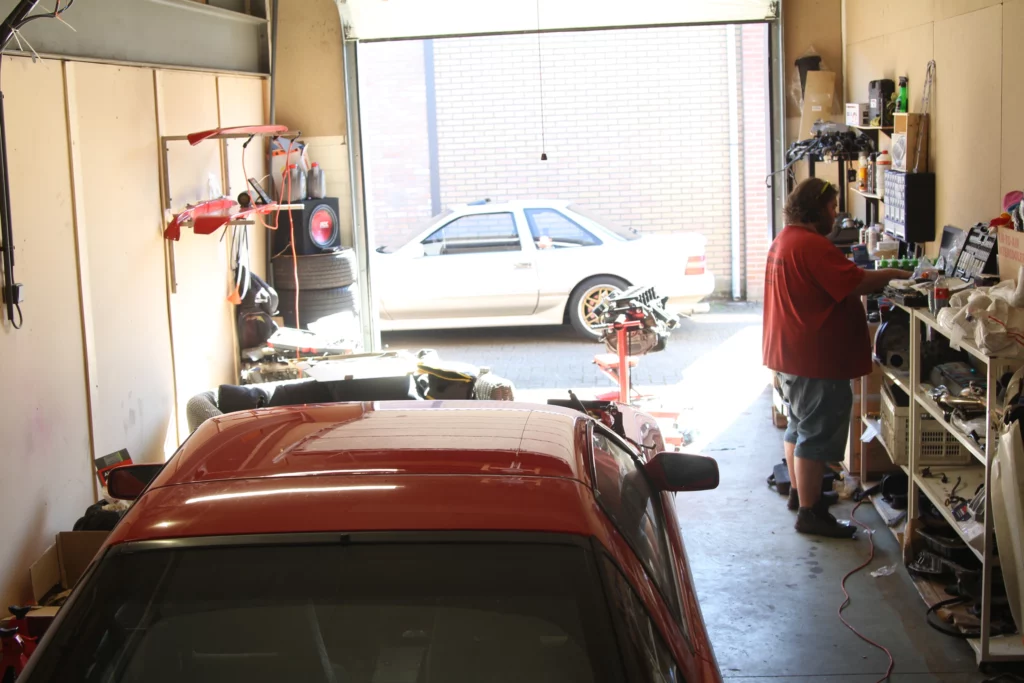
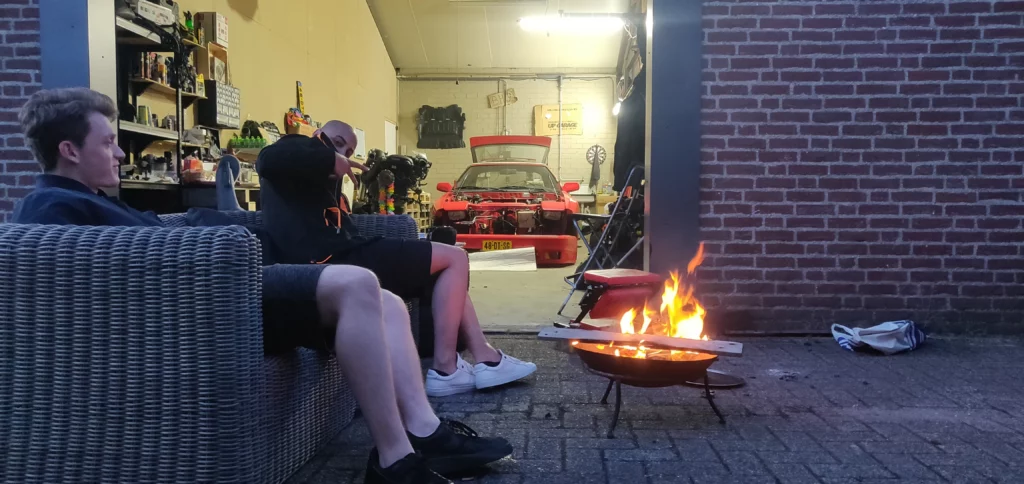
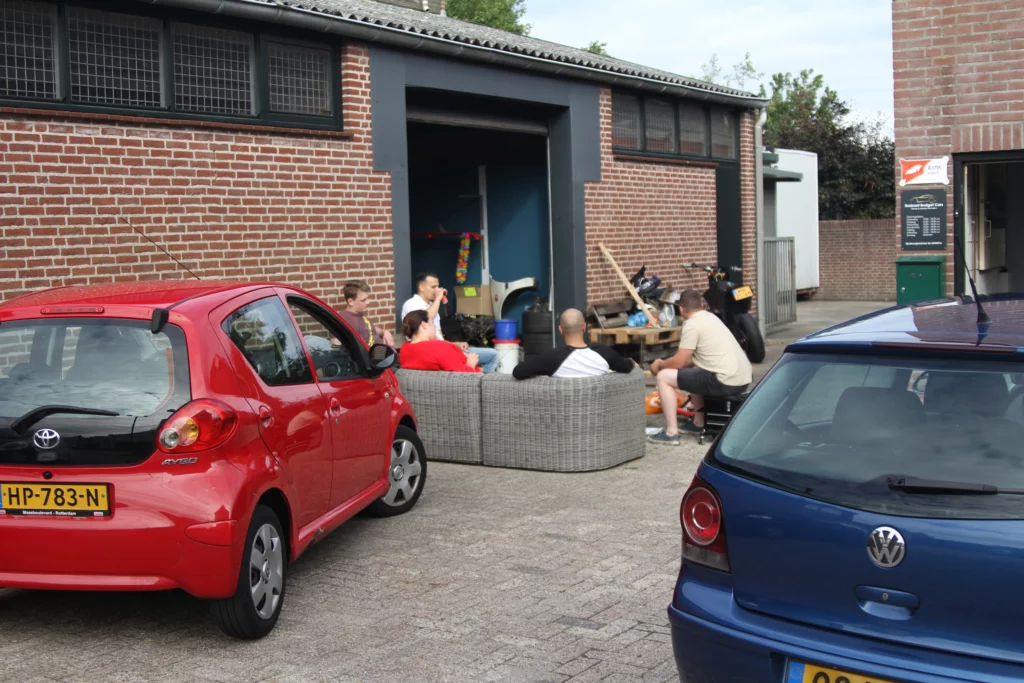
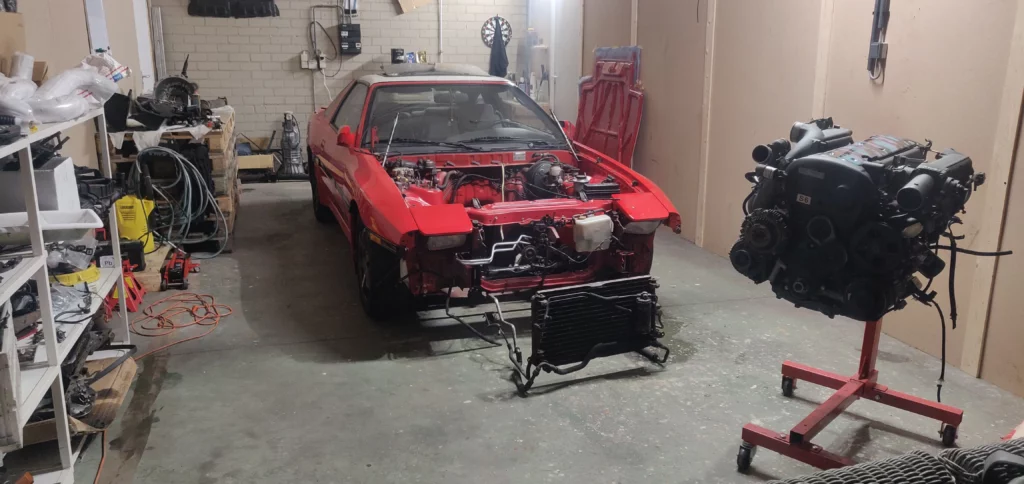
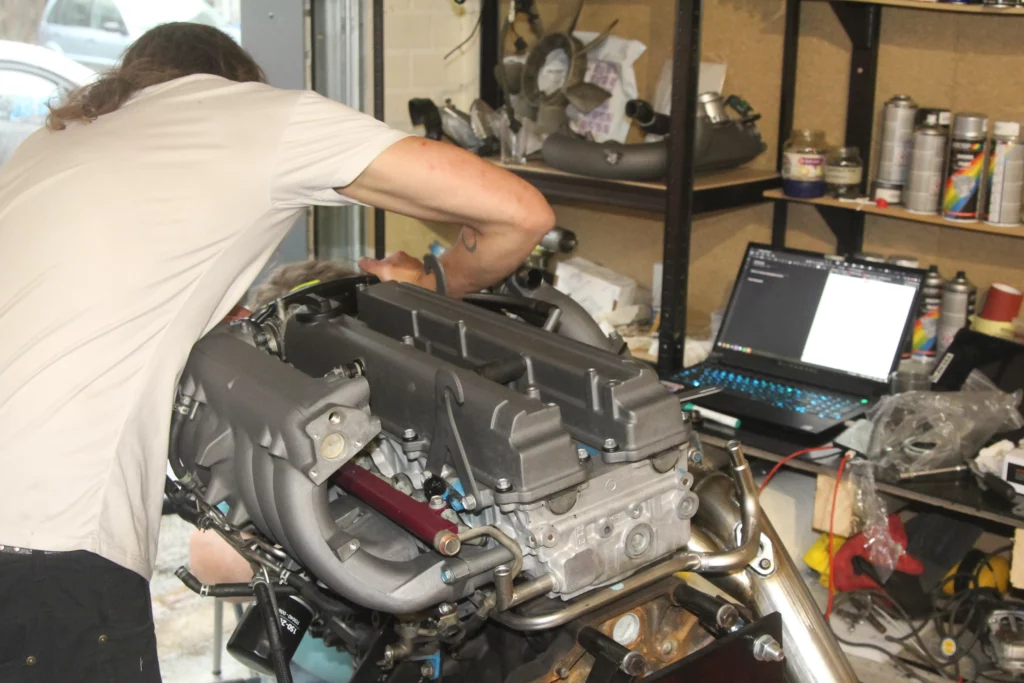
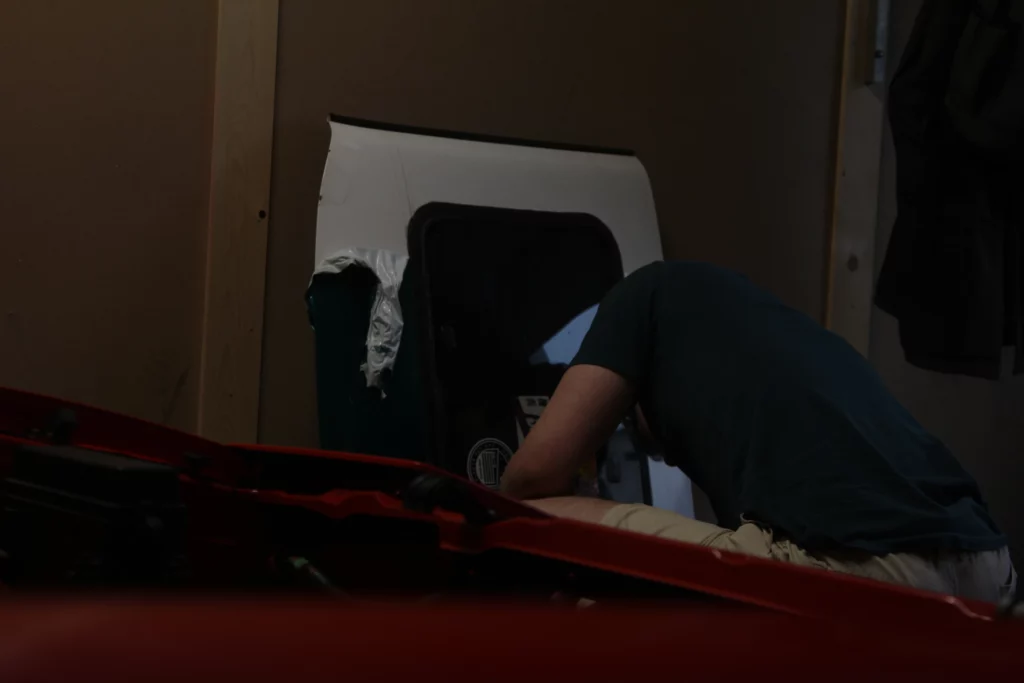
While time flies by faster than expected, I am still struggling to get my car back on the road. I realized that my plans have changed immensely. Initially, when I bought the engine, I had planned to simply drop it in without doing too many extras. However, this was no longer the case as I started refreshing and painting the JZ and engine bay. Meanwhile, I was researching and looking at parts and other builds, which made me realize that it might be smart to go with a standalone ECU directly. Since I had to customize the wiring harness anyway, it would be cheaper to do it now rather than paying double later if I ever wanted to go standalone. Plus, it would make future upgrades easier. So, after talking with the tuner and consulting with other JZ-swapped car owners in the Netherlands, I made up my mind and bought a Link FuryX – go big or go home, right? With the engine refreshed and ARP head studs installed, I will be able to handle serious power if I decide to add a bigger turbo in the future. The only setback was my transmission, as I bought a JZ engine from a JZS171, which always comes with an automatic transmission. I was planning to use my W58, which, as far as I know from my research, can handle about 400WHP on a stock 1JZ as long as I don’t do anything crazy like burnouts or drifting. I knew about this issue from the start, but the prices of the R154 transmission were quite expensive. My original plan was to drive with the W58 for about a year or two and then upgrade to an R154 later. However, fate had other plans. Someone in our Supra community was parting out their project car, which had an R154 transmission. Within seconds of reading the post, I asked them what they wanted for it, and they gave me a price that I wouldn’t be able to find anywhere else. Don’t get me wrong, I still paid a considerable amount of money, but compared to the online listings, I got a “friend discount”. Of course, he lived on the other side of the country, but luckily I had a free day, so I hopped into my car and made the journey to pick up the transmission and some other parts. I also picked up parts for fellow MK3 owners who lived closer to me. The worth of the parts exceeded the value of my daily driver at that time, haha. So now that I have the R154 transmission, I need to get a whole new clutch setup. In the meantime, I also found a tagra with a sunroof, which I obviously needed to have, and I bought a new cover set for my 1JZ. Since I wanted something different to make my engine stand out more, I asked a good friend of mine who is a graphic designer to make a sticker for the metal valve cover, and he did an amazing job! I also bought a JZA70 power steering reservoir, as I found the plastic 7MGTE one ugly, and a Futurefabrication 3” downpipe. With all these parts ready, we had another build day with some friends. My friend and I assembled the JZ engine completely, while another friend removed the green wrap from the tagra sunroof, and made a start of deep-cleaning the cloth interieur. Meanwhile, our other friend took care of the music, drinks, pictures, and kept our spirits high with jokes. This build day went smoothly with great progress and lots of fun, as evident in the pictures!
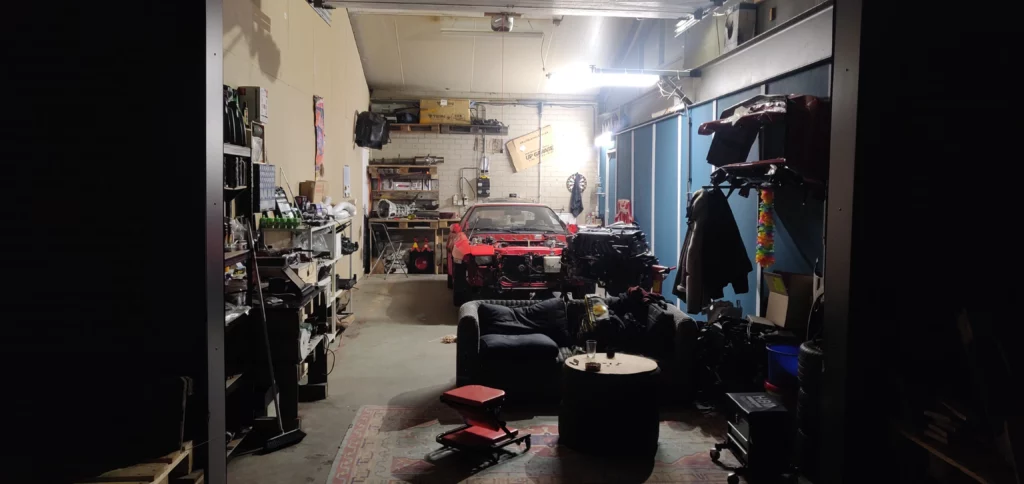
As you might have noticed, I have been making some upgrades in the garage. I haven’t been sitting still; I painted the walls and added an extra workbench in the back. I also removed the entire interior of the Supra to thoroughly clean it, as the smell wasn’t pleasant, and I made the mistake of smoking in there as a smoker. From now on, there will be no smoking in the Supra anymore!


Dropping the Engine | 04/09/2022
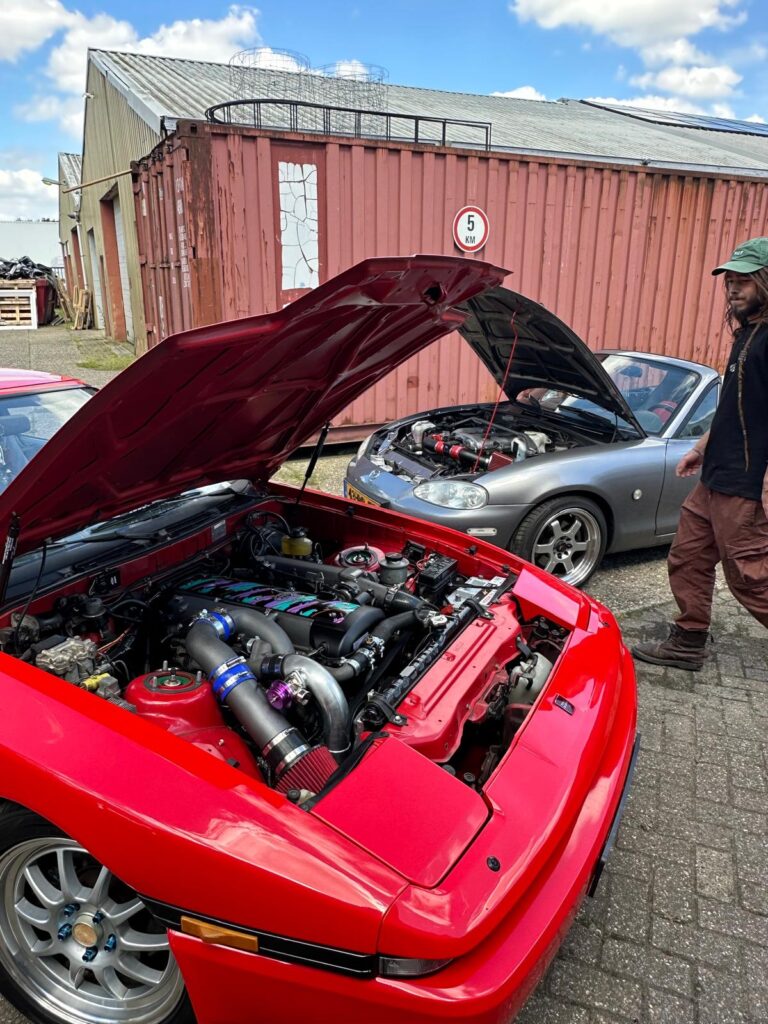
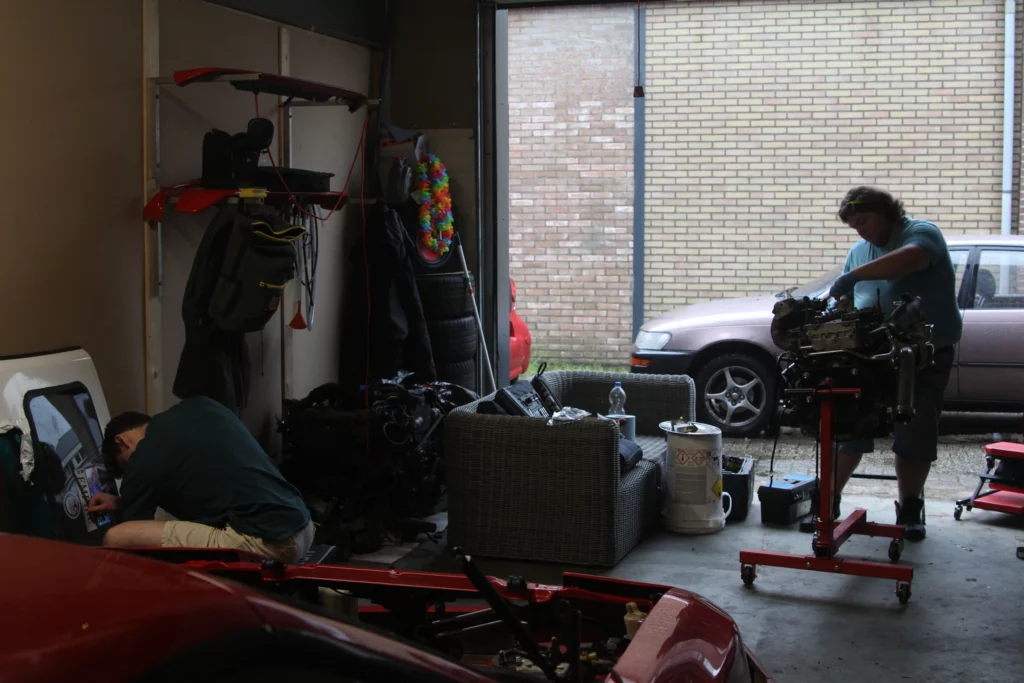
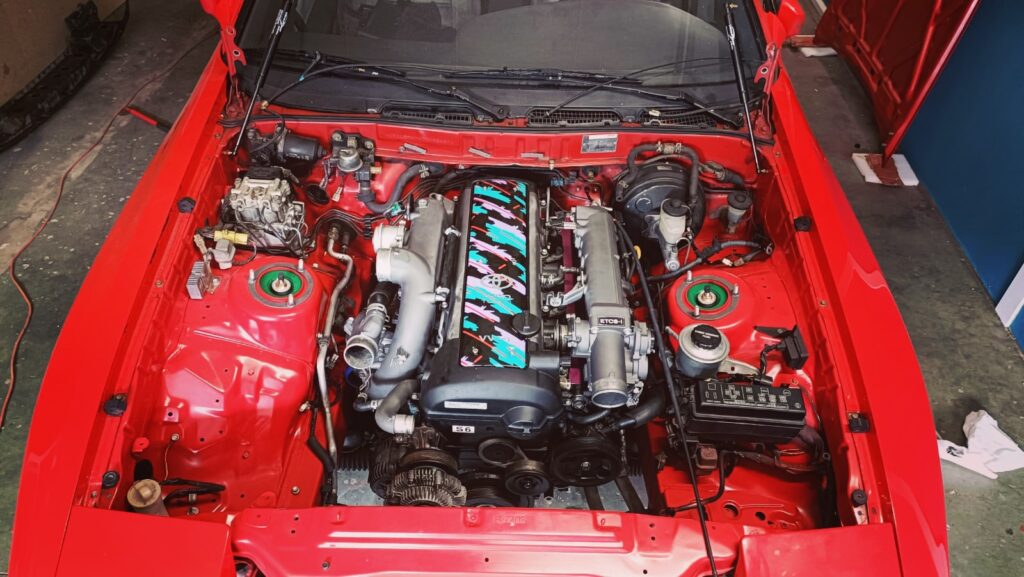
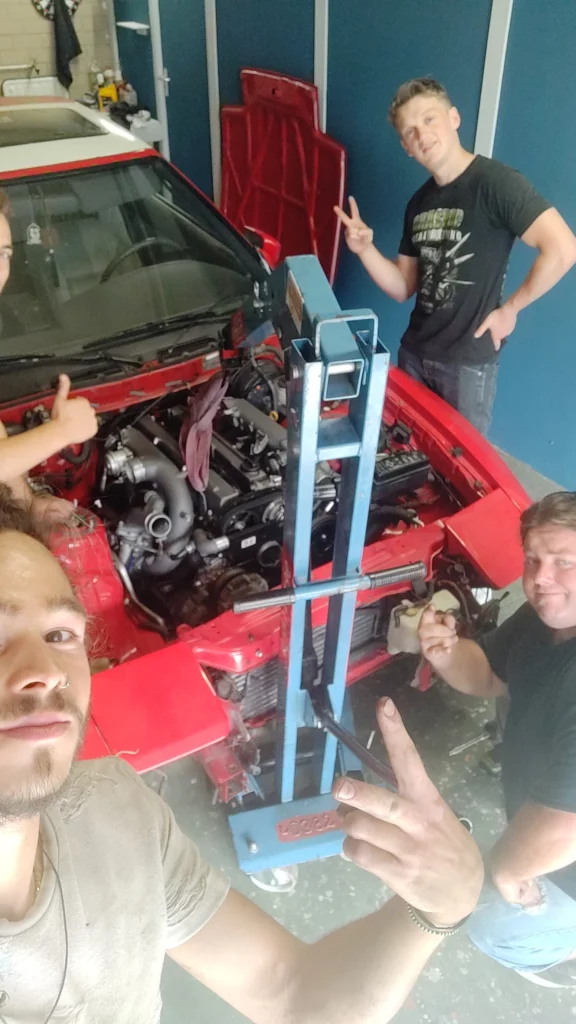
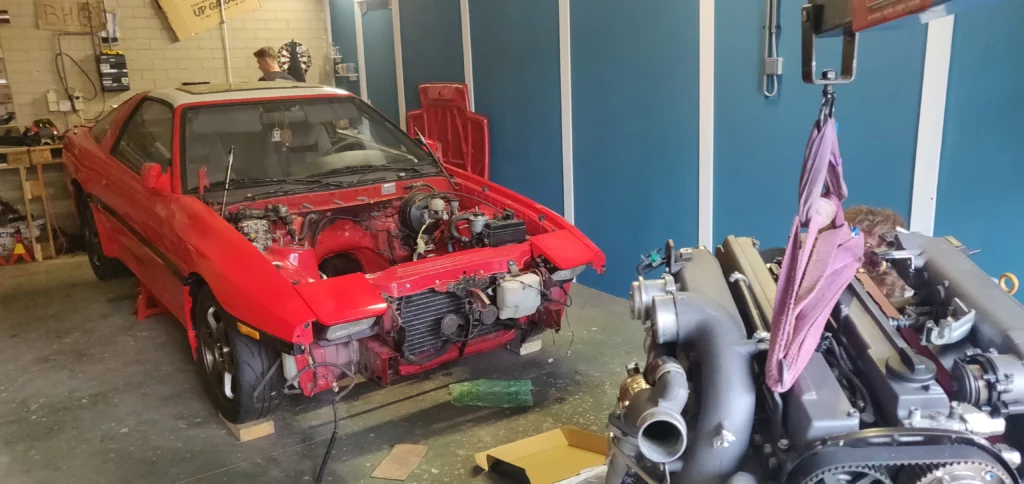
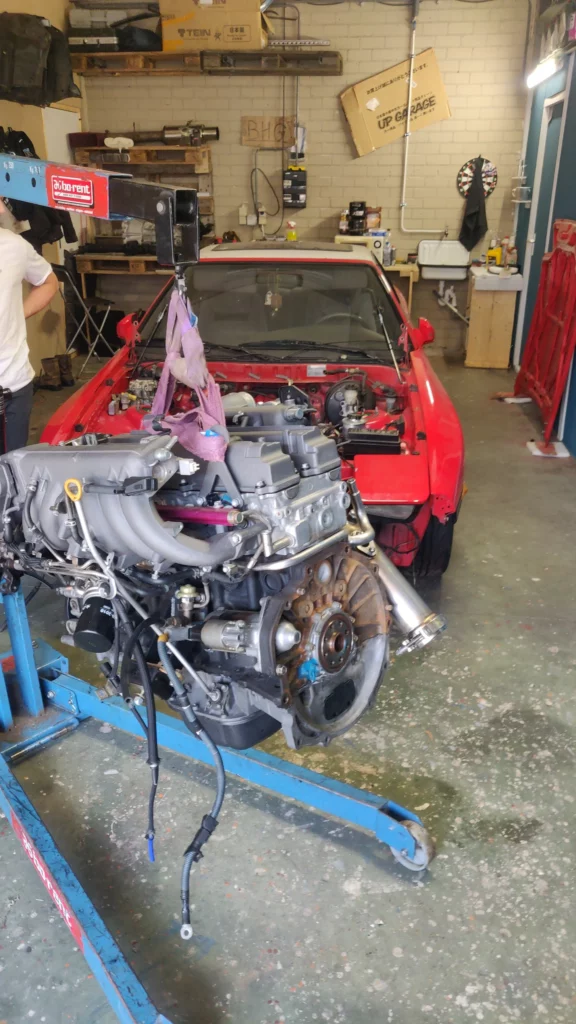
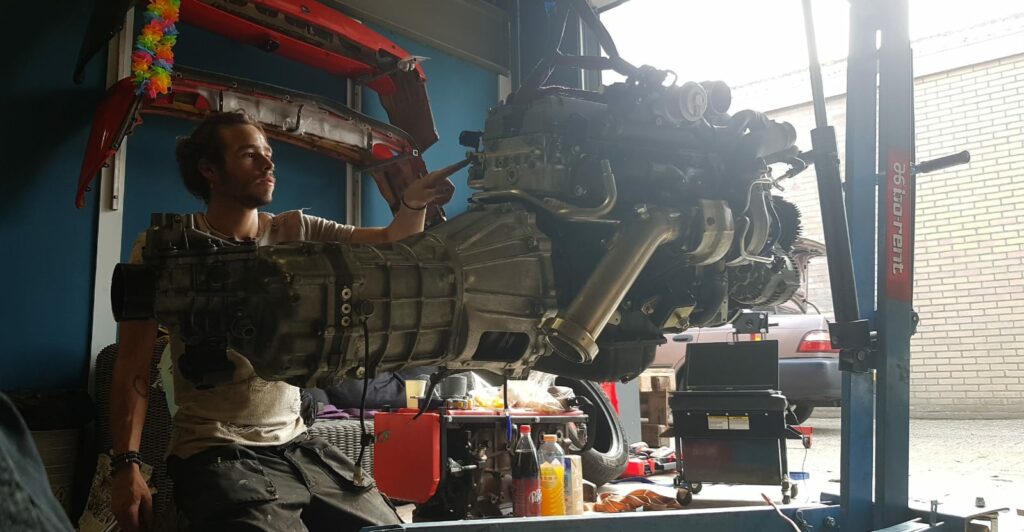
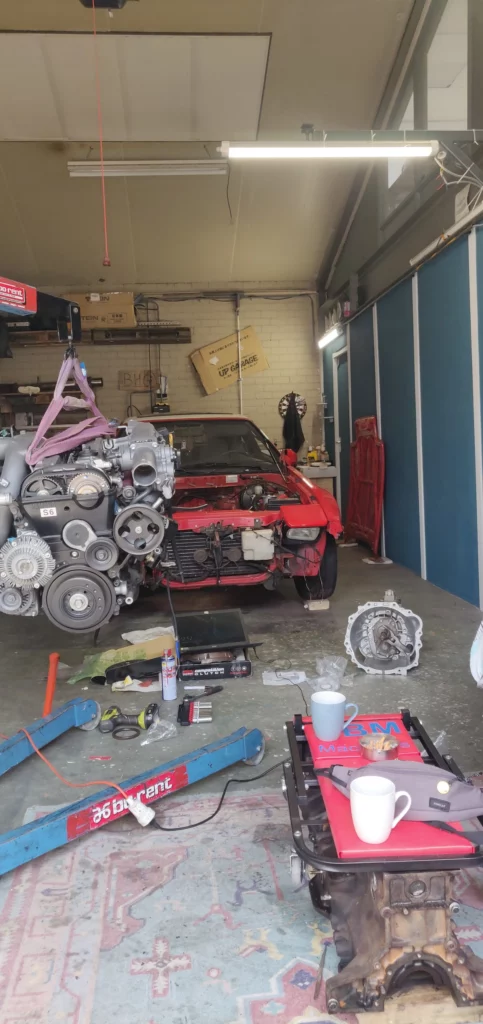
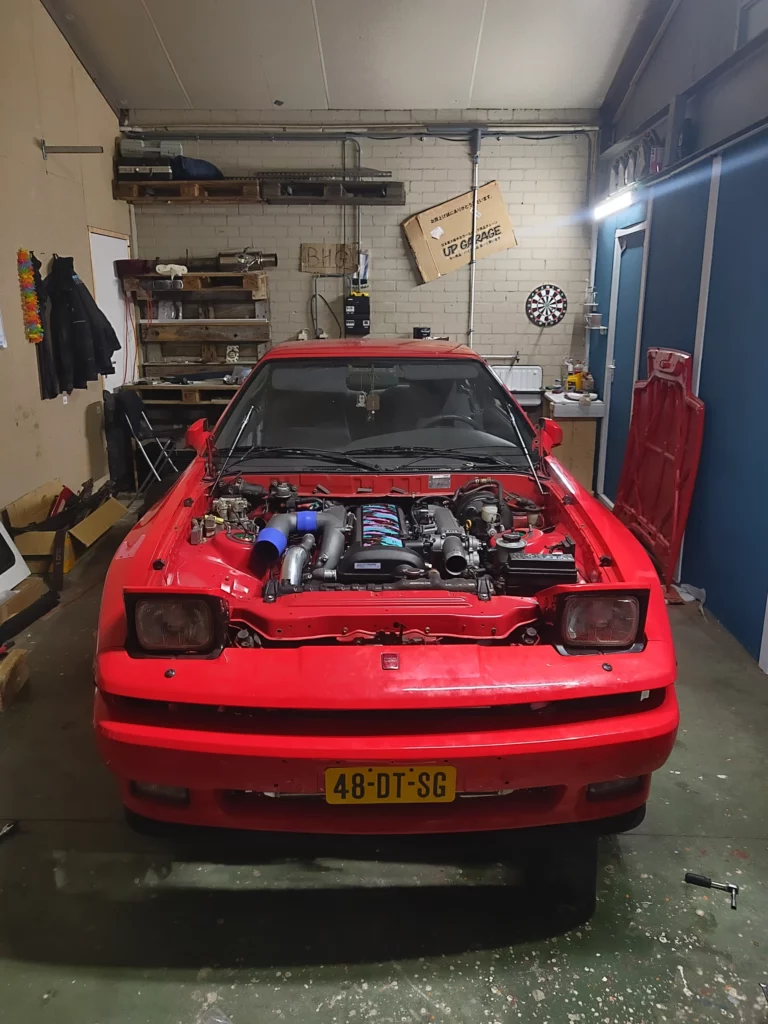
The long-awaited day had finally arrived. I was eager to give my Supra a new and improved heart, with the help of my three friends. One of them owned the Soarer I had mentioned earlier, another friend whom had helped me pull out the old engine. And a new friend i made with a Chaser, and I whom i helped in the past with pulling out his 1jzGE and dropping in a jzs171 1jz-gte. This experience had boosted my confidence in tackling the JZ engine installation this time around. I had learned from my previous mistakes and was better prepared this time. I had placed wood planks under the front tires to raise the car, allowing the crane to reach under the subframe. The rear of the car was already lifted, as I planned to install the transmission on the engine outside of the car and lower them in together. We put the engine on the crane and started to install the transmission to the engine. I rechecked the motor mounts, as it was a gamble if they were in the right place. I did not receive and could not find any information on which side which bracket is supposed to be. I asked for some pictures from people I know who did a similar swap on how they put it together and used that as a template. As you might see in the pictures, the wiring harness is missing. Did I forget it? Did I plan to put it in when my engine was in the car? No… I did plan to put the harness around the engine before dropping it in; however, I had some issues. A while back, I ordered a brand new harness from WiringSpecialties. Unfortunately, they sent me a non-vvti harness. This became a whole hassle, as they did not want to admit their mistake, despite having enough proof and pictures to show them it was the incorrect harness. After a whole battle that I do not want to go into here, I ended up contacting PayPal, and through them, they forced WiringSpecialties to refund my money, and I sent the harness back. However, in the end, I did make a loss since I only got the money back I paid for the product, not the import tax my country charges and shipping. Since I did not want to wait with putting in the engine and had no clue how to get another harness quickly without paying too much, I accepted the fact that it would be a problem for later on. With the transmission tightened to the block and the motor mounts in place, we carefully lowered the engine into the bay. Thanks to my preparation the night before, we didn’t encounter any clearance issues, and the engine was installed smoothly. We double-checked the motor mounts, and everything aligned perfectly in the end. After all the time and effort I had put into the project, I finally had a moment to admire and appreciate the progress. Despite not finding much enjoyment in the painting work, I had no regrets. This felt like a significant milestone, and I was getting closer to the end of the project!
Fitting the Intercooler | 15/09/2022
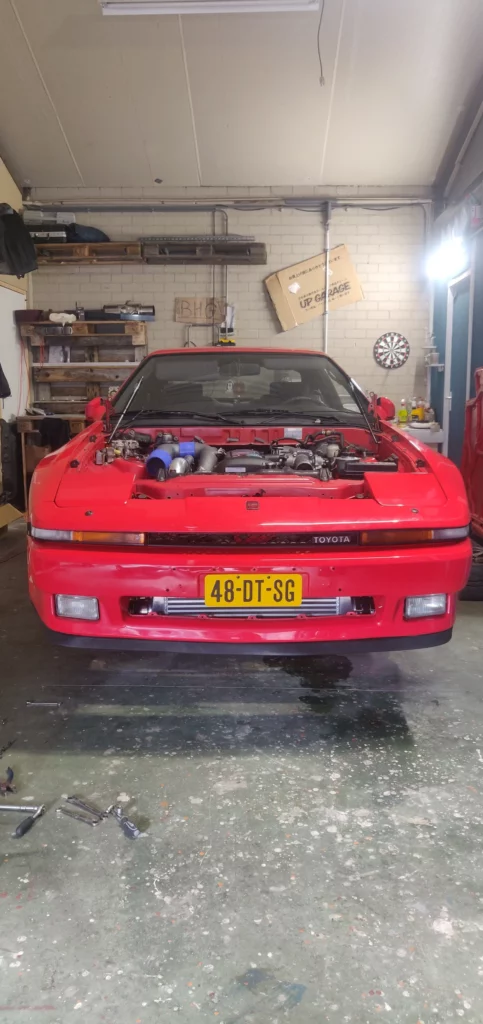
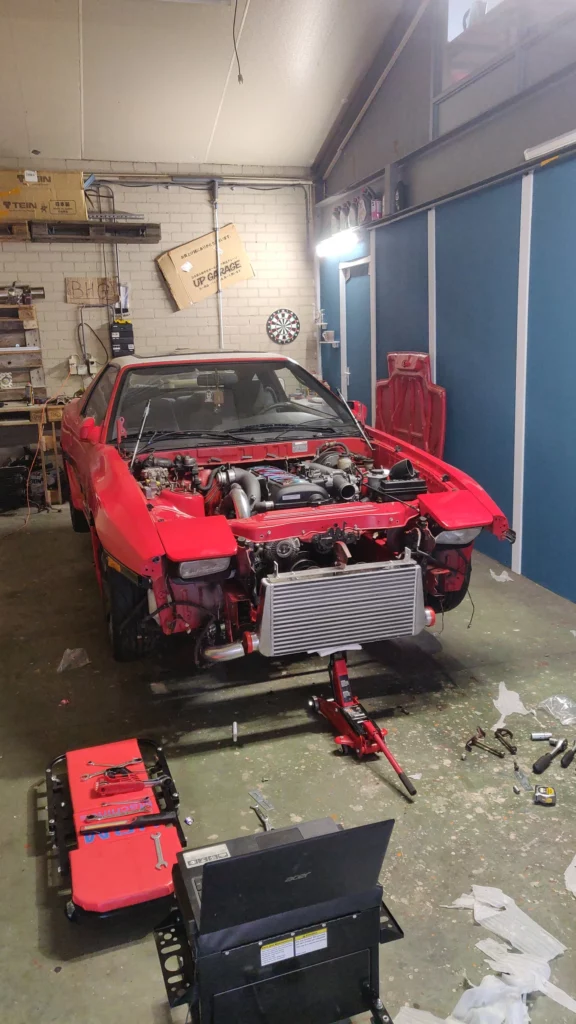
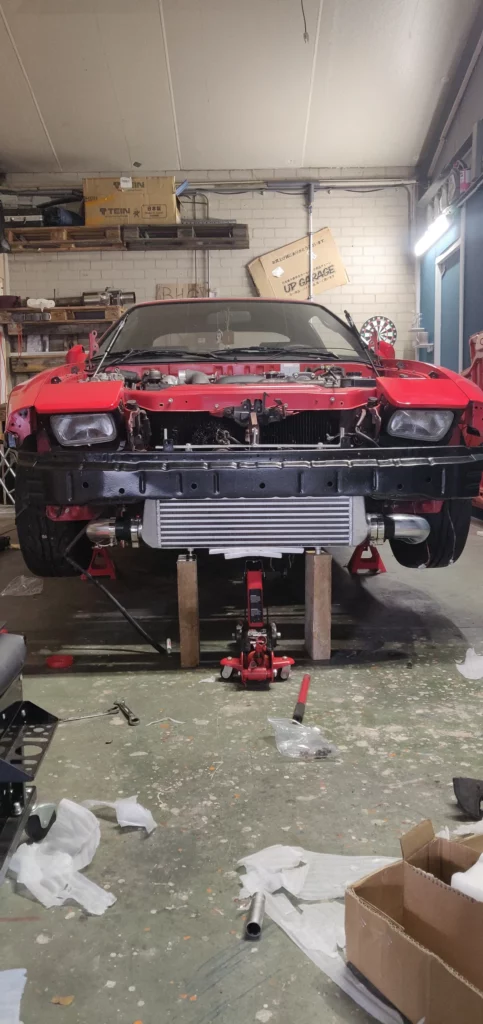
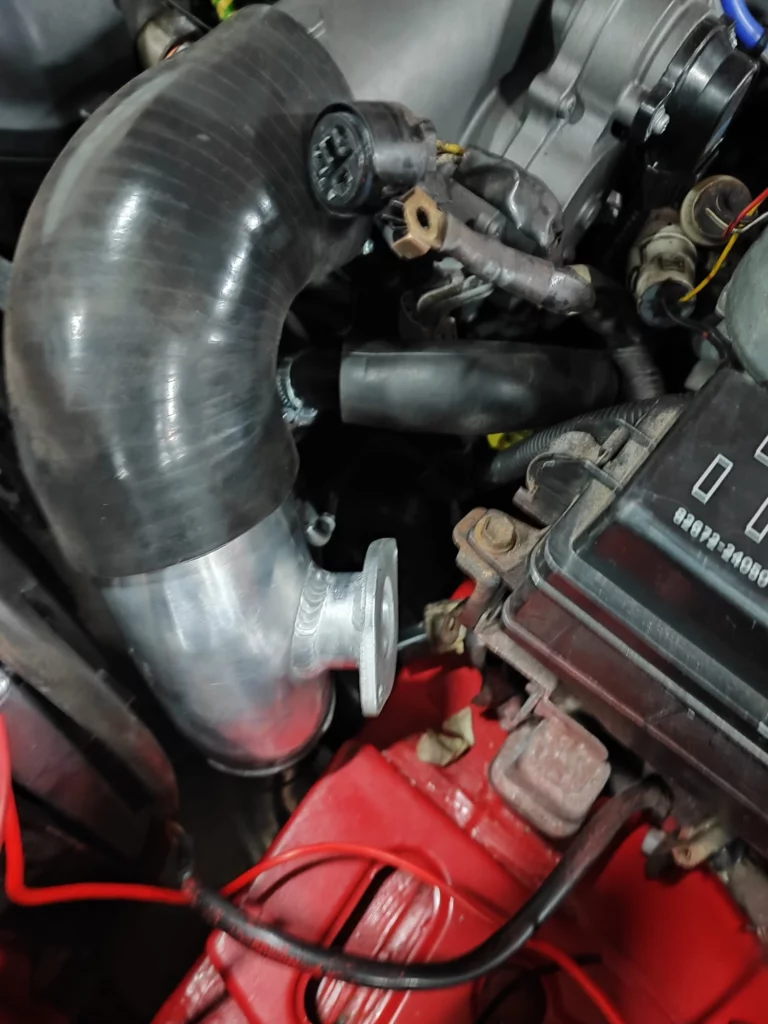
With the engine in its place, it was time to start mounting the intercooler. A while back, I researched all kinds of ways to make this work and came to the conclusion that it was best in my case to find a plug-and-play kit to make it easier on myself since I’m not capable of welding. Looking back at it now, however, it might have been cheaper to order a universal intercooler and some loose piping and bring it to someone who was able to make it for me, since we have import tax here in the Netherlands if you order from outside the country. But nonetheless, I now had a box full of piping, couplers, good quality boost clamps, a thick intercooler, and a blow-off valve, made for swaps like these. One mistake I made, however, when I stumbled upon fitting it all, was the fact that this kit was made for a JZ which wasn’t running power steering. Since I wanted to keep that, one pipe was not able to fit right. This issue, however, was later resolved by relocating the blow-off valve to the other side of the bay, which made the piping fit as it was supposed to be. I started with fitting the intercooler in its place using a jackstand. I got advice from multiple people to weld some reliable brackets on the side of the intercooler and mount it to existing brackets on the chassis for extra sturdiness to make sure it won’t break. Using cardboard and tape, I made molds and brought them to a nearby welding company. They welded pieces of aluminum to the intercooler, and the next day I was able to correctly mount it in place. With the intercooler being sturdy and immovable, I started with the piping. Not much to write about that since it was quite easy and just copying the photos from the website. With the intercooler being this thick, however, I had zero to no clearance between the intercooler and the crash bar. Usually, it’s not really the smartest move to cut into this, but since I only needed to remove a small lip on the inside which was around 2 cm, I did not find this to be a real danger to do. With some minimal modification on the crash bar, and the sun shining bright that day, I took the extra step to repaint that part so the bare metal was protected against weather damage. It was also in need of a fresh repaint compared to the bay, engine, and car. At the beginning of the swap, I wanted to keep the AC, however, after doing some research, I discovered that I needed a different kind of AC pump for the engine, and I wasn’t able to find one at the time for a reasonable price. So, I decided to remove the whole AC system from the bay, which also freed up a lot of space in there. The biggest problem I had with this intercooler kit was my clutch fan hitting my intercooler piping. I did not think about that before buying this kit. The only two options I had were either to get a whole new side custom-made by someone or to go with electric fans. i choose the second option, as i did not want to spend dubble on the intercooler.

Wiring, Relocating & Custom parts | 24/01/2023
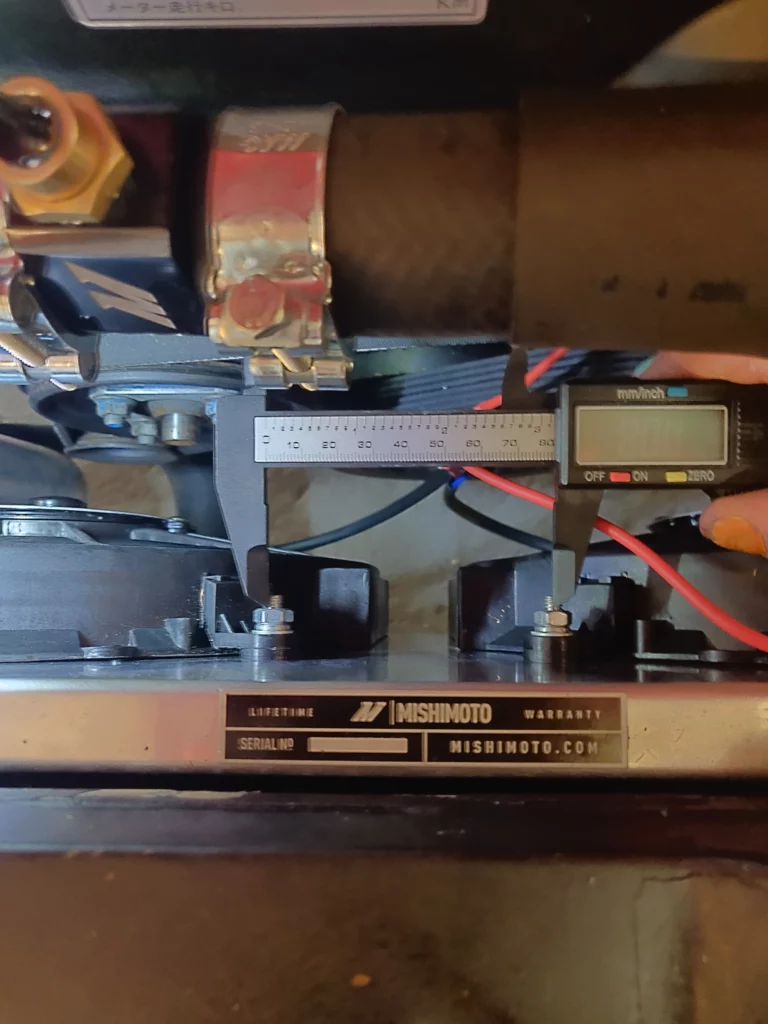
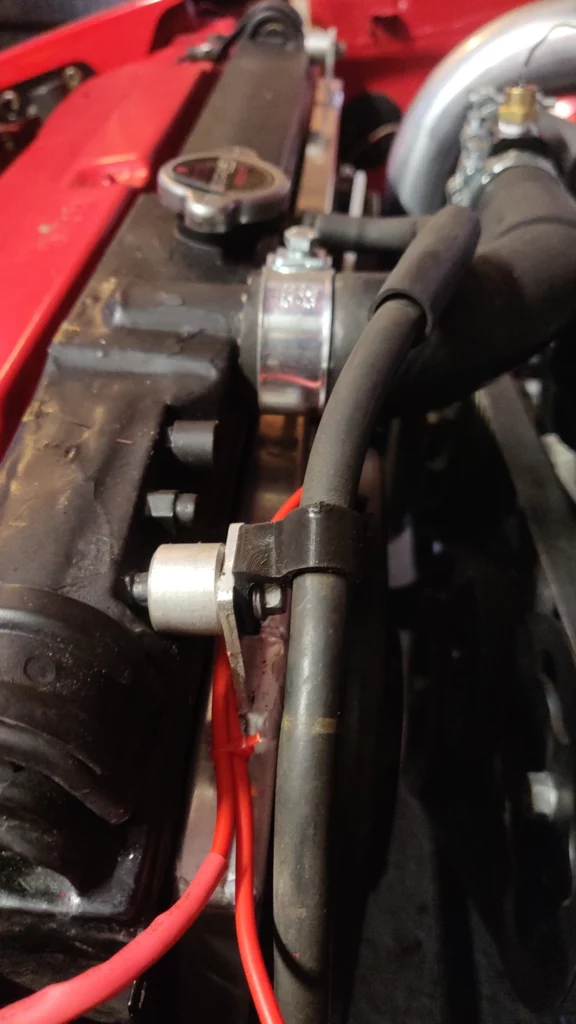
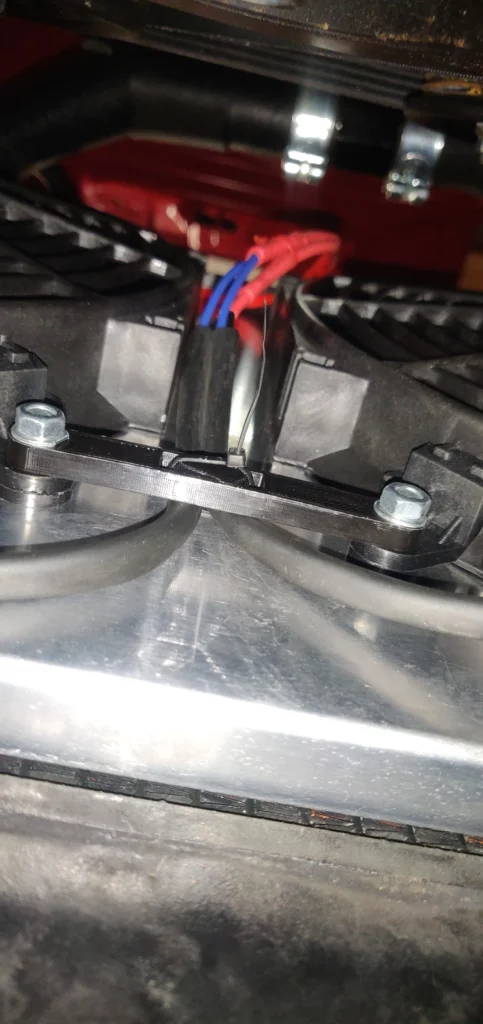
As always, a lot has happened in the meantime, and these posts are mostly focused on the big achievements in the build. A while back, we had our annual “Supra Owner BBQ” where all the people who own a (driving) MK3 Supra come together, make a small trip, and have a BBQ. While enjoying the day and sharing stories, tips, and opinions, the story of my harness came up for discussion. Since I did not have any clue how to get a new harness without spending an absurd amount of money, one of our group told me about a company near my hometown that is able to make a harness out of my old 7M and 1JZ harnesses. I contacted them soon after and brought the old looms to them. A few weeks later, I was able to pick it up and start wiring the car. Although it’s not a new harness, it’s something that works and fits. The installation did not take too long, about one day, as I had to rewire and add some length to some wires, but nothing too serious. Also around this time, I received my Mishimoto electric fans, which were a nice addition to the car. Since the clutch fan did not fit because of the intercooler piping, it was a great upgrade. While wiring up the electric fans, I noticed that there wasn’t a good place to hold the wires tightly. The two wires coming from the fans were hanging loose behind them, and I was worried that they might get tied up with the V-belt and rip the whole wiring out with the first pull. I started looking for a good place to hold them, but it seemed more difficult than I thought. There were no brackets or places to zip-tie them together nicely without it looking messy. Luckily, a friend of mine had recently bought a 3D printer for fun. I talked to him about making some custom brackets to hold the wires together. I sent him the measurements and drew him the brackets. A few days later, he came over to show me our first self-made Supra parts! This really made a difference for me. It was such a small addition, barely visible, and without telling someone, no one would notice it. But in my opinion, it makes the car look a bit more professional. While installing the two little brackets, we also measured up another bracket to hold the hose for the coolant overflow tank. I couldn’t find anything to hold it, and in all the pictures I saw of Supras, the hose was just loose. With the power of owning a 3D printer, we decided to make another little custom part. Again, it fit perfectly! It’s the small details that make it look better. I have always been a believer in the saying, “God is in the details.” Every little addition makes a difference, and I was thrilled to see that my friend and I were able to make these custom parts to improve the look and functionality of my Supra. It was a reminder that there’s always a solution if you’re willing to look for it, and that having friends with unique skills can be invaluable.
Off to a Professional | 14/04/2023
There is not much to tell about this, since i did not work on this myself, but i’d still like to give an update.
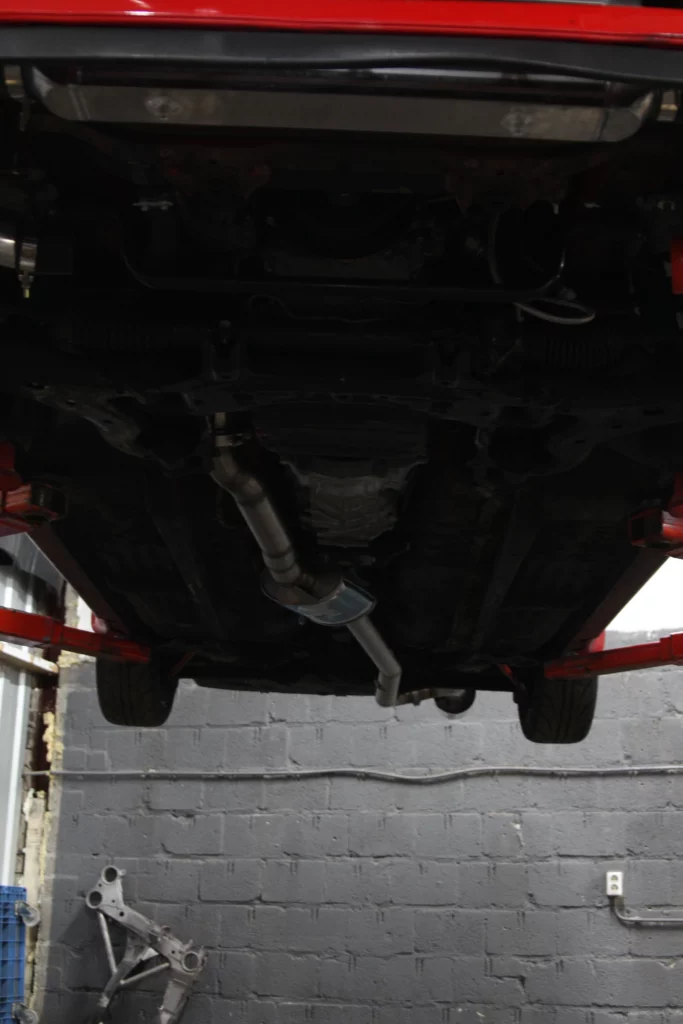
Now that the engine is in place and the wiring is mostly done, I’m slowly nearing the end of the project. However, there is still one big thing that’s needed – a very nice, big exhaust! Since I sold my old exhaust and want something bigger and better, there are only two options for me – buy something from a company like HKS or get a custom one done by someone.
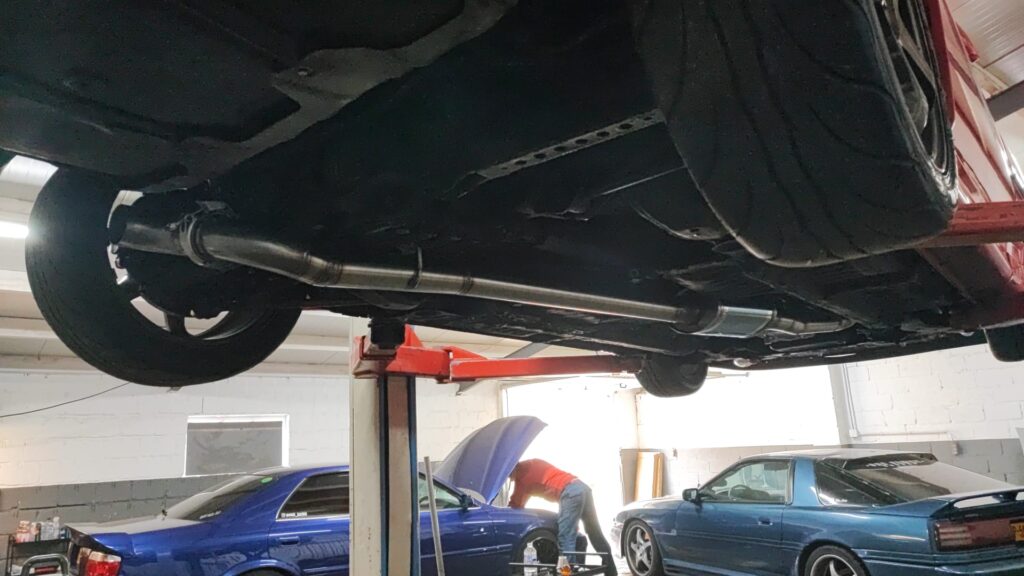
A while back, I talked with someone from our group who is very experienced in this field and willing to do this for me. He also helped me with pulling the engine on our first attempt. The only thing I needed to provide were the mufflers and a downpipe. I already bought a Future Fabrications downpipe, so I just needed to find the right muffler for the sound I wanted.
I always liked the HKS Hi-Power exhaust sound on the 1JZ, but they do not sell mufflers separately. Luckily, I was already searching for quite a long time for all kinds of mufflers, not only new ones, but I was also scouting the second-hand market a lot. This is where I stumbled upon someone who was selling the backend of his 3″ HKS Hi-Power exhaust from his S14. Without hesitation, I contacted him and bought it for way less than I would ever expect.
The only thing I needed now was a generic muffler for in the middle just to lower the noise level to avoid getting a fine from the police every time I start the car. So, I bought a new universal Simons muffler.
With the parts now ready, it was time to take the car to his garage. While I was enjoying life, my Supra was getting the best exhaust money can buy. He also fixed some electrical issues I had, like adding cables to the starter, lengthening and connecting the reverse lights, and adding grounding points. Within about two weeks, my car was ready to come back home!

Clusterfuck of Wires | 04/06/2023
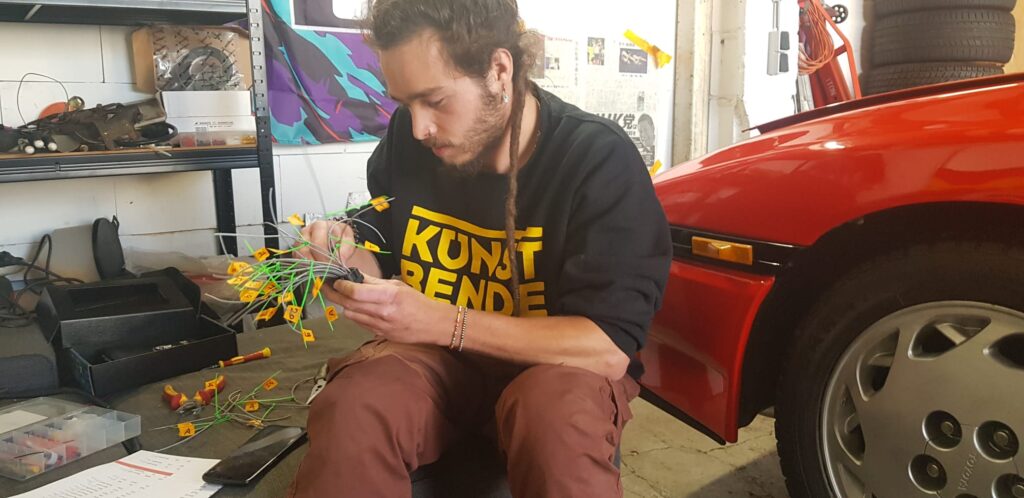
These past couple of weeks have been more than insane, and I’ve learned more about the electrical system of a car than I thought possible, yet there is so much more to learn. From an insane search for a translated pinout diagram to understanding it, labeling them, and converting them to a link connector. Aside from that, I had to add and connect more cables for the wideband and MAP sensor, learning to twist them correctly, and understanding the “tuning” aspect of the program while trying to get a basemap working.
Part one, Research.
Nothing is as easy as I thought; it seems to be a recurring theme, yet I never seem to learn from it, haha. Since I’m going standalone, I will need to repin all the harness connectors. Initially, I believed this would be a straightforward task, assuming that all the abbreviations would match, and it would simply involve removing a pin from one location and adding it to the corresponding spot on the Link connector. However, before I could even begin, I had to obtain a reliable pinout diagram for a JZS171 harness. This turned out to be more challenging than anticipated. I scoured numerous old, inactive forums where others had faced the same issue. Some individuals claimed to possess the diagrams, but their posts were at least a decade old, and I received no responses to my inquiries. I reached out to a few companies for assistance, but they couldn’t provide the help I needed. They suggested that the JZX100/110 diagram might be similar, but I hesitated to solely rely on those comments and continued my search. It led me to some of the most untrustworthy sources for information: social media. I contacted JZS171 owners from around the world on Instagram, desperately hoping someone had access to the diagrams. Finally, luck was on my side when a JZS171 owner from the UK responded within an hour, mentioning that he might have a translated sheet for me. He sent it to me on the same day. Step one was complete! Credit must be given where it’s due; the person who sent me the diagram is called Dan_1jz on Instagram. With the diagrams in my possession, I began comparing them, and that’s when I realized something crucial. It’s not as simple as merely switching each wire over. You truly need to be familiar with your management system for this task. After attempting to figure it out on my own, I decided to call someone more knowledgeable in this field. Surprisingly, our conversation was short, as he promptly advised me not to mess with it and suggested that I consult my tuner to handle the task.
Part two, Labeling
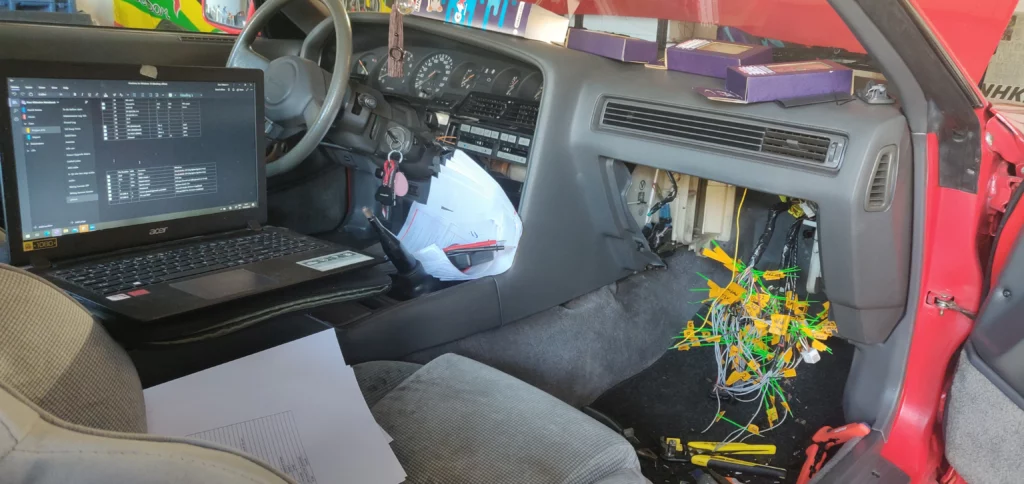
While I was waiting for the tuner to figure out the pinouts, I began the task of identifying and labeling all the wires at the connectors. This process took me about a day to complete. Unfortunately, during the labeling process, I noticed that two pins were not properly installed in the connectors and were loose. This discovery started to raise doubts about the integrity of my harness. If I hadn’t opted for a standalone setup, this issue would have gone unnoticed, and I shudder to think about the potential problems and the time it would have taken to locate and rectify them. However, mistakes happen, and I resolved the issue, so ultimately, there is no problem. As I continued with the wire labeling, I also created a detailed OneNote page where I documented my own diagram, including all the wires, abbreviations, pinout information, and wire colors. I wanted to make troubleshooting and reading the diagram as easy as possible. Usually, I tend to be a bit “messy” and not create such comprehensive sheets with detailed information, but when it came to wiring, I wanted to take the safest and most meticulous approach possible. I’m proud to say that I accomplished that!
Part Three, Loom creation
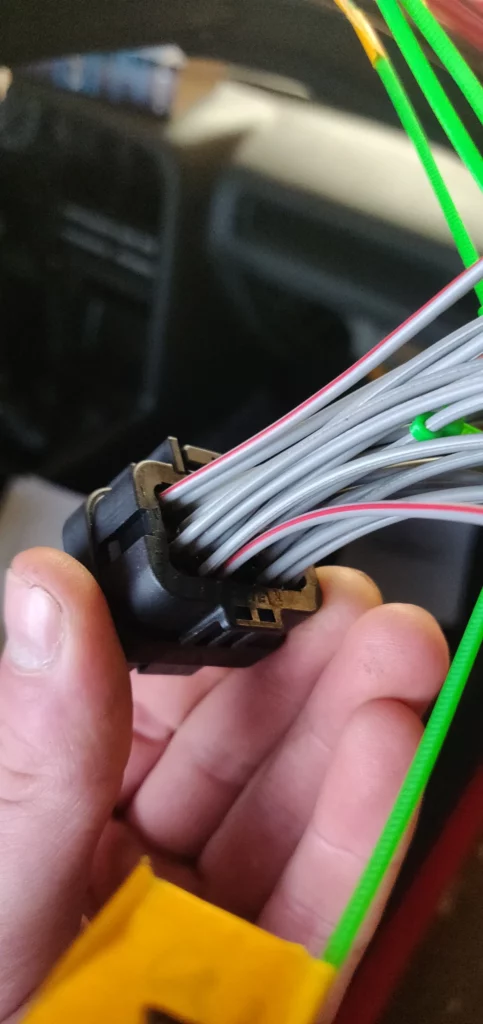
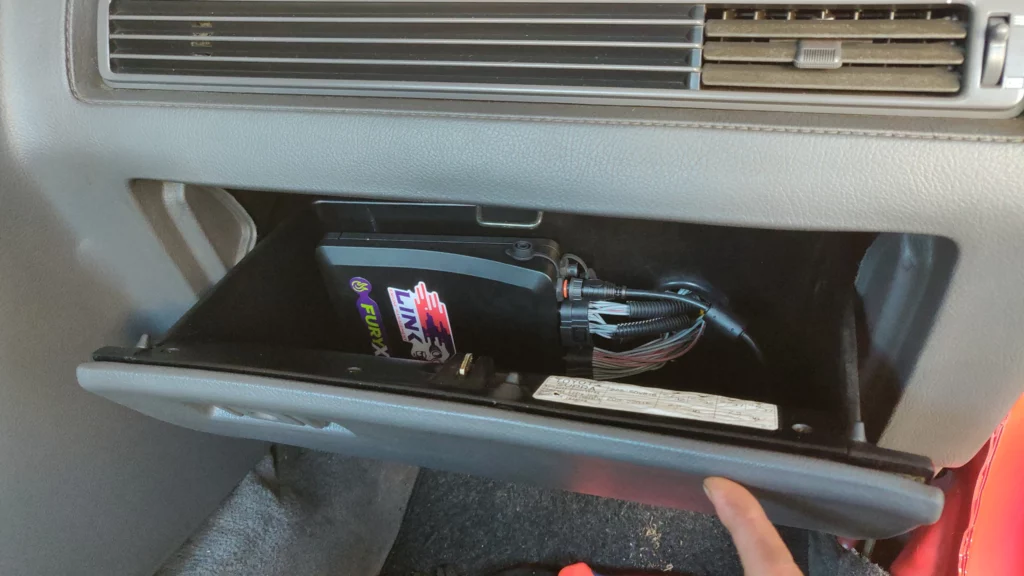
Having completed the harness installation, I realized that the engine loom wasn’t long enough to reach a suitable location for mounting the ECU. The connectors were in the exact same spot as the OEM ECU location, which happened to be a cramped space behind the glovebox. It was virtually inaccessible when the interior was intact, and maintaining the integrity of my car’s interior was an essential aspect for me. Since the car needed to be mapped and I wanted the convenience of easily connecting a laptop to the ECU at any given moment, I decided that the best position for the ECU would be inside the glovebox. Not only was it easily accessible, but it also added a cool factor to the setup. With this idea in mind, I had no choice but to extend the length of the loom. Unfortunately, this meant doing more work on the harness, something I had no desire to do. However, I believed it would be worth it in the end. This time, I was prepared. I ordered a high-quality set of wire cutters, strippers, and crimp tools, along with heat shrink tubing, electrical tape, and thermal splice connectors. I decided against soldering any part of the engine loom, as I had come across negative feedback regarding soldering in such applications. I also developed a step-by-step plan. I would cut some loose wires, attach new link pins to them, and then insert those wires into the link connectors. With this done, I now had two connectors with 20 cm of wire protruding from them. All I needed to do was cut the corresponding wire from the OEM connector, strip it, and connect it to the corresponding wire on the link connector. To keep track of my progress, I added check marks to my OneNote page, allowing me to “check” each wire off one by one once completed. This part turned out to be relatively straightforward, but I had to stay focused and avoid rushing. I double-checked the wires and took my time to ensure accuracy. In the end, it took me a full day’s work, but the results were noticeable!
Part Four, adding wires
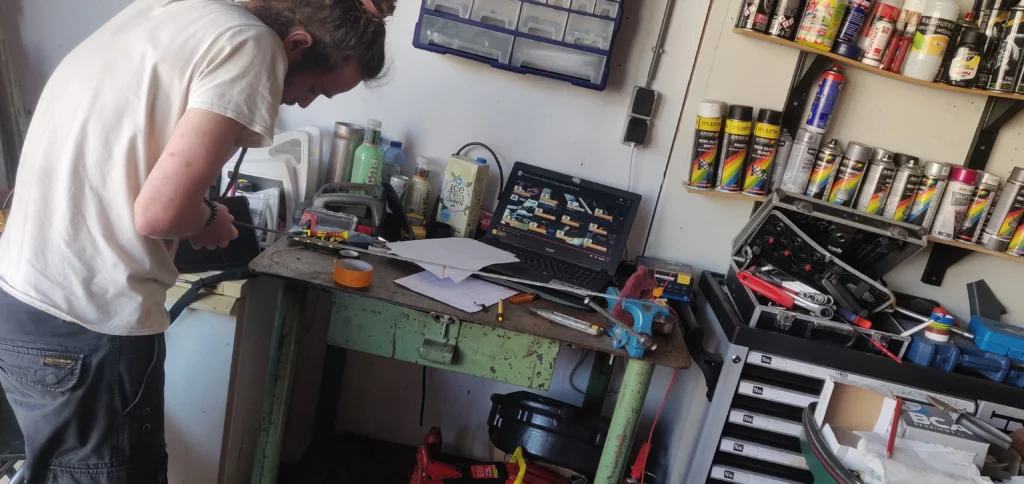
As usual, I overlooked some things again. I had planned to use a MAP sensor and a wideband sensor, but I didn’t have any wires for them since they’re not stock on a 1JZ. This meant I had to add some cables, but I didn’t want to leave them loose without any protection. A while back, when I thought the harness I ordered was incorrect and I had no idea how to obtain the right one, I had considered making my own harness. During that time, I watched informative videos and read posts about creating a harness, and that’s when I came across information about wire twisting. I decided to use this technique for creating my two looms. Step one was cutting the wires to the appropriate length and labeling them with numbers at each end. Then, I carefully twisted them by hand. After that, I secured the ends with zip ties and applied a layer of electrical tape in the opposite twist direction to cover the entire loom. I repeated this process in the other direction to strengthen the entire loom. Next, I placed a black plastic cable protector around it and routed the wires as neatly as possible within the engine bay. I must admit, I thoroughly enjoyed doing this, and I am extremely pleased with the results! I would love to create an entire engine harness using this method at some point, as it provides a clean and professional appearance.
Part Five, placing the ECU
With everything installed behind the glovebox, I proceeded to fit the ECU onto the backwall of the glovebox. I marked out the bolt holes, drilled them, and attached the ECU bracket using rubber rings placed around the bolts and between the bracket and the glovebox plastic. This method helped minimize vibration. Now that the ECU was securely in place, I measured the connector holes, cut them out, and inserted a grommet around the plastic to eliminate any sharp edges near the loom. This seemingly minor detail turned out to be one of the easiest tasks I’ve done in a long time. It was a straightforward process, but the impact it had was incredible!



The Long-Awaited Day: Dyno Time | 06/06/2023
The Preparations:
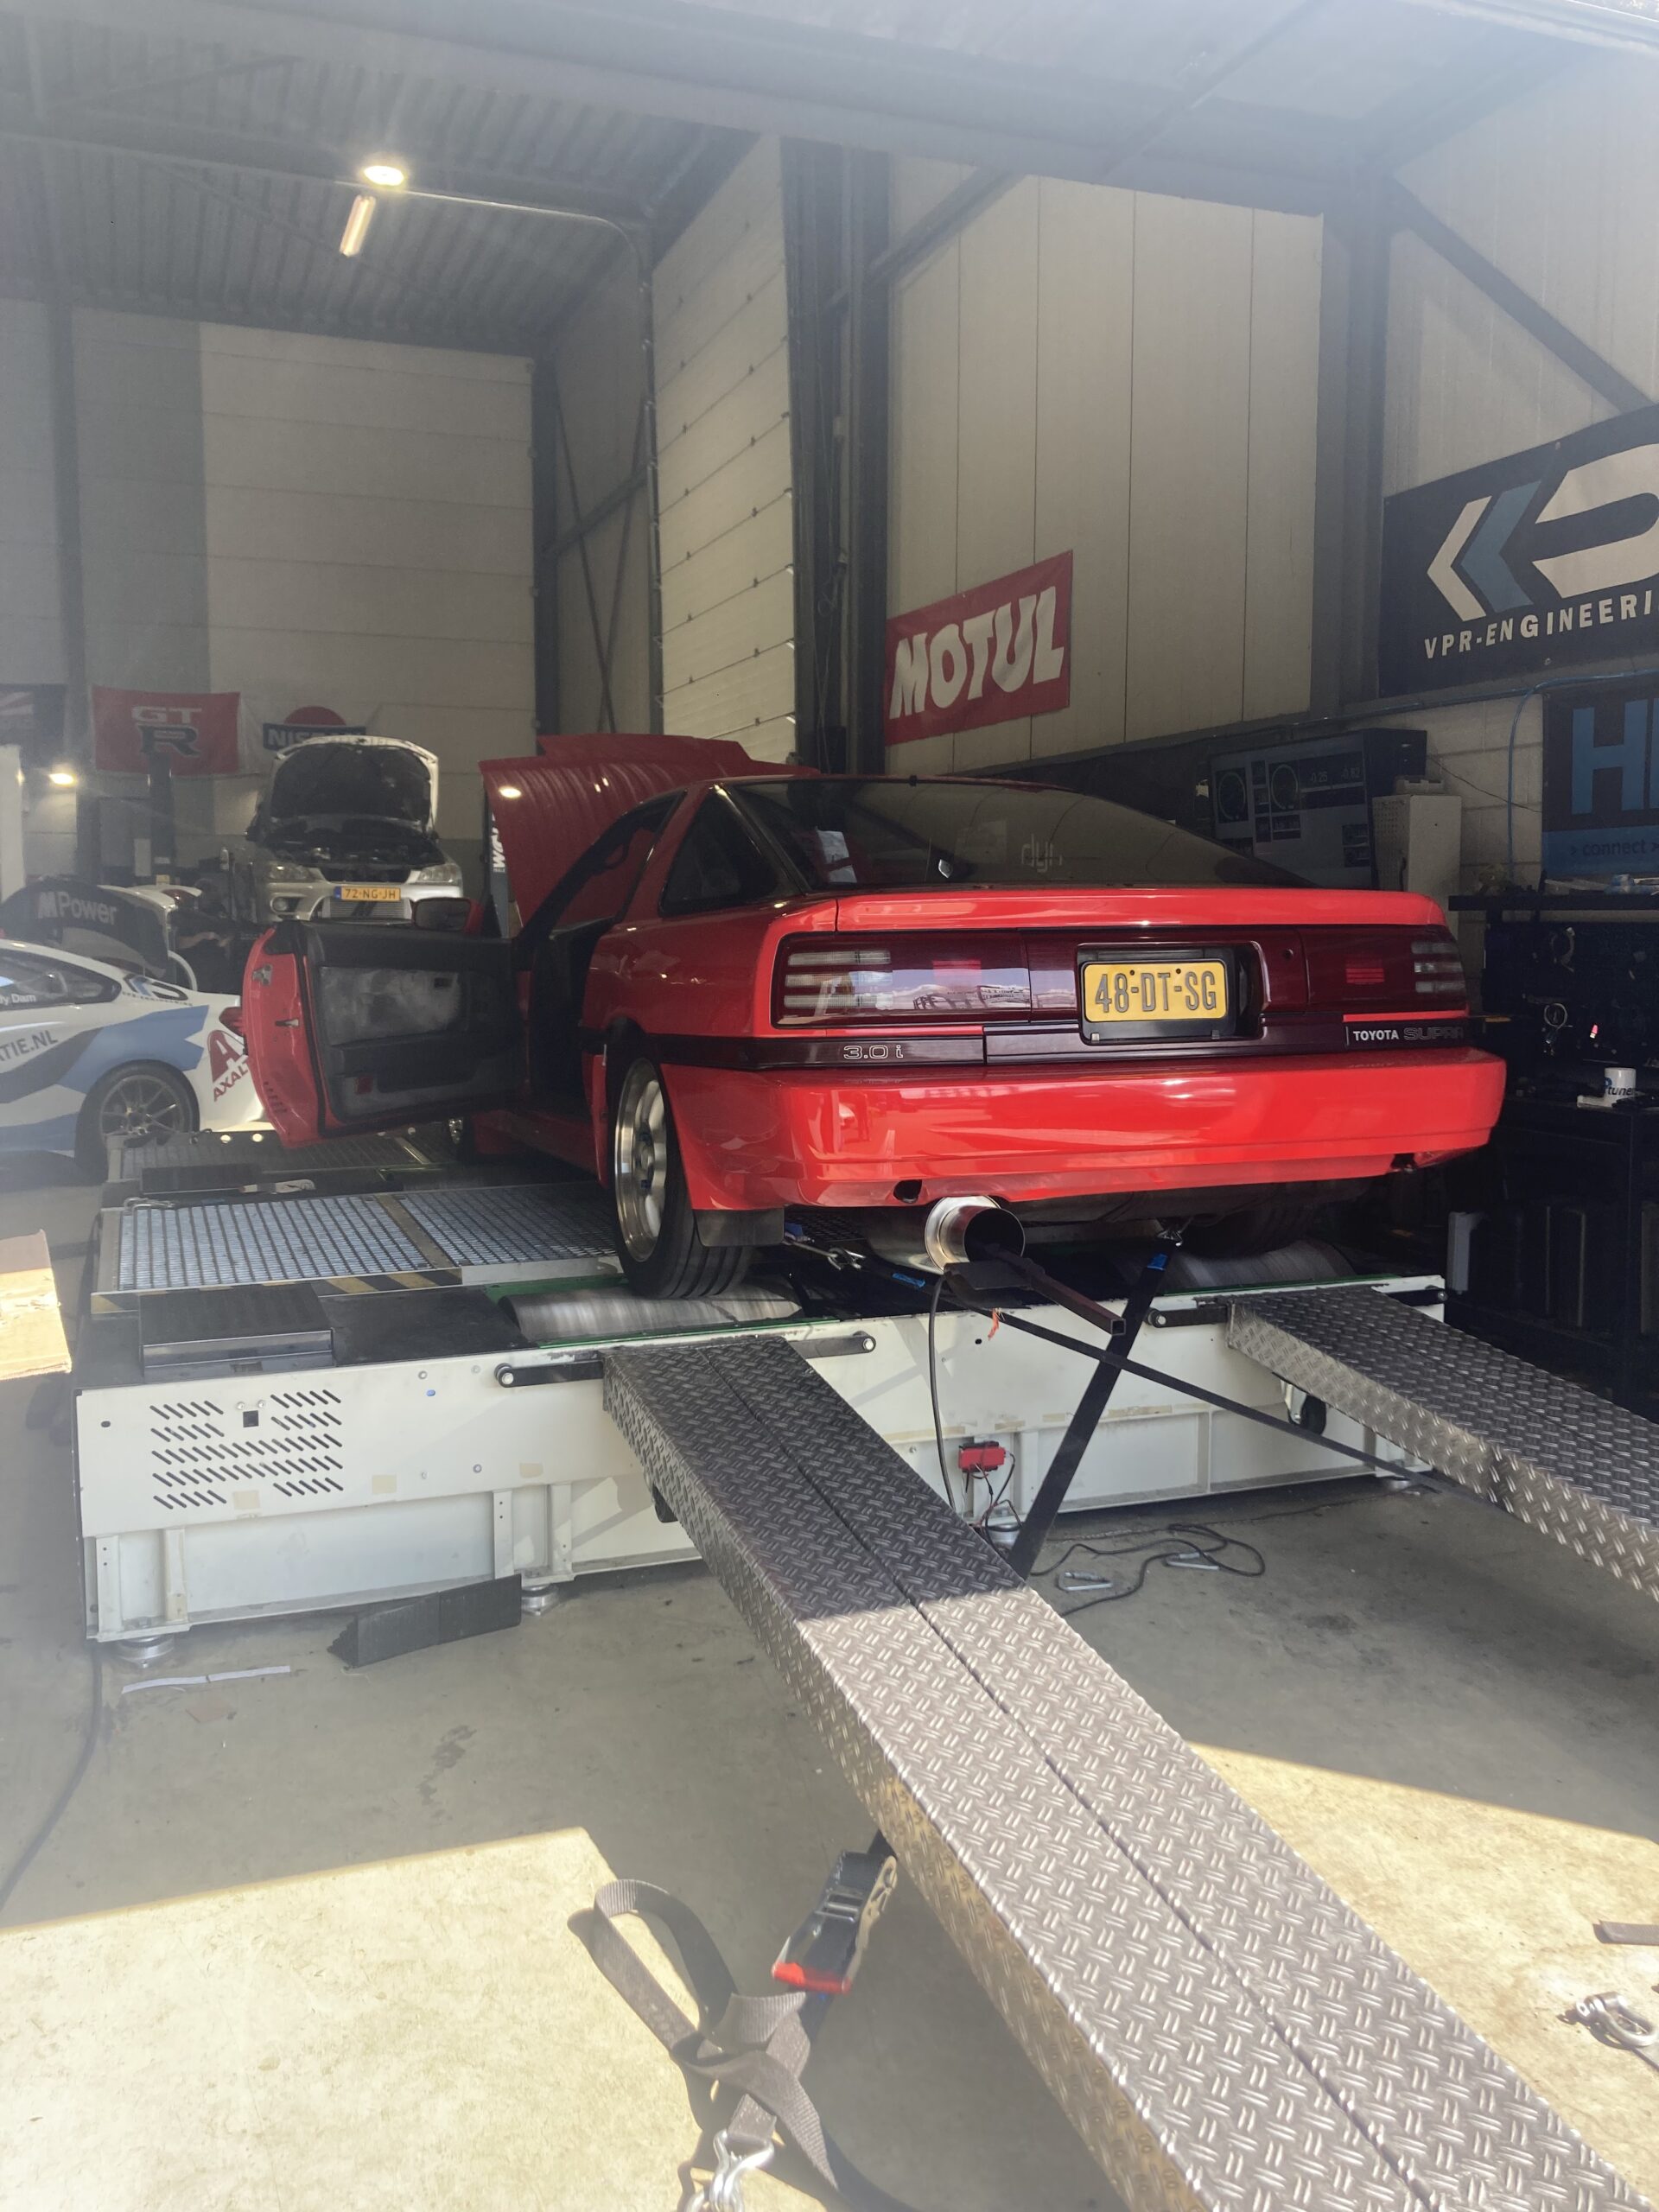
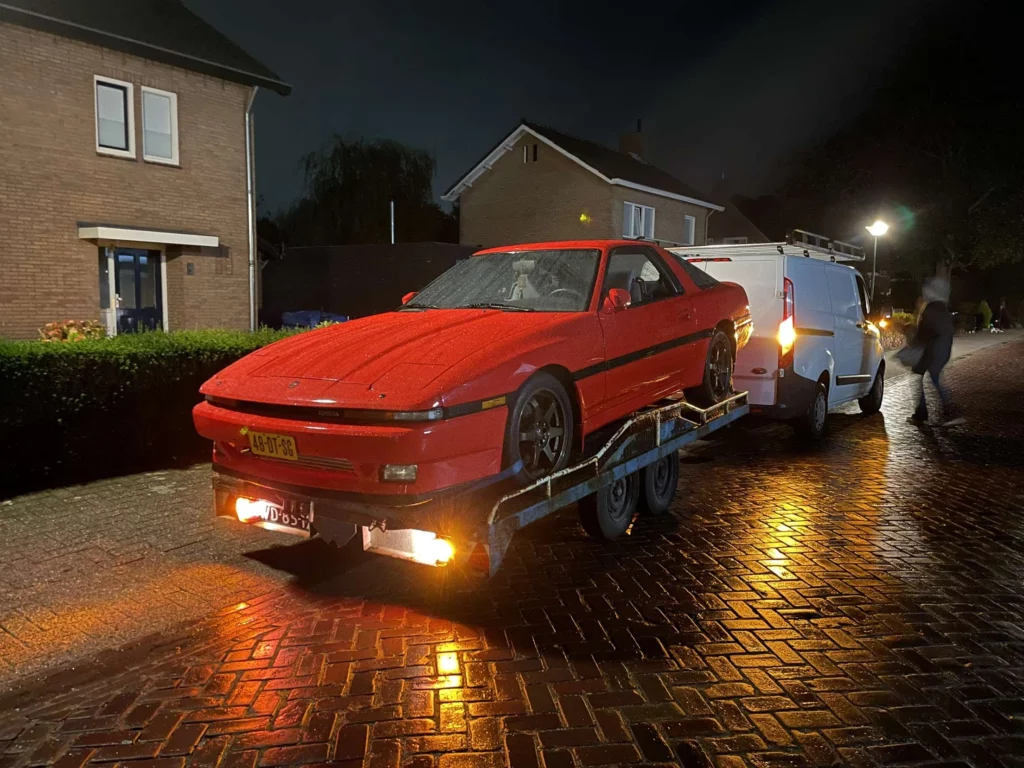
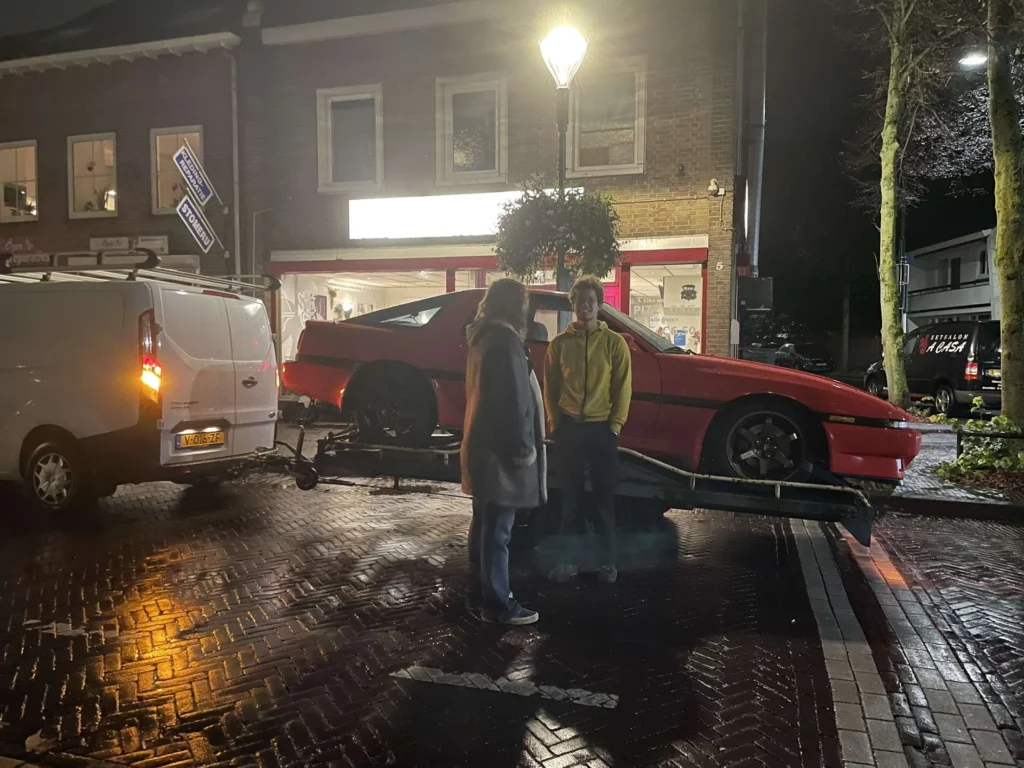
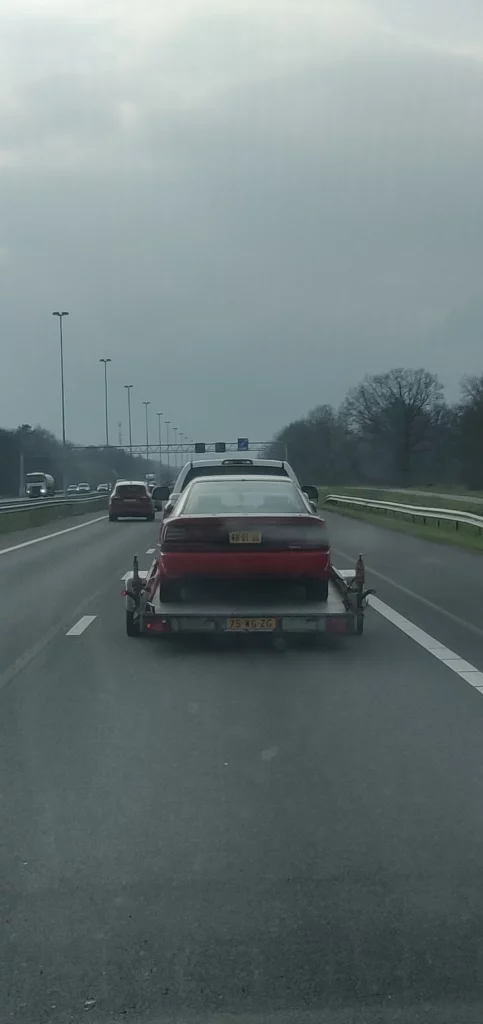
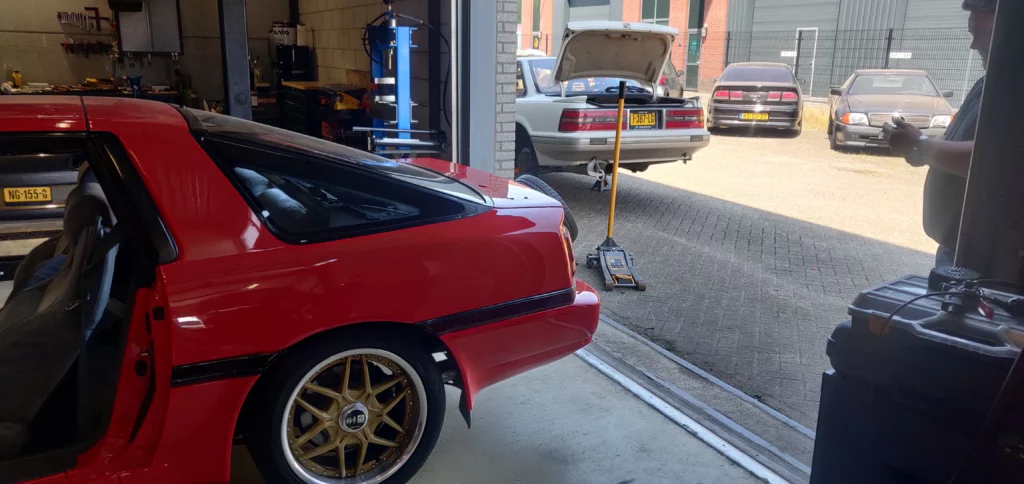
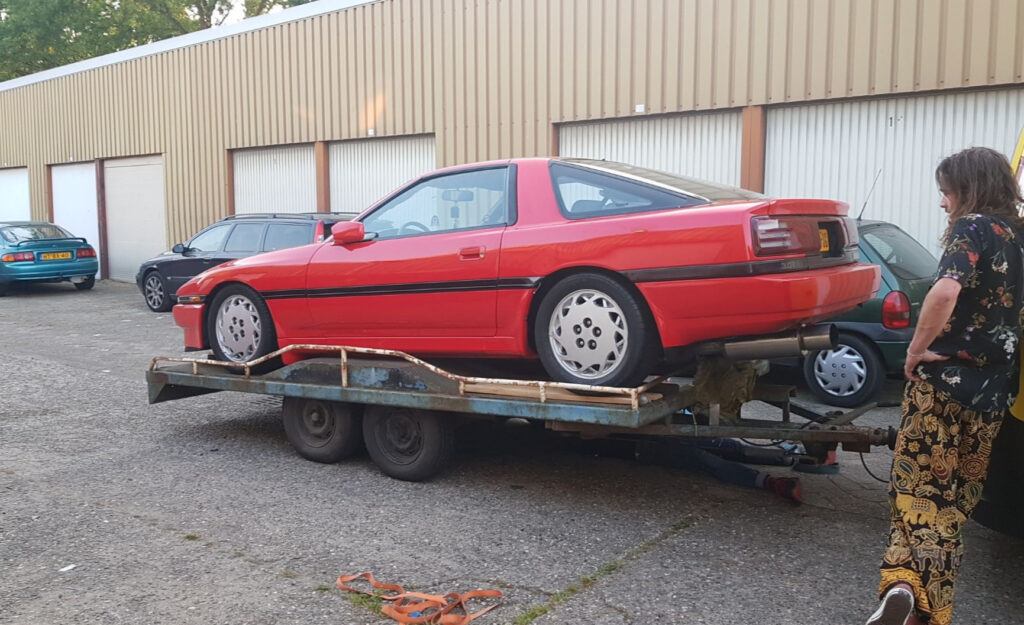
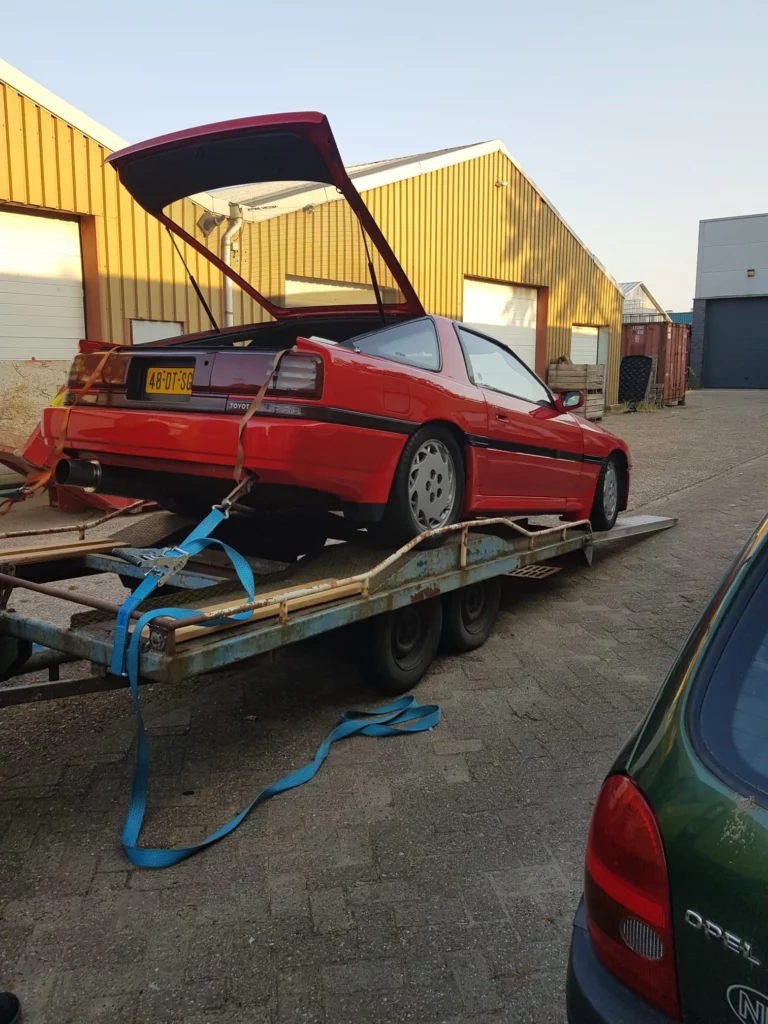
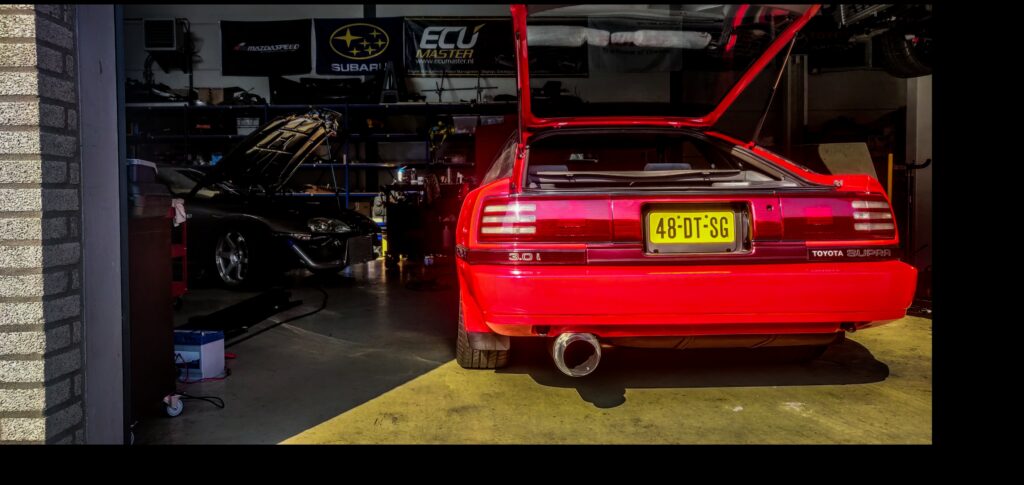
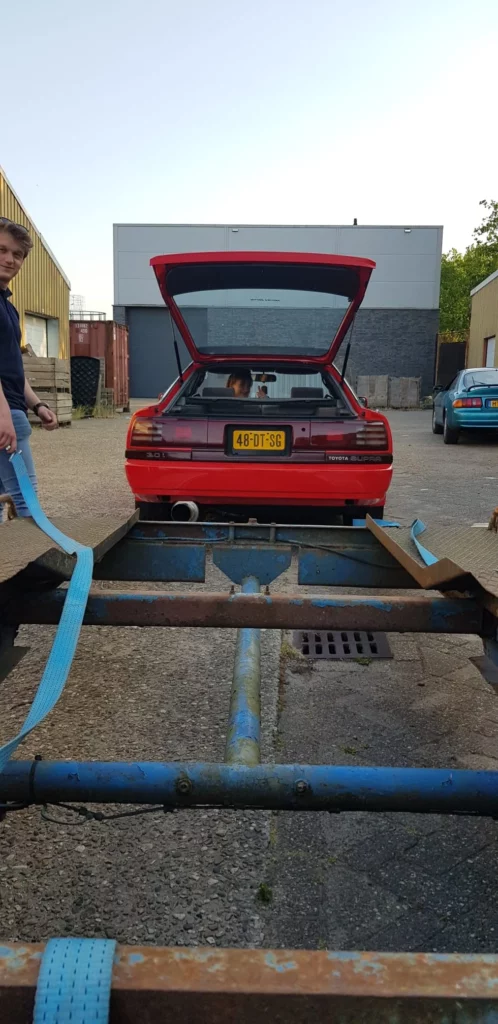
Originally, I had planned to drive my car to the tuner, but due to some electrical and tuning issues, it was not yet able to start. Thankfully, my amazing friends came to the rescue, and we found a trailer to transport the car. Two nights before the dyno day, my friend and I began preparing the car for the trip. While he fetched the trailer with his Celica, I enjoyed some beers in the city center, and later, he picked me up from the pub. The Struggles and Victories: Moving the car onto the trailer proved to be quite a challenge. The car wouldn’t start, and the ancient trailer we used required careful manual pulling with ratchet straps. Despite these hurdles, we persevered and successfully got the car onto the trailer, ready for the journey to the tuner.
The Dyno Day:
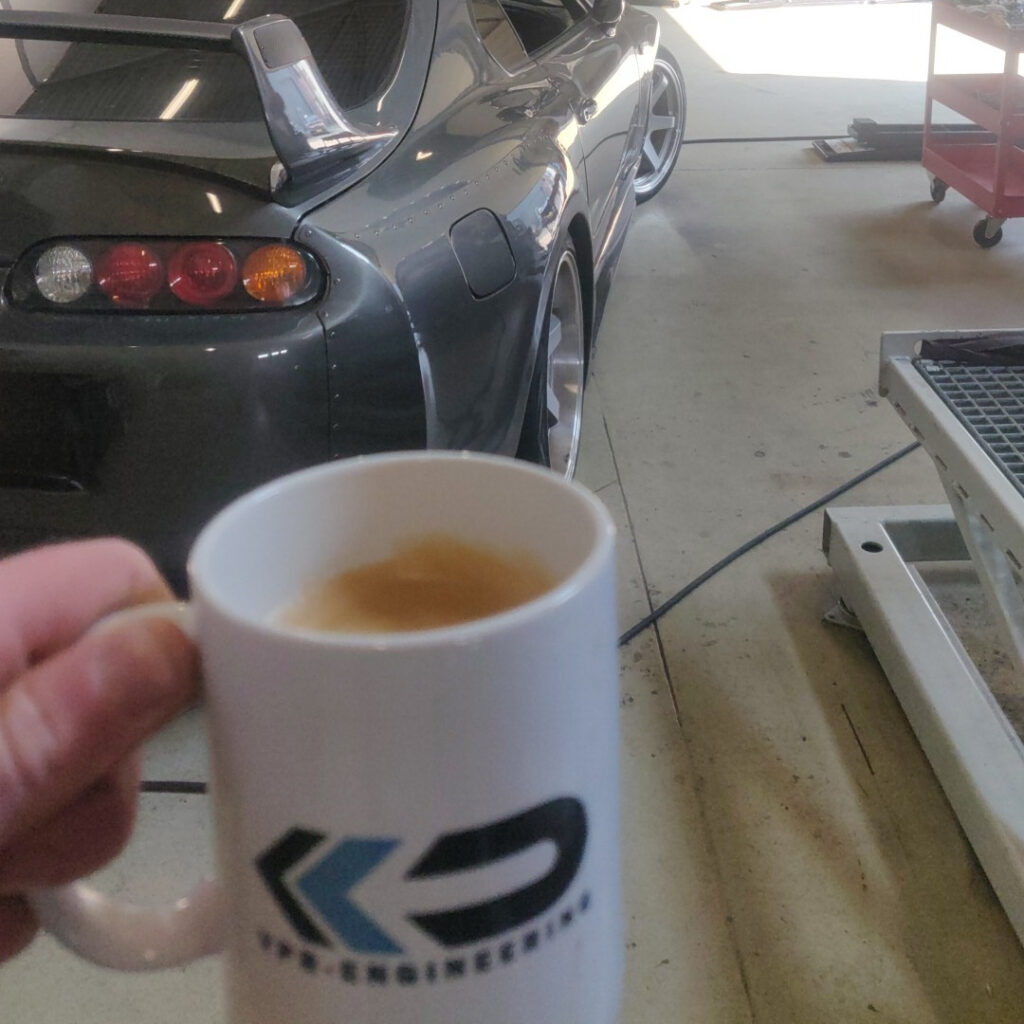
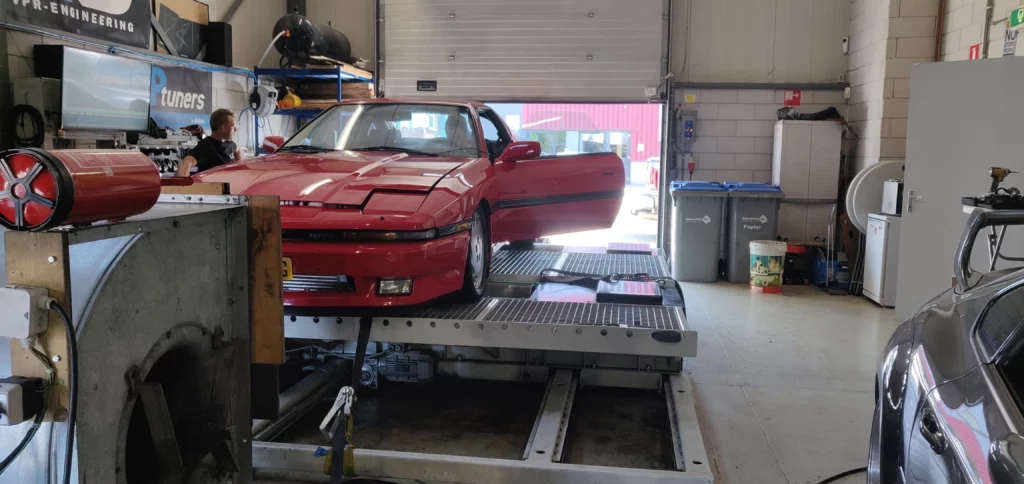
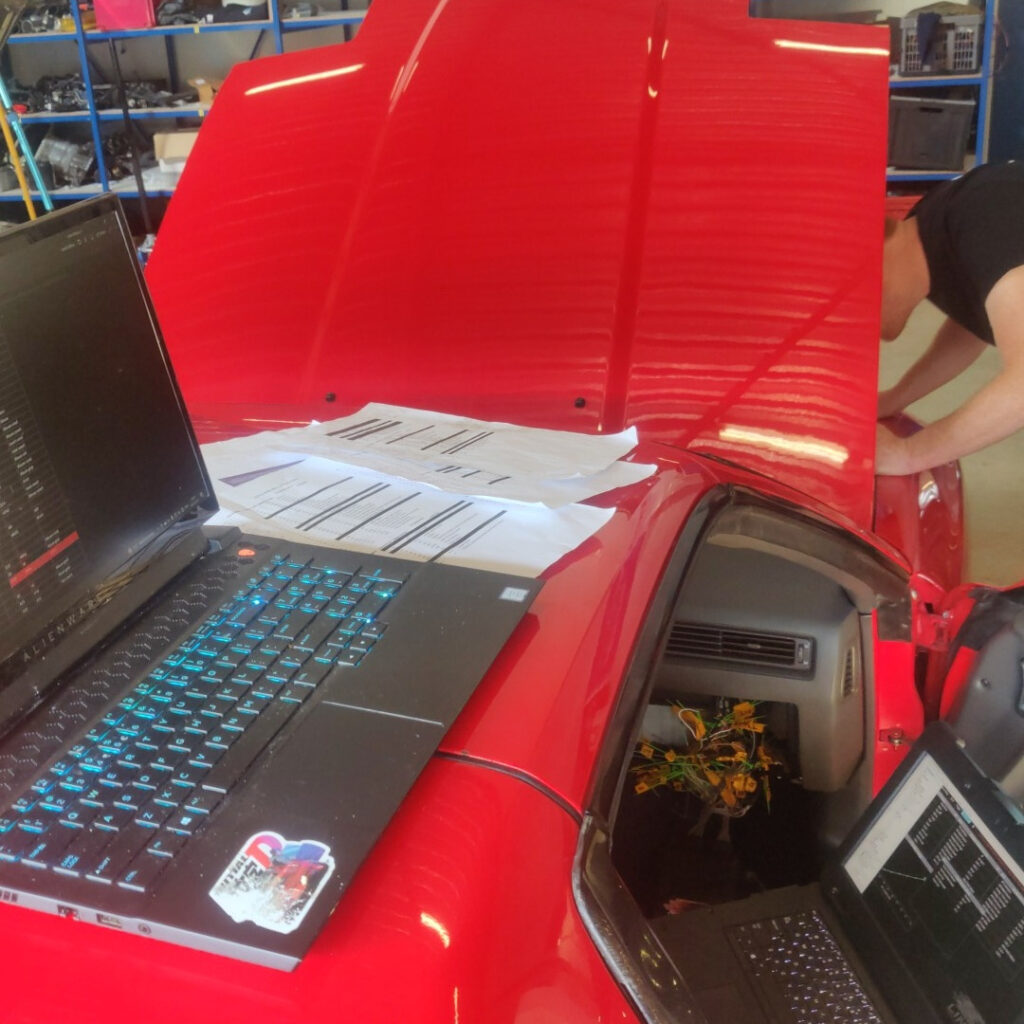
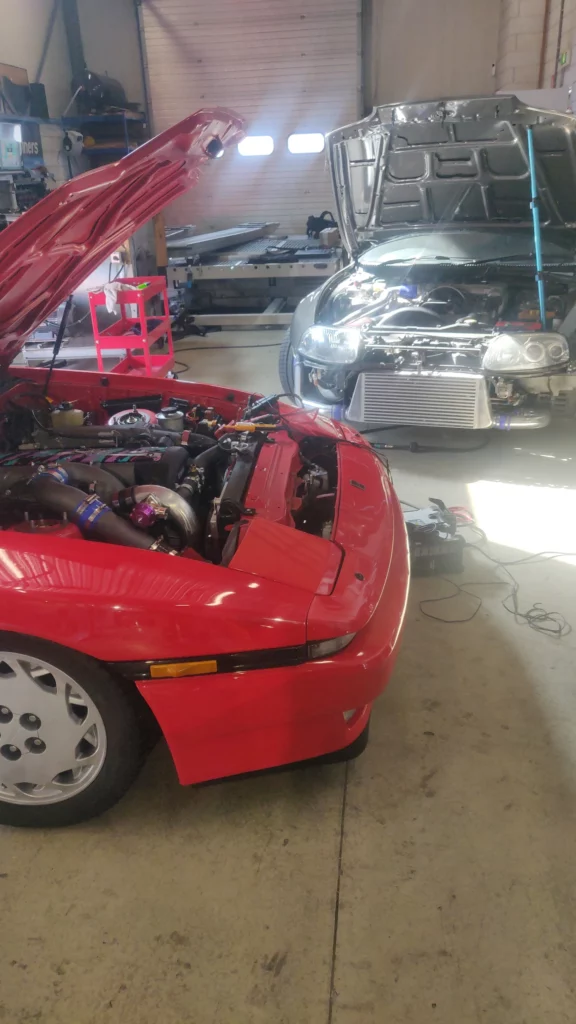
At the tuner’s garage, my excitement was palpable as we discussed the project’s details and the issues I encountered. I was fortunate to find the best tuner in the country, who promptly diagnosed and fixed the starting problems. Having documented all the wiring abbreviations on a OneNote page, I was able to provide him with the necessary troubleshooting information quickly.
A Surprise Upgrade:
During our discussions, the tuner suggested adding a boost solenoid to enhance the car’s performance. Feeling adventurous and eager for improvements, I agreed to the upgrade without hesitation. It was going to be an expensive day anyway, and the power gain I would get from it would be worth the money, for sure!
The Engine Roars to Life:
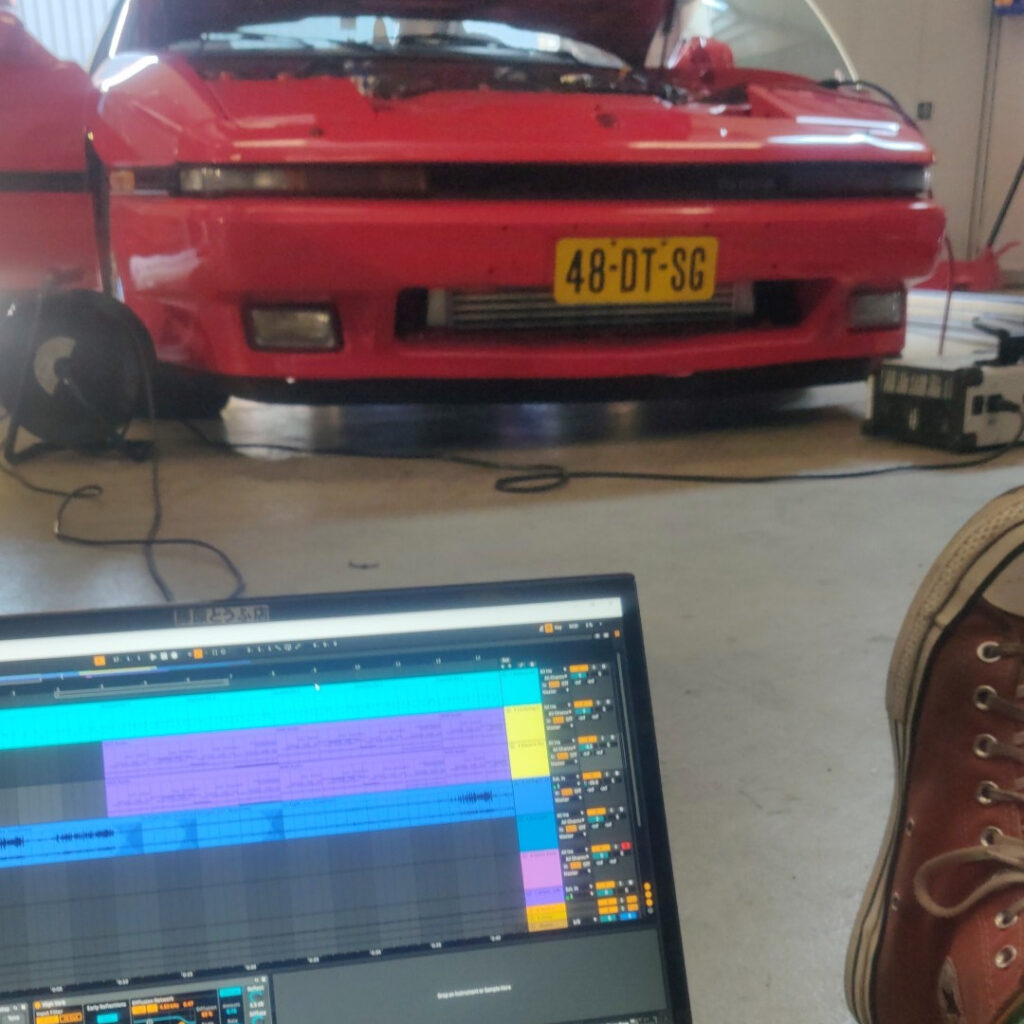
With the plans laid out, the tuner started working on the basemap while I relaxed on the ground with my laptop, working on some music. Suddenly, the car came to life with a crank, taking its first breath in a long time. I couldn’t help but savor the moment and abandon my laptop. The sound it made was out of this world, much better than anticipated, thanks to a fully custom-made exhaust by one of my fellow Supra owners. The tuner, too, complimented me on the job I had done with the swap and engine rebuild, especially for a first-timer like myself.
A Minor Hitch:
After some tweaking and tuning, it was time for the dyno run. However, the tuner noticed that the tires were old and needed replacement for safety reasons. This issue, however, I expected, and I had already called a friend who came to the rescue with fresh tires, and we resumed preparations. Unfortunately, during the final checks, it was discovered that the driveshaft bearing was worn out, posing a risk for further tuning. Although it was a setback, I appreciated the tuner’s concern for safety and decided to prioritize fixing the bearing before continuing. Encouragement and Confidence: Despite the minor hitch, I felt encouraged and confident in my project. The team at VPR-Engineering complimented my work and the remarkable progress I had made. Their compliments meant a lot to me, and I realized I had overcome many obstacles that I hadn’t anticipated.
The Road Ahead:
Currently, I’m working on fixing some minor issues encountered recently. I’m taking my time to ensure everything is in perfect shape before scheduling a new run with VPR. Although it might take a bit longer due to other commitments, I’m excited about the progress and can’t wait to hit the streets again with my fully tuned car! Special Thanks: I owe a debt of gratitude to some exceptional individuals who made this possible:
- Pim Tielemans: For lending me the trailer.
- Eric Bastiaan-net: For providing spare sets of tires and offering encouraging words.
- VPR-Engineering: For their expertise, patience, and support throughout this adventure.
- DMR Motorsport: For safely transporting my car back to my garage.




Fixes and MOT | 10/08/2023
Lately, I’ve temporarily shifted the Supra to the back burner, giving my engeneering project a bit of a breather. It all began with the fervor of prepping the car for a dyno day at VPR, a task that left me feeling somewhat burnt out. I yearned to explore my other life interests for a while. But don’t let my momentary detour fool you – I’ve been far from stationairy on the build.
In the process, I’ve encountered an array of challenges and surprises. They ranged from the frustration of disassembling and reassembling certain components three times over to the curious cases of ‘broken parts’ that turned out to be perfectly fine. Amidst these trials, there was yet another adventure on the horizon – the imminent MOT day.
Yes, the journey continues, and I want to assure you that my unwavering determination and drive to make the Supra roadworthy remain as robust as ever. The road to achieving this goal hasn’t been without its twists and turns, and I’m excited to share with you the lastest updates. So grab a cup of your favorite coffee, as this might just be the last post of the season. After this, I plan to tuck the Supra away in hibernation until the end of February.
Driveshaft Dilemmas: A Tale of Replacing the Center Bearing
In the process on tuning the car, we stumbled upon a significant roadblock – a worn-out center bearing. Rolph, the tune expert, emphasized the importance of not driving or tuning the car with such a deteriorated bearing. Currently, the car was limited to an idle map due to this issue.
Thankfully, a friend of mine happened to have a spare center bearing lying around, and I also had a new one that, unfortunately, turned out to be incorrect for the job. So, we struck a deal to swap them. We made the trade in a parking lot after both attending the same concert, an unexpected rendezvous that we hadn’t really even planned.
The following day, although feeling a bit tired, I was buzzing with excitement to make the swap. I hoisted the car up, removed the exhaust, and took out the driveshaft. However, to my dismay, I discovered that the spare bearing I had received was also the wrong one. It was a frustrating setback, and I couldn’t help but wish for a smoother installation process. Hindsight is 20/20, and I should have anticipated such twists in this automotive adventure.
Amid all this, I found myself in a situation where I had to reinstall the old bearing. The reason? I needed to be able to move the Supra out of the garage when necessary.
Now, you might wonder, why the sudden urge to relocate the car? Well, aside from the ongoing Supra project, I have other activities and Interests in my life aswell. Some friends of mine were in a band and required a last-minute place to rehearse for an upcoming performance the next day.
With the old bearing back in place and the car ready to roll, I cleared out the garage and allowed a live music session to unfold while I simultaneously researched the pending fixes for the Supra.
Sometimes it pays off to prepear for unforseen ventures!
But here’s where the story takes a positive turn. One of the members in our group happened to be in the midst of a full car rebuild, with an abundance of spare parts waiting in the wings. Among them was a center bearing that he generously offered for a test fit. If it worked, I could purchase it from him, bypassing the delays of shipping.
This turn of events accelerated the process significantly. After re-tracing my steps and installing the new center bearing, the car was finally equipped with a brand-new one, ready to face the challenge of the dyno.
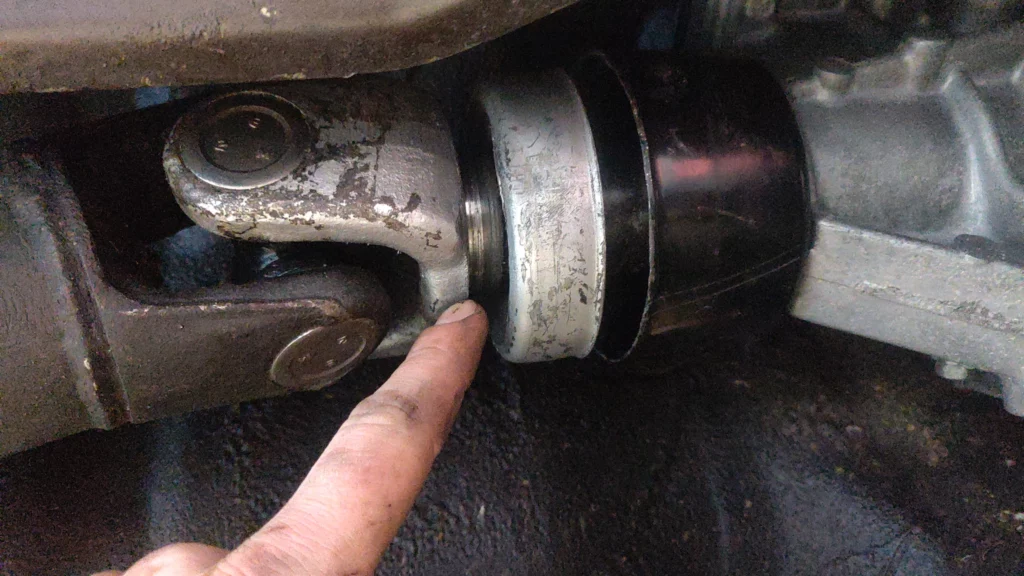
However, one issue remains unresolved. A minor dent in the dust boot of the transmission, where it connects to the shaft, causes the shaft to graze the dust cap, resulting in an annoying scraping sound. Despite multiple attempts to bend it back into shape, the problem persists, and to this day, I’m yet to find a solution.
The Radiator Saga: A Cooling Conundrum
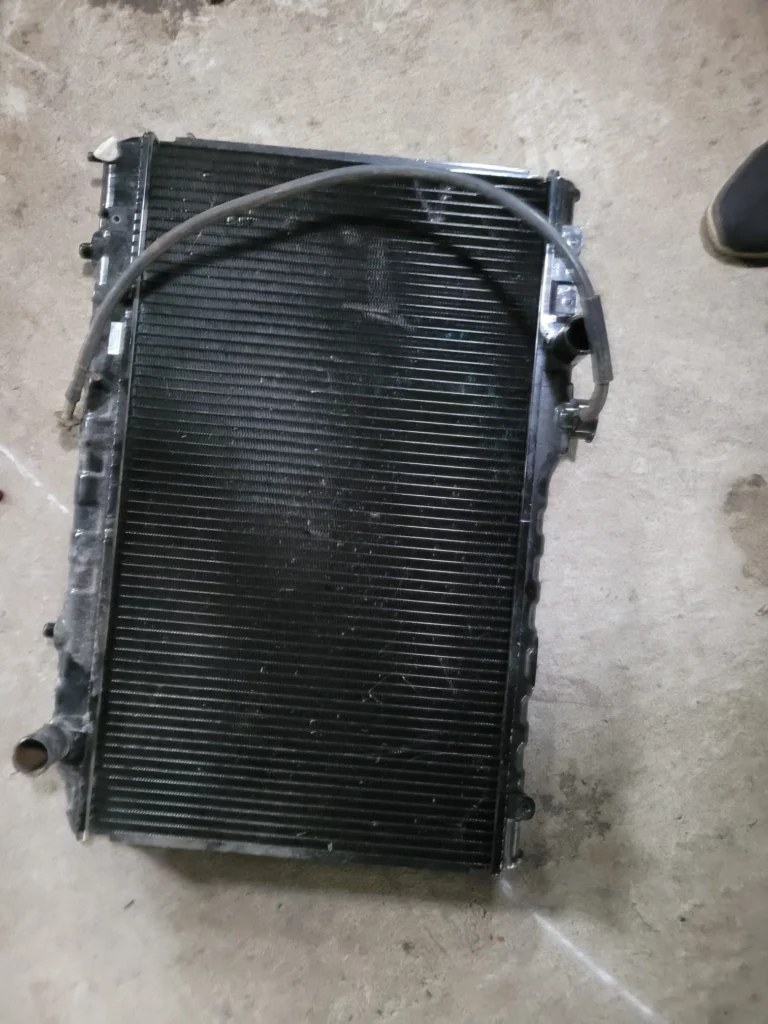
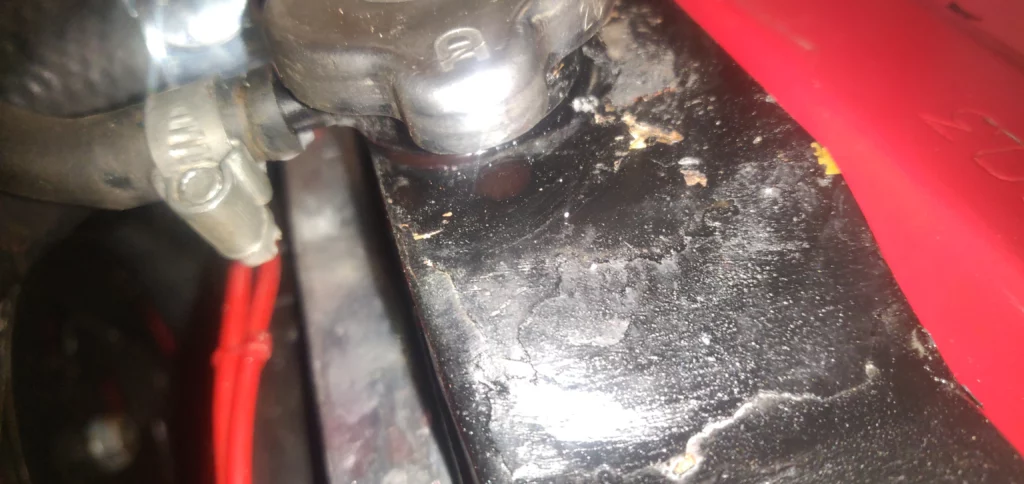
Now, here’s a little tale that will keep you entertained. Before our dyno session, a small crack appeared in the fill neck of my radiator, and I decided to tackle it with a bit of DIY spirit using JB Weld. Fortunately, we hadn’t pushed the Supra too hard during this time. However, when i returned to the garage, I noticed that my DIY fix hadn’t held up as well as I’d hoped, with noticeable issues after a few startups.
Facing the dilemma of either splurging on a high-end Koyorad radiator or finding a more budget-friendly solution. I decided to consult a radiator welding specialist to get it professionally repaired. After a discreet off-the-books payment, I reassembled the system with high hopes, only to be met with profound disappointment – the leak persisted in the same spot.
My frustration levels peaked, so I got in touch with the specialist to explain the situation. His response was less than satisfactory, filled with defensive disbelief. I offered to provide videos, photos, or even schedule a video call to illustrate the problem, but he was unwilling to entertain these options. Instead, he simply insisted that I return the next morning to prove that his work was flawless.
Given the circumstances, I couldn’t muster up much gratitude. Time was running out, and my work commitments meant I couldn’t dismantle everything again. In a rather unsavory turn of events, I decided to cut my losses and tossed the 30 euros I’d paid him into the scrap pile. It was time to hunt for an alternative solution, albeit somewhat reluctantly.
Against my initial reservations, I found myself scouring the market for affordable replacement radiators to explore my options. I just couldn’t justify shelling out 200 euros for a B-quality radiator when a premium Koyorad option stood at around 400 euros. It felt like an unnecessary expense.
In a stroke of luck, I reached out to fellow enthusiasts and inquired if anyone had recently upgraded their radiator not out of necessity but to handle increased power. To my delight, I received several responses. For a very reasonable price, just a few days later, I had a second-hand, fully functional OEM radiator in my possession. Not to bog you down with details, but the installation was a breeze – a matter of loosening and tightening three bolts. Easy as pie
Unraveling the Enigma of the Electric Fans
I’ll admit, at this point, I was convinced I was losing my mind! After successfully installing the new radiator and center bearing, I was bursting with excitement to take the car for a test spin and feel the difference. But, as luck would have it, strange things started happening once again.
As I fired up the car and let it reach operating temperature, something was amiss – the electric fans refused to kick in. Troubleshooting mode engaged, I attempted to override the control box by supplying direct power, but it was all in vain. I meticulously inspected all the connectors, ground points, and the relay, only to find that everything appeared to be in perfect working order. What confounded me even further was the fact that I hadn’t tampered with this system since it was functioning flawlessly. The confusion was real.
Frustration mounted as I decided to take matters into my own hands by directly powering the fans. To my bewilderment, that, too, yielded no results. I was left scratching my head, wondering if my new Mishimoto fans had already given up the ghost after running for just five minutes. It was a bizarre situation that begged for an explanation.
I embarked on the daunting task of disassembling the entire electric fan system, breaking it down to its smallest components. To my surprise, everything looked perfectly fine; there was nothing visibly wrong with any of the components. The mystery deepened, leaving me in a state of bewilderment and self-doubt, utterly unsure of how to proceed.
Ultimately, after reassembling the system and testing it once more, the fans miraculously sprung back to life. It was a puzzling turn of events. The culprit turned out to be the new wires I had installed, harboring an elusive fault that had triggered this confounding problem. To this day, the exact location of the fault remains a mystery, as does the reason it had worked flawlessly before. But, I can happily report that the issue has been resolved, and my sanity is no longer in jeopardy.
Refining the Engine Bay: From Chaos to Clarity
In the midst of all the work, fine-tuning, and the addition of a boost solenoid to the engine bay at the tuner, it became abundantly clear that a thorough cleanup was in order. What once was a chaotic tangle of hastily added wires, secured with the old twist-and-tape method, now required some much-needed order.
As I delved into the project, another issue surfaced – not all of the intercooler pipes were correctly tightened. With a meticulous approach, I set about rectifying these discrepancies and embarked on the task of rewiring everything, this time opting for the proper method of crimping the wires together. It was a labor-intensive process, but the peace of mind it offered was well worth the effort.
With the car now running smoothly and maintaining a cool temperature, I couldn’t resist the urge to take it for a spin around the block. Of course, I exercised caution, avoiding any reckless behavior. Still, it was impossible to ignore the remarkable surge in power I experienced when shifting into second gear. Yet, my elation was short-lived as a conspicuous, unnerving sound crept into my awareness – a distinct, vacuum-like sucking noise.
Being a newcomer to the world of turbocharged cars, I was plunged into a quest to unearth the source of this mysterious sound. Leaning over the hood, I began to trace the origin of the noise. To my surprise, a rush of icy air brushed against my legs, revealing the root of the problem – the couplers hadn’t been securely tightened. It was a lesson in the importance of applying the necessary force, even if it did provoke a twinge of apprehension.
These unexpected challenges, though they might have appeared as minor setbacks, brought an element of excitement to the project. Despite occasional thoughts of impending catastrophe, there was a certain satisfaction in unraveling the mysteries that arose along the way. Fortunately, these were relatively straightforward issues, serving as valuable lessons.
Overcoming Starter Woes: A Tale of Tenacity
Challenges seem to be a perpetual companion. A notable chapter in my journey unfolded when we were preparing the car for a dyno session, and the first signs of starter trouble reared their head. Given that the engine is Japanese import from a used JZS171, a well-worn used car, the suspicion that the starter was nearing the end of its life became increasingly likely.
Fortunately, a glimmer of hope emerged from the depths of my garage – an old 7M starter that I had kept for moments just like this. Word had spread through our group that these starters were interchangeable, but what followed was nothing short of an mechanical odyssey.
Have you ever ventured beneath the hood of a 1JZ VVTi swapped MK3 Supra? If so, you likely understand that the challenges faced in this endeavor rival the most daring missions from an action film. The layout of the 2 bolts, the real estate of the engine bay being at a primium and having no lift availeble – it all added up to a supremely challenging task. But, driven by sheer determination and perhaps a colorful lexicon of curses, I persisted and managed to secure the new starter in place.
However, as is often the case in my experiences, victory was short-lived. A disappointing revelation awaited me – the connectors were different. This unexpected turn of events left me at a crossroads. I wasn’t about to mutilate the existing wiring harness or embark on another parts-ordering expedition. First, I needed to ascertain whether the starter was truly at fault.
Upon conducting a series of tests, I was met with a surprising discovery – the old starter was still brimming with vitality and more than capable of starting the car. While this was undoubtedly a positive outcome, it left me pondering the true source of the issue. Desperate for answers, I reached out to fellow enthusiasts for guidance.
In no time, I received a solution: the ‘starter relay mod.’ The crux of the matter lay in the factory wires, which had been too thin from the factory to start with and corroded with age, impeding the flow of current to the starter solenoid. This, in turn, caused the starter to not receive enough amperage. Armed with the boundless knowledge the internet provides today and a vehicle that had gracefully aged over three decades with knowledge, the fix was no longer a daunting mystery. Instead, it was a matter of following a comprehensive step-by-step guide. Even though my knowledge of electrical engineering may have been at the level of a Neanderthal at best, I emerged from this experience with newfound expertise and confidence!
The MOT Challenge: Triumph Through Perseverance
The moment of truth had arrived – my car was almost road-ready, and the next step was to secure an MOT appointment before the winter hibernation. With the booking set for a Wednesday morning, I embarked on a journey of last-minute checks.
Admittedly, I still harbored trepidation about tackling the starter relay modification, fearing that it might hinder the approval process. To resolve this, I hastily procured the required parts and set out for the garage on a Tuesday evening, despite my prior plans for the night at 22:00. This left me with a mere four-hour window to address the issue, even if it meant skipping dinner.
Determined to succeed, I resolved to pull an all-nighter if needed, although it wasn’t a prospect I looked forward to. The stars must have been aligned in my favor, as I managed to complete the task just in the nick of time. Time pressure breathing down my neck, but I can proudly attest to having done a thorough and neat job. Rather than haphazardly placing the relay somewhere in the engine bay, I secured it meticulously in the passenger-side kick panel. The wiring was neatly routed through the bay, leaving no room for a redo anytime soon.
The following day, I embarked on the drive to the MOT appointment. I ensured that the car reached its operating temperature before arriving, fully aware that my emissions might raise a few eyebrows. It was a calculated risk I had to take.
As I journeyed towards the garage, I soon discovered a problem I could have expected: I couldn’t drive without scraping the streets to pure dust. This was proof I really need to raise the ride height of the car sometime soon.
The garage was conveniently located a mere 400 meters from my own, and I didn’t encounter much more than the scraping during the drive. However, the real revelation awaited at the MOT center.
The verdict was out – with a CO2 emissions level of 5% compared to the maximum allowance of 3.5% in my country, it was clear that the car hadn’t met this particular criterion. While I had expected the emissions to be a challenge, I was surprised that this was the sole obstacle in my path. Given the age of the vehicle and the numerous issues I had confronted during the two-year-long restoration, I had anticipated other potential pitfalls.
With that hurdle behind me, I could proudly declare that my relentless hard work had paid off. It is time to take a well-deserved break from the process, spanning a couple of months, until I scheduled a new appointment with the tuner. This hiatus would provide ample time to prepare the emissions and tune, all in anticipation of legally hitting the streets once more!
A closing note
This might be the last post of the season, but it’s not the end of the road. I’m excited to share that, after a well-deserved break, I’ll be back in the driver’s seat, ready to tackle the remaining hurdles on the path to making the Supra roadworthy. We’ve triumphed over driveshaft dilemmas, radiator sagas, electric fan enigmas, and starter woes. The MOT challenge tested our perseverance, and we emerged victorious.
The lessons learned, the unexpected twists, and the sense of accomplishment are what make this journey worthwhile. So, as we take a brief pause, I want to thank you for being a part of this adventure. Stay tuned for the next chapter, as we continue to navigate the winding road towards our goal of roadworthiness. Until then, take care, and here’s to many more miles of thrilling experiences ahead!



The Enjoyment